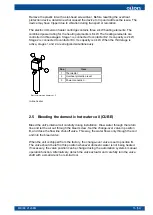
Install the sensor in the domestic hot water tank’s sensor pocket as specified in the
piping diagram.
● If a dedicated tank is used, install the sensor in the lower section of the tank.
● If a combined storage tank is used, install the sensor in the upper section of the
tank.
● Install the sensor probe (supplied with the unit) into a sensor pocket designed for
6-mm probes. The sensor pocket needs to extend into the interior of the tank by at
least 150 mm.
Install the sensor in a way that allows it to measure the temperature of the fluid in the
storage tank as accurately as possible. The sensor pocket needs to extend far enough
into the interior of the tank, and the sensor pocket’s internal diameter must be suitable
for the sensor probe’s diameter.
● Use only metallic sensor pockets that won't corrode to any significant degree (from
the outside or the inside) over time.
● The air gap between the probe and the pocket wall should be as small as possible.
If necessary, use thermal paste between the sensor probe and the pocket walls.
● To ensure that the sensor probe remains firmly seated at the bottom of the sensor
pocket, secure the sensor cable with a cable gland.
The cable can be extended if required. Use a regular insulated copper twin cable for
connecting the cable and extending the cable (0.5 mm
2
, length < 40 m).
● Join or splice the cable ends in a way that causes no additional electrical resistance
in the wires.
● Protect the joint against moisture and oxidation.
2.9 Electrical connections, covers, and cable management
Detaching the front panel (models with an integrated DHW tank)
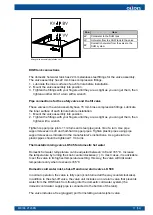
Unscrew the fastening screws (FS) at the lower edge of the front panel (MFC). Once
the screws have been removed, the panel will hang on the top of the frame by the
flange at its top edge. Lift the panel upward, and pull the panel towards yourself.
Electrical connections
To access the unit’s switchboard, detach the cover on top of the compressor unit
(TC) and the compressor unit front panel (FC). Note that you can make most of the
connections by removing the top cover. Check the electrical connections from the unit’s
electric diagrams.
Switchboard cover and cable entries
Keep the switchboard cover (TC) closed and the screws fastened at all times. Remove
the cover (TC) only when performing electrical installation work.
Keep the cover closed and the screws fastened when filling or bleeding the system’s
circuits (brine circuit, heating circuit, or domestic water circuit). This will prevent leaking
water from entering the compressor unit and spilling over the switchboard. Water can
damage the switchboard.
Thread the cables through the gland plate on the switchboard cover, ensuring that the
glands are properly sealed. Ensure that no leaks or condensate can travel along cables
or through or along insulation onto the switchboard behind the panel.
M8006 2123EN
19 (54)
Содержание CUBE 10 EasyAce
Страница 1: ...M8006 2123EN 10 June 2021 CUBE and ECO INSTALLATION AND COMMISSIONING...
Страница 2: ......
Страница 51: ...Pump curves Wilo Yonos PARA GT 7 5 Grundfos UPMXL GEO 25 125 M8006 2123EN 49 54...
Страница 57: ......


