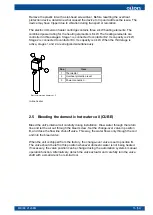
6. Remove the change-over valve’s (FV202) actuator from the valve body. The
actuator is held in place by a locking pin; pull the pin out.
7. Detach the corrugated heating water inlet hose from its tee connector (located on
the lower section of the storage tank).
● Detach the hose by turning the freely-rotating nut while keeping the hose from
rotating from the other side. When connecting or disconnecting the hoses, be
careful not to twist or turn them. Do not open the compression fitting.
8. Detach the in-line heater’s (EB203) corrugated hose.
● Detach the hose by turning the freely-rotating nut while keeping the hose from
rotating from the other side. When connecting or disconnecting the hoses, be
careful not to twist or turn them. Do not open the compression fitting.
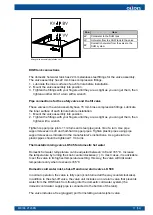
9. Remove the compressor unit’s fastening screws (M8), and pull the unit out.
● Leave the brine circuit’s piping attached to the unit.
Reinstall the components and connections in reverse order. During reassembly, test
the flat gaskets in the water and brine connections, replace if necessary.
● Carefully reinstall the domestic hot water sensor in its sensor pocket.
Compressor unit fastening screws (EasyAce) ver. 1
Pulling out compressor unit ver. 1
M8006 2123EN
21 (54)
Содержание CUBE 10 EasyAce
Страница 1: ...M8006 2123EN 10 June 2021 CUBE and ECO INSTALLATION AND COMMISSIONING...
Страница 2: ......
Страница 51: ...Pump curves Wilo Yonos PARA GT 7 5 Grundfos UPMXL GEO 25 125 M8006 2123EN 49 54...
Страница 57: ......


