- 9-
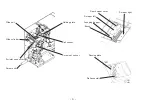
Brush
5
-
3
.
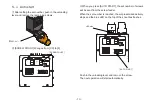
Set the number of settings.
ᰴᘧ♫ࠉṊ࣭࣮ࣝࢺᕤᴗ
ᅗ
␒
㸿㸱
ᢎ
ㄆ
᳨
ᅗ
〇
ᅗ
タ
ィ
ኚ᭦␒ྕ
ᖺ᭶᪥
ኚࠉ᭦ࠉグࠉ
ᢎㄆ
ኚ᭦⪅
సࠉᡂࠉᖺࠉ᭶ࠉ᪥
సᴗෆᐜ
〇ရྡ
㸦㒊ရྡ㸧
B
㸯㸳㹱
3%6%
㧗ᶫ
㧗ᶫ
㧗ᶫ
ཬᕝ
%65
⤌❧㸸
[RESET]
the number of
settings
[SCREW SET]
The setting is done with [SCREW SET] on the shoot box panel.
The left side (X10) is the tens digit, and the right side (X1) is the ones digit.
It is valid only when [RESET] is pressed or immediately after the power is turned on.
5.
Basic Operations
5
- 1.
Loading the screws
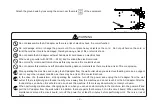
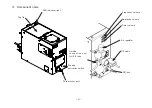
- Take out the top cover, turn the power switch on and off so that the brush stops
verticallyright above the rail, as shown on right.
-At the first initialization of the machine, please place roughly equal amount of screws on
both side of the rail. Level of screws inserted shall be below lower edge of the rail.
-Please adjust the amount of screws accordingly, depending on the actual operating rate
and conditions of screw delivery flow.
- Use only the adapter supplied with this machine to connect it to a wall outlet. When you
turn the power on, the LED for the power
lights up, the motor rotates and screws are scooped on to the rail.
- The rail vibrates to deliver screws to the pick up spot. When the screws come to the
stopper, the motor and the rail vivbration stops
after 1-6 seconds
5
- 2.
Turning
ON the power
Use only the AC adapter supplied with this machine otherwise it may cause
damage to the machine.
- The Type and length of screw changes the load capacity so check and adjust
the load accordingly.
-Do not overload the hopper with screws otherwise it may cause a malfunction
or damage the machine.
-This machine accepts only steel screws. Plustic or stainless screws are not ac-
cepted.


