background image

OFITE, 11302 Steeplecrest Dr., Houston, TX 77065 USA / Tel: 832-320-7300 / Fax: 713-880-9886 / www.ofite.com

22

Calibration 

Fluid Manager

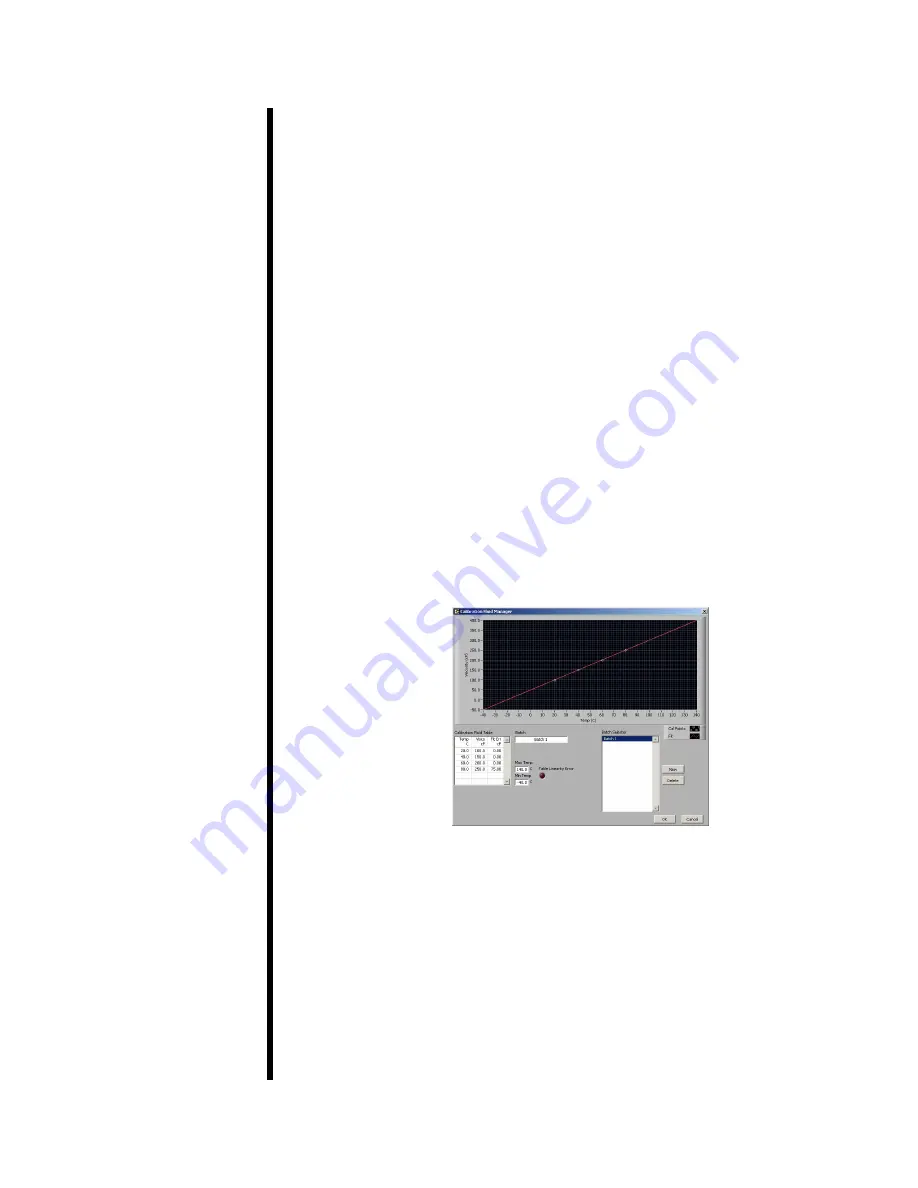
Before calibrating the unit, you must input the specifications of the calibration 

fluid that you are using. This will give the software the information it needs to 

perform the calibration accurately.

Click the “Fluid Manager” button on the Calibration screen to add a new 

calibration fluid batch.

1. 

Click “New” to add a new batch. You can also edit an existing batch by 

selecting it in the “Batch Selector” list.

2. 

In the “Batch” field, type a name for the batch. OFITE recommends 

using the lot number and viscosity from the Certification Chart that 

was provided with the fluid.

3. 

In the “Calibration Fluid Table”, enter at least two Temperature/

Viscosity pairs from the Certification Chart. Only two pairs are 

required.

The “Table Linearity Error” light will shine red if the values in the 

“Calibration Fluid Table” do not create a straight line. If this occurs, 

check the values and re-enter them.

4. 

Once you have entered all the batches, click “OK” to close the Fluid 

Manager and return to the Calibration screen.

Содержание HTHP

Страница 1: ...iscometer Part No 130 77 Instruction Manual Updated 8 22 2019 Ver 7 OFI Testing Equipment Inc 11302 Steeplecrest Dr Houston Texas 77065 U S A Tele 832 320 7300 Fax 713 880 9886 www ofite com Copyright...

Страница 2: ...Builder 27 Select Analysis Outputs 30 Saved Test Data 31 Calibration History 33 Import Export 34 Starting a Test 35 Maintenance 36 Disassembly 37 Cell 37 Rotor 38 Cell Top 40 Coupling 41 Remove Instal...

Страница 3: ...iscometers the HTHP Viscometer features our easy to use ORCADA software Using this exclusive software a computer novice can operate the HTHP Viscometer and yet the system is versatile enough for advan...

Страница 4: ...7 5 O ring for Pressure Ports 7 32 Diameter Nitrile Qty 8 130 77 6 O ring for Outside Cell Assembly 3 Diameter Viton Qty 4 130 77 7 Retaining Ring Stainless Steel Qty 3 130 77 91 Angular Contact Beari...

Страница 5: ...rsion Spring F1 130 77 1 Vee Jewel Qty 6 130 77 10 3 16 Stainless Steel Ball Qty 2 130 77 20 Rotor Bushing Qty 6 130 77 22 Upper Backup Ring Qty 4 130 77 23 Lower Backup Ring Qty 4 130 77 3 O ring for...

Страница 6: ...ake into account the effect of bearing drag Taylor vortices zero offset etc when looking at the expected accuracy of the reading b For practical purposes the minimum viscosity is limited to 0 5 cP due...

Страница 7: ...8 pin cable to the viscometer and the computer On the unit this connection can be found next to the DB 9 connection There will be a matching connection on the back panel of the computer 5 Plug the vis...

Страница 8: ...nnection can be found on the right panel of the unit 4 Connect the 68 pin cable to the viscometer and the computer On the unit this connection can be found next to the DB 9 connection There will be a...

Страница 9: ...r control over the pressure going into the pump Use this valve to fine tune the pressure control system To access this valve remove the panel directly to the left of the control panel When operating a...

Страница 10: ...n o ring 130 77 4 into the o ring groove inside the cell just above the rotor Carefully inspect all o rings before use Replace any that show signs of damage or wear O rings are most likely to be damag...

Страница 11: ...r 10 Slide the bob shaft up through the coupling and screw it into bottom of the torsion spring assembly 11 Slide the cell body under the coupling and screw it into place Watch the torque magnet close...

Страница 12: ...loosen it a little You want to tighten the bearing just until it engages with the pivot no more 15 Test the movement of the torsion magnet It should turn freely 16 Screw the cell cap onto the coupling...

Страница 13: ...s with the two pressure lines and tighten the connections The ports and pressure lines are designed to only line up one way If they do not fit correctly rotate the cell within the heating well until t...

Страница 14: ...ent solid particles from damaging the o rings If you are preparing the unit for a calibration you can fill the rotor up to the o ring instead of injecting addition fluid into the cell 26 Inspect the o...

Страница 15: ...municating with the viscometer If the firewall shows the following alert select Unblock Windows XP Firewall Alert Main Screen Communication Indicator Status Log Indicator Available Tests Key Manual Mo...

Страница 16: ...ed to indicate a problem Start Logging This button is available in manual mode only Click here to begin recording test data The light next to this button will shine green while logging is in progress...

Страница 17: ...n incorrect value in this field will adversely affect your test results This is the only place where the bob selection can be changed Key The checkboxes next to the graph key enable and disable graphi...

Страница 18: ...w Pressure Limit see page 23 During initial pressurization the pressure will be below the Low Pressure Limit If Prime is not checked the test will be aborted immediately Clear This button removes all...

Страница 19: ...ng well cement should be calibrated quarterly API Recommended Practice 13B 1 and 13B 2 specify viscometers being used for drilling fluids should be checked monthly The calibration fluid should be stor...

Страница 20: ...create or edit a rate set click the Calibration Rates button To create a new set click the New button and enter a name and the rotational speeds To edit a set select it in the Rate Set list then chan...

Страница 21: ...Best Fit viscosity value for a perfect calibration S S Fit Error deviation of actual shear stress from S S Best Fit r 2 This is a measure of the accuracy of the calibration It will be calculated at t...

Страница 22: ...m 21 Temperature the temperature of the sample Shear Rate rotational speed 1 s RPM rotational speed RPM Shear Stress Raw the actual signal coming from the unit Ref Viscosity the viscosity of the sampl...

Страница 23: ...also edit an existing batch by selecting it in the Batch Selector list 2 In the Batch field type a name for the batch OFITE recommends using the lot number and viscosity from the Certification Chart...

Страница 24: ...d is relative to the operating pressure One Heater Two Heaters The heater switch adjusts the heater PID controller to change whether the unit is using one or two heaters to set the test temperature Sw...

Страница 25: ...iscometer at 210 DR RPM DAQ Settings RPM High RPM Med and RPM Low Dead Time DAQ Time These fields are used to determine the amount of time needed for the sample to stabilize at a given rate The fields...

Страница 26: ...ware determines if the temperature has reached the setpoint Temp Reaches Threshold If this option is selected the software will stop waiting on the setpoint as soon as the temperature is within the th...

Страница 27: ...to monitor 3 In the field after the variable name enter the variance required to initiate a save point For example if you want the software to record a data point when the temperature increases or dec...

Страница 28: ...rom the list in the upper left hand corner of the screen 2 Enter a name in the Test Name field 3 Choose an Analysis Model a RP 39 Power Law Model records the Power Law calculations n and k b RP 13D Bi...

Страница 29: ...3 etc The RPM fields set the speed of each step of the sweep 5 Repeat step 4 in the following record fields until you have completed building your test 6 Click the OK button to save the test and retu...

Страница 30: ...e currently highlighted record will be plotted The graph below the records provides a visual representation of the current test Each line represents one aspect of the test RPM Setpoint Temperature Set...

Страница 31: ...reen will show the various data points being calculated by the viscometer based on the chosen Analysis Model This chart however is customizable You can choose which data points are displayed on the ch...

Страница 32: ...or and click the small sign next to it This will show you all of the data for tests run that month including any comments you added 3 Select the test you are looking for and click the OK button Multip...

Страница 33: ...will be asked to select a filename and destination and then click OK The resulting file can then be opened in Microsoft Excel for further analysis Print Click this button to print the results to the...

Страница 34: ...r and click the small sign next to it This will show you all of the calibration tests run that month including the fluid batch and any comments you added after the test 3 Select the test you wish to v...

Страница 35: ...st navigate to the folder specified in the Data Archive Directory field in the Options screen see page 23 for details From there go to the ORCADA folder and then the Tests Import Export folder 5 On th...

Страница 36: ...ed temperature If you experience this problem use the Heater switch on the unit control panel to choose only one heater You will also need to change this setting in the Options screen see page 23 for...

Страница 37: ...y remove the test cell and rotor and clean them thoroughly to avoid corrosion and caking During high temperature tests the test fluid may expand up into the torsion assembly After each test inspect th...

Страница 38: ...ired to beak it loose 4 Remove the backup ring and o ring 5 Pour out the contents of the cell and allow it to drain Be sure to catch the rotor if it falls out 6 Remove the rotor from the cell and set...

Страница 39: ...rotor bushing out of the bottom of the magnet holder 3 Remove the magnet and place it on a non magnetic surface Keep magnetic objects away from the magnet 4 Place all of the parts in a cleaning solut...

Страница 40: ...880 9886 www ofite com 39 5 The rotor should be further disassembled by removing the rotor bearing a Using a small punch press the rotor bearing out of the middle of the rotor b Thoroughly clean or re...

Страница 41: ...nd run a brush through the bob shaft to clean the bore 4 Remove the two screws that hold the torsion spring module to the coupling 5 Use the torsion magnet to lift the stainless steel ball from the co...

Страница 42: ...t with a small brush in the cleaning solution Inspect the o ring and replace it if it is damaged or worn 3 Remove the coupling from the stand and clean it thoroughly Use a brush to clean all holes cre...

Страница 43: ...ot bearing until it falls out 6 With the bearing installer firmly push the new bearing all the way into the rotor The rotor and bearings are designed with a very tight tolerance so that the outer surf...

Страница 44: ...around the pivot thermowell 4 Close the arms of the puller engaging the slots on the bushing flange on each side 5 Hold the arms closed with one hand and slide the weight of the slide hammer up with t...

Страница 45: ...unt of high temperature thread lubricant to the end of the two screws before screwing them in place 5 Slide the drive magnet into the slot until it is roughly centered 6 Inspect the rotor bushing for...

Страница 46: ...the torsion magnet and remove the magnet from the spring assembly 4 Loosen the set screw on the zeroing sleeve and slowly pull the spring assembly down and out of the spring housing Do not stretch th...

Страница 47: ...through the spring housing and secure it in place by tightening the set screw on the zeroing sleeve 3 Slide the torsion magnet over the pivot and onto the spring assembly and secure it in place by tig...

Страница 48: ...sducer housing so that the screw hole in the base is aligned in the center of the screw notch in the cap This will give you the most room for adjustment Off Center Centered Screw Hole Screw Notch 4 Re...

Страница 49: ...Place the pivot cap back onto the torsion assembly and place the cell cap back onto the test cell 10 Unplug the serial cable from the ORCADA port and plug it into the compass port ORCADA Port DAQ Port...

Страница 50: ...cap 45 and then click OK After doing this eight times the software will display a calibration score If any errors occurred follow the on screen instructions to correct them 15 Once the calibration is...

Страница 51: ...card and load drivers for it The install package will start up again and finish the install 6 When the installation is complete confirm that the software is installed properly and that the card is wor...

Страница 52: ...3 880 9886 www ofite com 51 Appendix Minimum Required Pressures Temperature Pressure F C PSI kPa Ambient 200 Ambient 93 3 0 0 201 295 93 9 146 1 100 690 296 355 146 7 179 6 200 1 380 356 395 180 1 201...

Страница 53: ...tipoise cP Poise P g cm s mN s m2 mPa s lb s 100 ft2 Centipoise 1 0 01 0 01 1 1 0 002088 Poise 100 1 1 100 100 0 2088 g cm s 100 1 1 100 100 0 2088 mN s m2 1 0 01 0 01 1 1 0 002088 mPa s 1 0 01 0 01 1...

Страница 54: ...Appendix Test Cell Assembly Port Adapter 130 77 36 Cell Body 130 77 32 Bob Shaft 130 77 43 Rotor 130 77 38 Magnet Holder 130 77 40 Drive Magnet 130 77 28 Test Cell 130 77 33 Torque Magnet Assembly 13...

Страница 55: ...0 77 3 Upper Backup Ring 130 77 22 Not Shown Bob Shaft 130 77 43 Baffle 130 77 41 Vee Jewel 130 77 1 Bob 130 77 39 O ring 130 77 4 Lower Backup Ring 130 77 23 Not Shown Test Cell 130 77 33 O ring 130...

Страница 56: ...ny losses or damages that occur as a result of Improper installation or maintenance of the products Misuse Neglect Adjustment by non authorized sources Improper environment Excessive or inadequate hea...

Отзывы: