background image

32

OSD Menu Terms & Settings

7. MOTION

The MOTION Menu is used to enable or disable the MOTION DETECTION, 
change the HOLD TIME, the SENSITIVITY, or assign the DETECTION AREA of the 
EasyView™ 2 dome camera.

•  OPERATION: 

Activate the motion detection ON/OFF.

•  HOLD TIME (SEC.):

 Determine the dwell time of the MOTION output. (3-60sec.) 

•  SENSITIVITY: 

Determine the sensitivity of the motion detection from 01 to 20.

•  DETECT AREA:

 Specific areas of the frame can be monitored for movement. 

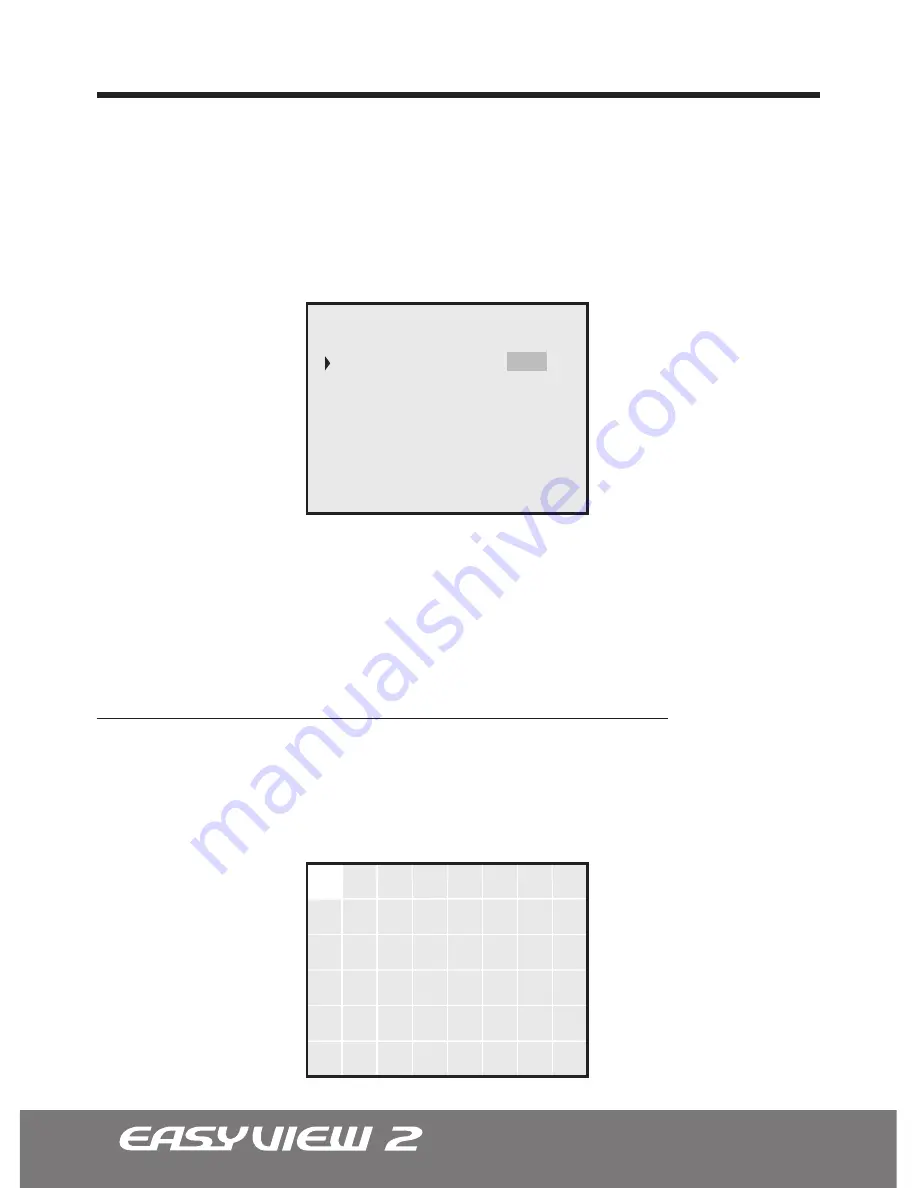
To setup the DETECT AREA, follow the simple instructions below. 

1.  Select the ‘OPERATION’ to ‘ON.’

2.  Scroll down to the ‘DETECT AREA,’ then press the [

u

] right key to enter the area 

select mode. A grid of squares will appear.

OPERATION
HOLD TIME(SEC.)

SENSITIVITY
DETECT AREA

RETURN
SAVE & EXIT

MOTION SETUP

OFF
10

11

MENU:SELECT MODE

MOVE

Содержание EasyView 2 CD Series

Страница 1: ......

Страница 2: ......

Страница 3: ...dware and software described herein at any time without prior notice No part of this guide may be reproduced transmitted transcribed stored in a re trieval system or translated into any language in any form by any means without prior written permission of NUVICO NUVICO makes no warranties for damages resulting from corrupted or lost data due to a mistaken operation or malfunction of the cameras pe...

Страница 4: ...bol within an equilateral triangle is intended to alert the user to the presence of uninsulated dangerous voltage within the product s enclosure that may be of sufficient magnitude to constitute a risk of electric shock to persons CAUTION WARNING The exclamation point within an equilateral triangle is intended to alert the user to the presence of important operating and maintenance servicing instr...

Страница 5: ...Y CAUSE HARMFUL INTERFERENCE TO RADIO COMMUNICATIONS OPERATION OF THIS EQUIPMENT IN A RESIDENTIAL AREA IS LIKELY TO CAUSE HARMFUL INTERFERENCE IN WHICH CASE THE USER WILL BE REQUIRED TO CORRECT THE INTERFERENCE AT HIS OWN EXPENSE CAUTION CHANGES OR MODIFICATIONS NOT EXPRESSLY APPROVED BY THE PARTY RESPONSIBLE FOR COMPLIANCE COULD VOID THE USER S AUTHORITY TO OPERATE THE EQUIPMENT THIS CLASS A DIGI...

Страница 6: ...ent of the obsolete outlet Protect the power cord from being walked on or pinched particularly at plugs convenience receptacles and the point where they exit from the equipment Only use attachments accessories specified by the manufacturer Unplug this equipment during lightning storms or when unused for long periods of time Refer all servicing to qualified service personnel Servicing is required w...

Страница 7: ...itial setup and programming functions easy Mounting hardware all come with pre drilled holes adaptive to most junction boxes providing installers with effortless installation For EasyView 2 dome camera accessories please refer to the Accessories section in the back of this manual ST Series 700TVL Indoor Plastic Outdoor Vandalproof CD ST21N I CD ST21P I Ivory CD ST21N B CD ST21P B Black Available M...

Страница 8: ...onnecting to Monitors 15 Adjusting the Vari focal DC Auto Iris Lens 16 Adjusting the 3 Axis Gimbal 17 Camera OSD Setup Controls 18 OSD MENU CONTROLS On Screen Display 19 OSD Menu Terms Settings 1 AE SETUP 20 1 1 CONTROL 20 1 2 SHUTTER 20 1 3 AGC 20 1 4 MAX AGC 21 1 5 BRIGHTNESS 21 1 6 CONTRAST 21 1 7 FLICKERLESS 21 2 WB SETUP White Balance 2 1 MODE 22 2 2 CONTROL 23 2 3 RED 23 3 3 BLUE 23 3 BLC AT...

Страница 9: ...DE 29 6 2 SENSING 29 6 3 DELAY TIME 30 6 4 DAY NIGHT 30 6 5 NIGHT DAY 30 6 6 IR LED SETUP 6 6 1 IR CONTROL 31 6 6 2 LINE 1 LINE 2 31 6 6 3 SATURATION 31 6 6 4 MIN LEVEL 31 7 MOTION 32 Setting Up the Detect Area 32 Technical Specifications NTSC 34 Technical Specifications PAL 35 EasyView 2 Dome Camera Accessories 36 Fan Heater Installation Instructions CV FH 37 Indoor Wall Mount Installation Instru...

Страница 10: ...12 Assembly Screws These screws are used to mount the Flush Mount Base to the Surface Mount Plate x4 Philips ST4x30 Assembly Screws These screws are used to mount the Surface Mount Plate to a sturdy surface x4 Philips ST4x30 Anchors These anchors are used to fasten the assembly screws securely to the mounting surface x1 Torx Wrench x3 Philips M4x10 Assembly Screws These screws are used to mount th...

Страница 11: ...l CA ORC Camera Control Board Safety Wire Bubble Dome Cover Flush Mount Base Surface Mount Plate Assembly Screws Philips M4x9 Indoor Torx M4x9 Vandalproof Assembly Screws Philips ST4x12 Indoor Philips M4x10 Vandalproof Mounting Screws Philips ST4x30 Indoor Vandalproof Note 11 assembly screws are attached to the dome cover and not included with the mounting hardware 9 4 5 8 6 1 7 12 11 10 13 3 2 9 ...

Страница 12: ...r the exact dimensions for both the Flush Housing and the Surface Mount Housing NOTE The Surface Mount Base for all outdoor vandalproof EasyView 2 domes are 51mm and are deeper than the standard indoor models Flush Mount Top View Surface Mount I Indoor V Vandalproof ...

Страница 13: ...ount Using four ST4x30 screws provided mount the surface mount plate to a sturdy surface Using three ST4x12 Indoor screws or M4x10 Vandal proof screws affix flush mount base to the surface mount plate 3 Flush Mount Using four ST4x30 screws supplied mount the surface mount plate to a sturdy surface Flush Mount Surface Mount Philips M4X9 or Trox M4X9 ST4X12 or M4X10 ST4X30 ST4X30 Plastic Anchors Sur...

Страница 14: ...and less time consuming Mounting on Electrical Junction Box Note Screws required for electrical junction boxes are not supplied These screws are readily available at any well stocked electrical supply store 3 4 Pipe Screws UNC 8 32 x 0 75 When mounting the flush mount base surface mount plate or both together use the pre drilled holes marked with the symbol for proper installation ...

Страница 15: ... Monitor Note The camera does not support both main video output and the service monitor output simultaneously Use one or the other and not together Power connection 12VDC 24VAC Dual Voltage Auto polarity detection and protection All cameras are equipped with a service monitor output on the camera module CA ORC ...

Страница 16: ... Loosen the Zoom Focus screws Using the screw move it RIGHT or LEFT to the desired position Once the desired adjustments have been made tighten the screw to lock in place Adjust the Field of View by moving the screw towards the RIGHT Tele to zoom in or towards the LEFT Wide to zoom out Adjust the Focus the same way as described above after the desired zoom position is established 1 2 4 5 3 ...

Страница 17: ...xis Gimbal The Gimbal mechanism yields maximum rotation and placement as shown below Z Axis Rotation 355 Y Axis Tilting 85 75 IR LED X Axis Panning 240 Tilting 85 Panning 240 Rotation 355 Tilting 75 w IR LED 1 2 3 2 3 1 2 ...

Страница 18: ...Controller CA ORC to make the desired changes to the EasyView 2 dome camera OSD menu Locate the Service Monitor Output as shown below at the base of the gimbal Service Monitor Output Directional Navigation Keys OSD Controller and Service Monitor Cable CA ORC ...

Страница 19: ...nu without saving Entering and Navigating the Menus To enter the main menu press the SET key To enter the sub menu scroll down to the desired sub menu and press the u right key Scrolling the available options are accomplished by pressing the corresponding p q up down arrow keys Go to the Main Menu from the Sub Menu To go to the main menu from the sub menu press the u right key while highlighting t...

Страница 20: ...n the SHUTTER mode The shutter speed of 1 60 NTSC or 1 50 PAL seconds are recommended for most environments 1 3 AGC Automatic Gain Control Auto or Fixed The AGC is automatically controlled under the AUTO mode You can have manual control over the AGC in the FIXED mode or change the value of the MAX AGC to allow for higher or lower tolerance This function is used to amplify the video signal when it ...

Страница 21: ...as 00dB 1 5 BRIGHTNESS 0 31 The brightness can be set to user preference The brightness ranges from 0 31 0 at its darkest and 31 at its brightest 1 6 CONTRAST 0 31 The contrast can be set to user preference The contrast ranges from 0 31 0 at its least contrast and 31 at its highest 1 7 FLICKERLESS ON OFF Enable the FLICKERLESS mode if the screen flickers due to differences in light and electric fr...

Страница 22: ...UTDOOR Fixed at 5400 K INDOOR Fixed at 3200 K FLUORESCENT Suitable for environment with fluorescent lighting HOLD Fixed at current lighting environment Refer to 2 2 CONTROL MANUAL Select the MANUAL mode to adjust the red or blue color values manually ANTI ROLLING Set to this mode if color rolling is observed This mode suppresses the color rolling ATW INDOOR Automatic Tracking White Balance ATW mod...

Страница 23: ...g the camera to the desired location Release the u right key when the desired white balance is achieved You may SAVE EXIT to lock in the color setting 2 3 RED 0 500 Displays the current red value of the WB mode Red value ranges from 0 500 2 4 BLUE 0 500 Displays the current blue value of the WB mode Blue value ranges from 0 50 MODE CONTROL RED BLUE RETURN SAVE EXIT WB SETUP HOLD PUSH 120 120 ...

Страница 24: ...LC A BLC E The BLC divides the frame and calculates each zone according to its exposure level counterbalance excessive background light to distinguish the subject in the foreground OFF The BLC is off HLC High Light Compensation The HLC masks out excessively bright areas within the frame and compensates the rest of the frame accordingly BLC F BLC is fixed weighted on one of 9 separate areas of the ...

Страница 25: ...ility of the entire picture by providing the optimum gra dation compensation for the image with both low luminance areas and high luminance areas existing in the same picture OFF ATR is OFF ON ATR is ON 4 SPECIAL The Special Setup is used to control the SHARPNESS DNR NEGATIVE HOR REVERSE and FACTORY DEFAULT of the EasyView 2 dome camera 4 1 SHARPNESS 1 16 Increasing this value sharpens the object ...

Страница 26: ... is on its moderate setting 2D L 2D DNR is on its lowest setting OFF The Digital Noise Reduction is off 4 3 NEGATIVE OFF ON OFF When turned OFF the camera reverts back to its normal operation ON When turned ON the camera inverts the screen to a negative like state 4 4 HOR REVERSE OFF ON OFF This reverts the mirroring effect back to normal ON The view is horizontally mirrored 4 5 FACTORY DEFAULT OF...

Страница 27: ...e camera title to easily identify between the many other cameras that may be connected to your DVR or network 5 2 EDIT TITLE OFF ON A custom camera title can be entered by accessing the Edit Title option Moving left to right choose the desired letter number or character by highlighting it and pressing the SET key The custom camera title can be up to 15 characters CAMERA TITLE EDIT TITLE PRIVACY MA...

Страница 28: ...MOSAIC mask which obscures the selected area 3 Scroll down to the EDIT AREA to define the unwanted area s OSD Menu Terms Settings MASK NO DISPLAY MASK TYPE EDIT AREA RETURN SAVE EXIT PRIVACY SETUP 01 OFF A TYPE MENU SELECT MODE SIZE SELECT MODE ADJUST MASK SIZE MOVE MASK SAVE EXIT 4 Using the directional arrow keys make the mask bigger or smaller enough to mask over the entire unwanted area Once t...

Страница 29: ...rts to B W mode in the absence of adequate lighting during night time COLOR The camera is always in color mode even during night time operation BW The camera is always in BW black and white mode 6 2 SENSING CDS OPD The SENSING option allows the user to choose between the CDS and the OPD sens ing modes CDS The camera relies on the CDS sensor to detect the light levels then triggers the IR cut filte...

Страница 30: ...a DAY conversion changes depending on the level set for the DAY a NIGHT conversion i e If DAY a NIGHT is set to 2 NIGHT a DAY selectable threshold would be only from 3 9 instead of full 2 9 range 6 5 NIGHT aDAY 2 9 This level determines the threshold level of the brightness before switching from Night mode to Day mode 6 6 IR LED SETUP Models equipped with IR LEDs only This function is used to adju...

Страница 31: ...ner most ring of LEDs Setting 0 indicated that the LEDs have been turned OFF and setting 22 indicates the LEDs are at its most intense 6 6 3 SATURATION 6 15 This feature determines threshold of the IR illumination intensity before it automatically compensates for the overexposure Higher the value lesser the tolerance it will have before compensation 6 6 4 MIN LEVEL 1 10 This feature sets the minim...

Страница 32: ...e MOTION output 3 60sec SENSITIVITY Determine the sensitivity of the motion detection from 01 to 20 DETECT AREA Specific areas of the frame can be monitored for movement To setup the DETECT AREA follow the simple instructions below 1 Select the OPERATION to ON 2 Scroll down to the DETECT AREA then press the u right key to enter the area select mode A grid of squares will appear OPERATION HOLD TIME...

Страница 33: ...s to bring up the sub menu 2 Select that particular block active or inactive or scroll down to SET ALL BLOCK or CLEAR ALL BLOCK to active or deactivate the entire grid 3 Scroll down to SAVE EXIT and press the u right key once all the desire areas of the grid have been activated to save changes and exit SELECT MODE MOVE SET CLEAR SET ALL BLOCK CLEAR ALL BLOCK SAVE EXIT OSD Menu Terms Settings ...

Страница 34: ... N Ratio Camera Control Setup Privacy Mask Digital Noise Reduction Back Light Compensation Motion Detection General Information Operating Temperature Operating Humidity Power Consumption Input Voltage CD ST21N High Resolution Color NTSC 1 3 CCD 700 TV Lines No Vari focal 2 8mm 10mm 131 6 W 35 6 T N A N A N A Internal 976 H x 494 V 525 Lines 2 1 Interlaced 1 60 1 100 000 sec 1 0 Vp p Composite 75 o...

Страница 35: ...x S N Ratio Camera Control Setup Privacy Mask Digital Noise Reduction Back Light Compensation Motion Detection General Information Operating Temperature Operating Humidity Power Consumption Input Voltage CD ST21P High Resolution Color PAL 1 3 CCD 700 TV Lines No Vari focal 2 8mm 10mm 131 6 W 35 6 T N A N A N A Internal 976 H x 582 V 625 Lines 2 1 Interlaced 1 50 1 100 000 sec 1 0 Vp p Composite 75...

Страница 36: ...A PM Universal Corner Mount Bracket CA CMB Universal Pole Mount Bracket CA PMB Junction Box CA JB Ideal for indoor applications Ideal for mounting camera on corners of a structure Ideal for outdooor applications Used for mounting camera on a pole Used for mounting camera on the ceiling EasyView 2 Dome Camera Accessories Multipurpose Junction Box Enclosure CA JB2 ...

Страница 37: ...ilips M3x6 Q ty 1 Length 6 mm Thickness 3 mm Assembly Screw Philips M2 6x14 Q ty 1 Length 14 mm Thickness 2 6 mm Specification Power Input Power Consumption Heater Power Consumption Fan Heater ON Heater OFF Fan ON 24VAC 10W 0 7W at 41 F 5 C at 59 F 15 C 24 Hours Note For Fan and Heater operation 24VAC power input is required Current model does not support 12VDC operation ...

Страница 38: ...ips M4x10 Q ty 3 Length 10 mm Thickness 3 mm Construction Finish Weight Environment Aluminum Ivory or Black 1 4 lb 0 64Kg Indoor Only This indoor wall mount is designed for EasyView dome camera This mount can be directly to a wall or attached to a junction box CA JB Specification Dimensions Unit Inch mm 5 64 143 4 4 37 111 2 2 75 70 3 95 100 4 7 36 187 0 28 7 ...

Страница 39: ... a wall or attached to a junction box CA JB Assembly Accessories Anchors Plastic Q ty 4 Length 35 mm Thickness 7 mm Mounting Screw Philips ST5x35 Q ty 4 Length 35 mm Thickness 5 mm Specification Aluminum Light gray or Black polyester powder coat 45 lb 20Kg Indoor Outdoor Construction Finish Max Load Environment Dimensions Unit Inch mm 4 33 110 3 44 100 2 75 70 4 53 115 5 63 143 0 47 12 ...

Страница 40: ......

Отзывы: