background image

3

1 Introduction

1.1 Acknowledgement

Thank you for purchasing our product. The product is a high-end MID (Mobile In-

ternet Device). For a full specification list, please see the Appendix, on page 39.

The product has a built-in Wi-Fi module, front camera, can be easily connected to

the Internet, can reproduce high definition videos and photos and supports camera

shooting and video recording. Besides, many office and entertainment applications

are available for the device. Brand new operation interface will provide you with a

new kind of enjoyment.

The manual systematically introduces the functions, applications and preventive

maintenance tips.  Please read this manual carefully before using the device.

1.2 Preventive maintenance

● Please always keep the MID dry. To avoid the corrosion and electric short-circuit,

please keep the device, battery and charger away from water and moisture, and

don’t operate the device or charger with wet hands. 

● To avoid the failure of the device, battery or charger, please protect them from

violent shocks or vibrations and use them in environments with an ambient tem-

perature between 5 and 35 degrees Celsius.

● Never shock, throw, prod, drop, stretch or bend the MID.

● DO NOT disassemble the MID. Only a certified service technician should perform

repairs on your device. Otherwise, the manufacturer will not be responsible for

any damage. 

1.3 Safety Instructions  

Before the operation of the MID, please read this chapter and teach your children

about these instructions. For further details, please refer to the safety instructions

and preventive maintenance sections.

● Never use the MID when driving car, in order to ensure safe driving.

● In the medical areas, please abide by related rules and regulations. Please shut

down the MID when near to medical equipment.

● To avoid any interference with the airplane’s electronic equipment, please shut

down the MID or use airplane mode when you are boarding a flight.

● To avoid electronic equipment failure, please shut down the MID in the vicinity

of high-accuracy electronic equipment.

● Please keep the MID far away from magnetic storage devices, the electromag-

netic fields of the MID may erase the data stored in the magnetic devices.

● Never use the MID in the vicinity of high temperature, inflammable gas (gas sta-

tion). 

● Protect the MID and accessories from the reach of children and prevent the use

of the MID without parents’ supervision.

● Please comply with related rules and regulations, and respect others’ privacy and

legal rights while using the MID.

● Please strictly adhere to related instructions in the manual when using the USB

interface, to ensure the safety of both the MID and PC.

● Never use the MID in the bathroom or other humid environment, and please

protect the MID from rain, liquids and moisture.

Содержание SP 702AS

Страница 1: ...SP 702A5 user manual english NPG Technology S L C Ecuador 14 28850 Torrejón de Ardoz Madrid Spain Telf 916 794 790 www npgtech com ...

Страница 2: ...isplay 10 4 2 Security settings 10 4 3 SD card and MID Storage 11 4 4 Date and Time 11 4 5 Language Settings 11 4 6 About MID 11 5 Multi Media 12 5 1 Supported File Formats 12 5 2 Music 12 5 3 Video 13 5 4 HDMI 13 5 5 Gallery 13 6 Connectivity 15 6 1 External 3G 15 6 2 WIFI Connection 15 6 3 Email 15 7 Internet 16 7 1 Browser 16 8 Other Applications 17 8 1 Clock 17 8 2 Caculator 18 8 3 File Manage...

Страница 3: ...our device Otherwise the manufacturer will not be responsible for any damage 1 3 Safety Instructions Before the operation of the MID please read this chapter and teach your children about these instructions For further details please refer to the safety instructions and preventive maintenance sections Never use the MID when driving car in order to ensure safe driving In the medical areas please ab...

Страница 4: ...e MID 2 3 MID Status and Task Bar Task bar icons When some messages appear in your task bar please tap the column and slide your finger on the screen to open the task bar Choose the menu you need and confirm the selection Then you can close the task bar by clicking the column to slide up Please refer to the below status icons Reminder board Reminder icons will work while receiving emails alarm is se...

Страница 5: ...een is turned on press the Power key the screen will shut down immediately Turn on the screen when it is turned off If the screen is shut down short press Power to turn on the screen The screen will be locked as in Picture 3 2 After opening it hold lock icon with your finger or touch pen and slide it towards the unlock symbol as in Picture 3 3 Power key Power Short press for sleep awake function lon...

Страница 6: ...til Quick swipe or swipe Quick swipe or swipe indicates making a quick vertical or horizontal movement with your finger or touch pen on the touch screen Pull Before you pull an item you need to touch and drag it until you pull it into the po sition you want Rotate For most pictures you only need to rotate the MID sideways to change the screen direction from horizontal to vertical For instance when ...

Страница 7: ... folder creation simple There are 3 easy steps 1 Drag all the icons together as shown in the Picture 3 6 2 Click the group of icons to open all the applications as in Picture 3 7 3 Tap the unnamed folder below the black frame it will pop up the on screen key board and you can rename this folder it is similar to the IOS system Delete the icons on the desktop 1 Click and hold the icon you want to de...

Страница 8: ...documents you have to conduct storage configuration on your MID Connect the MID to a PC via USB connection the task bar will confirm the connec tion 1 Open the task bar please see the Chapter 2 3 MID status and task bar 2 In the task bar click USB connected then touch Turn on USB storage as in Picture 3 9 3 Now the MID is connected to the PC To copy the files to the memory card 1 Connect the MID to a...

Страница 9: ...the top of the screen in the application interface or left swipe the screen it will switch to the widgets interface Long tap any compo nent to turn it into a shortcut and then you can run the application through the shortcut Create shortcut icons on the desktop In the applications and widgets interface long tap any icon to switch it into a short cut drag and drop the icon to any place on the deskt...

Страница 10: ... unlock pattern 1 Click setting application in the main interface 2 Click safty 3 Click screen lock 4 Choose picture in the text setting area 5 Move to next step according to remind 6 There are nine touch points in the picture when it popup unlock picture board connect the four points from vertical and horizontal direction As Picture 4 1 move your finger when finish System will record the picture yo...

Страница 11: ... or scroll up and down to adjust the hours and minutes select AM or PM to change between morning and afternoon there is no such selection when you choose 24 hour format tap set 6 Tap Use 24 hour format you can switch between 12 hour format and 24 hour format the selected time format will be used on the alarm 7 Tap Select date format and choose the date formats in MID 4 5 Setting the Language 1 Ope...

Страница 12: ...r example if you choose artist type you can see the ar tists names from A to Z if you choose one artist the list will display the artist s album and album list AUDIO MP3 AAC OGG WAV APE FLAC AMR WMA VIDEO AVI MPG VOB MKV FLV TS TP H264 MPRC 4 RMVB DIVX MPEG 2 PICTURE JPEG GIF PNG BMP 5 Supported file formats View current play Cover of album Random play Repeat Next song Pausa Previous song Played ti...

Страница 13: ... drag the blue margins to adjust the trimmer 3 After adjusting the size tap Crop to finish 4 Click Cancel to return to the photo without applying the crop 5 Click cancel return to photo scan if you want give uo shaving yNote Choose related player first if there is more than one player 5 5 Gallery The Gallery application can search in the SD memory card for video and photo files you can use the Galler...

Страница 14: ...he screen if you already set the setting to slide slide the lock icon to wards the camera icon 2 Touch the camera icon in the main screen Record video 1 Make sure your device is in video mode 2 Move the camera towards the target you want to record 3 Touch the red button the system will start to record During the recording the red button will display a white square 4 Touch the red button to finish r...

Страница 15: ...ogress bar while saving the photo 6 1 External 3G Your MID supports external 3G interface 1 Connect the 3G dongle to the MID 2 Wait for the 3G icon to appear in the task bar 6 2 Wi Fi connection Your MID can connect to Wi Fi networks 1 Open the Settings from the main interface 2 Select Wi Fi 3 The MID will automatically scan the available Wi Fi networks as in Picture 6 1 4 Select the Wi Fi network...

Страница 16: ...n the top of screen 4 Enter the Compose new email interface 5 Input the receiver s email address in the receiver column 6 Input subject and email content 7 Click add attachment binder icon it will pop up a menu 8 Choose the type of file you want to attach from File Manager Gallery Office Suite etc 9 Select the attachment you want to send pictures videos documents 10 Click send button to send the emai...

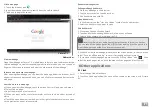
Страница 17: ...pplication the clock will be shown on the screen as in Picture 8 1 View a webpage Open the webpage as Picture 7 1 click address column to input address enter the related webpage to view corresponding website information you can slide your finger on the screen to browse and view the other parts of the webpage Increase and decrease the webpage After opening the webpage you can draw the webpage below ...

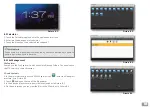
Страница 18: ...o share resources SD card contents 1 In the main interface touch the ES File Explorer icon enter the file explorr interface as in Picture 8 2 2 Touch button on the top of the file explorer 3 In the extended Favorites window click mnt extsd as in Picture 8 3 4 On the next screen you can view the files in the SD card as in Picture 8 4 Picture 8 1 iRecordatorio Puede cambiar del panel básico al avanzado...

Страница 19: ...n a SD card and insert the card in the MID 9 2 Uninstall Application uninstall procedure 1 Open the Settings in the main interface 2 Select Apps it will list all the applications 3 Select the application you want to uninstall and then select uninstall 4 Click OK to finish the uninstallation 9 3 Update Path Update the application procedures of Android system Download the latest application procedure...

Страница 20: ...n the recovery mode 3 Enter in the system upgrade mode the wallpaper is a triangle with an exclama tion mark as in Picture 10 1 4 Short press Volume when you see the triangle 5 System enters in another mode recovery mode there are seven options as in Picture 10 2 6 The first option Restart system now The second option apply sd card update zip The third option Wipe data Factory reset The fourth opti...

Страница 21: ...re 10 2 uTip Enter safe mode to uninstall the software error in the normal system reboot after uninstall MID normal start to exit safe mode Picture 11 2 Picture 11 1 11 DVB T 11 1 Icon and user interface When this software is used for the first time it will remind you that no channels are stored User interface Icon yNote The DVB T Player allows recording digital TV programs in the NPG MID as long a...

Страница 22: ...11 2 Icons Scan Brightness Brightness Volume Snap Shot PVR Channel List Explore the TV channels from the TV channel list Back Settings CH CH EPG Full screen Picture 11 5 11 3 EPG Displays the EPG information for the current channel ...

Страница 23: ...r the application system Please make sure the connection of the internet works well Please make sure the way to set the E mail is correct 7 Cannot read the data from the TF card Please make sure the TF card is inserted correctly in the device 8 Sometimes the MID runs slowly This is a common situation But you can close some applications in the task manager interface or unload some third party appli...

Страница 24: ... 707 500 272 Portugal preço de chamada 0 10 min Fax 34 916794891 This symbol on the product or in the instructions means that your electrical and electronic equipment should be disposed at the end of life separately from your household waste There are separate collection systems for recycling in the EU For more information please contact the local authority or your retai ler where you purchased th...

Отзывы: