diameter, the amount of off-set
“a” is: a = D / 2 – r
Example: Given r=.06” (1.5mm); D=.30” (8mm)
A=.15” (4mm)-.06” (1.5mm) =.09” (2.5mm)
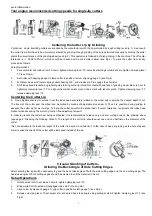
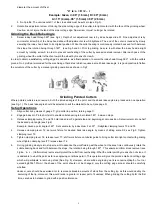
b. No.3 profile: The venire scale C1 of the cross slide must be set zero (see Fig. 3).
2.
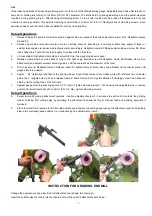
Rotate fine adjustment screw H to bring the side cutting edge of the cutter into light contact with the face of the grinding wheel.
Caution: do not injure the land of the side cutting edge. Now screw H must no longer be rotated.
Grinding the Back Rake Angle
3.
Swivel index head through 90
o
(see Fig.4). Depth of cut adjustment now is by index heaps slide S1. Fine adjustment is by
micrometer screw S6 of the index head slide with adjustment screw S5 tightened. The end of the cuter is rounded by slowly
swiveling the index head back to its original position. While the cullet bearing is continuously rotated back and forth between
the stops, the rotation being through 180
o
(see Fig.5 and 6). Prior to grinding, be sure to with draw the index head a slight
amount by rotating screw S in order to prevent overheating of the cutter by excessive stock removal. After each pass of the
grinding wheel the cutter is then fen toward the wheel by means of screw S.
In order to obtain a satisfactory cutting edge it is advisable, as a final operation, to swivel the index head through 90
o
with the cutters
given a No.3 profile are intended for the machining of hard steel which requires a small back rake angle, it is good practice to flatten
the curvature of the cutter by a manual grinding operation as shown in Fig.7.
Grinding Pointed Cutters
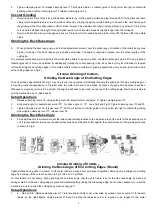
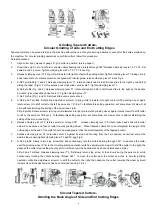
Where pointed cutters are concerned, both the included angle of the point and the aback rake angle are produced in one operation
(see Fig. 1). The back rake angle should be selected to suit the material to be cut.(see page 5)
Setup Operations
1.
Align cutter lip by means of gauge ’C; grip cutter in position; return gauge C.
2.
Engage index pin P into short slot to enable collets bearing to be rotated 180
o
between stops.
3.
Release clamping levers T3 and T6 hold index drum F against stop and, beginning at zero position. Set swivel arm at one half
the desired point angle (see Fig.2).
Example: Given a point angle of 60
o
Set swivel arm by index drum F at 30
o
.Retighten clamping levers T3 and T6.
4.
Release clamping lever T2; set work fixture for desired back rake angle by means of sitting scale S2, see Fig.3. Tighten
clamping lever T2.
5.
Tighten clamping lever T4; release lever T7; shift work fixture on tubular guide to bring cutter into light contact with grinding
wheel tighten clamping leverT7; release lever T4.
6.
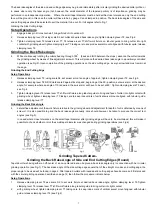
During grinding slowly return stop screw G to advance the work fixture past the wheel; at the sane time continuously rotate the
collets bearing back and forth between the stops, the rotation being through 180
o
This ensures uniform stock removal (see
Fig.4a
,
b
,
c
,
)Uniform stock removal will protect the cutter from overheating. Whet the cutter point by means of an oil stone. It
is advisable to whet the point as far as engraving conditions permit. This operation will give the point a small end cutting edge
which will participate in removing stock (See Fig. 5) .However, where airline engraving work is concerned(depth of cut nor
exceeding.0004”(.01mm) the shape of the point should not be changed; only the cutting edge proper should be carefully
whetted.
However, care should be exercised not to remove noticeable amounts of stock from the cutting lip, as this would destroy the
centering of the lip; moreover, this would render a greater or lesser part of it useless. When grinding the cutting lip for the first
time, care has to betaken to grind with a positive tolerance.
5


