background image

WindRunner™ self-balancing electric vehicle                                      user manual


74


The Chinese laws and regulations only allow the aviation enterprise to transport the lithium ion battery pack 

not exceed 160Wh capacity, so the aviation is not applicable for transporting the battery pack of a WindRunner. 

So, you must transport the battery pack by truck or train, and firstly consult the transport company. For other 

countries and regions similar with restrictive regulations, please contact the local carrier companies for details. 

If you want to ship a battery, please pack the battery with thick poly-foam and corrugated paper box. Make 

sure the package is strong, sold and water tight. 


8.  Routine  maintenance 

8.1 Keep cleanness 


Please clean your WindRunner immediately after use. 

Periodically clean to keep the optimum performances of the 

WindRunner. 


During cleaning, you may wipe the mainframe of WindRunner 

with a soft cloth soaked in clean water. 


It is forbidden to use alcohol, gasoline, kerosene, acetone or other corrosive chemical solvents to clean the 

WindRunner. All the above may cause surface damage, internal part failure, and warranty qualification loss. 

Содержание WindRunner

Страница 1: ...USER MANUAL Caution of risks...

Страница 2: ...ead this manual carefully to avoid any hazards and risks For a further understanding of potential hazards and safe riding skills login to our official website http www ninebot com for a safe riding in...

Страница 3: ...INC AND ITS DISTRIBUTOR WILL NOT BE RESPONSIBLE FOR ALL LOSS WHEN RIDE ON MOTORWAY Read understand and follow the instructions issued on the User Manual especially the chapter 6 Safety guide New ride...

Страница 4: ...Any other trademarks mentioned in this manual and all concerning rights shall be the proprietary of their owners Ninebot reserves all rights for WindRunner and 8 shape logo This manual was compiled by...

Страница 5: ...is manual and you can enjoy a safe and pleasant ride To ensure a better riding experience To perform the basic operations of WindRunner before riding To master routine maintenance and also contact of...

Страница 6: ...ion to the following marks and meanings Carefully read and understand them well improper use and or operation can cause serious loss of property or heavy injury death improper operation may cause malf...

Страница 7: ...Model of WindRunner G1 series 13 1 3 Illustration of G1U G1X 15 2 Install a new WindRunner 16 2 1 Check the package content 16 2 2 Check the S N 18 2 3 Assembly 19 2 3 1 Tools required and preparatio...

Страница 8: ...30 3 3 3 Normal mode 20km h max 31 3 4 Lock mode 32 4 Use the intelligent remote keys 33 4 1 ON OFF 33 4 2 mode switch 33 4 3 Lock mode 36 4 4 Battery indication 37 5 How to ride 39 5 1 Before ride 3...

Страница 9: ...idden 55 6 3 Driving manners safe riding 58 6 4 Active protection instruction 61 6 5 Intelligent safe alarm protection 62 7 Charging and battery maintenance 66 7 1 Introduction of battery 66 7 2 Charg...

Страница 10: ...s and troubleshooting 78 9 2 List of alarm information codes 80 9 3 Spare parts for repairing and replacing 84 9 4 Reporting your troubles 85 10 Datasheet 86 10 1 WindRunner G1U urban type 86 10 2 Win...

Страница 11: ...ting the battery stamina 93 Accuracy of battery indication 94 B 2 Tire and land form 95 B 3 About intelligent Speed limit 96 B 4 Hot back up safety mechanism 97 B 5 G1X and G1U upgrading mode 98 B 6 B...

Страница 12: ...rd or not If not the CPU may control the motor on both left and right sides to rotate rapidly and keep the WindRunner balanced The self balancing function allows the driver to stand on the WindRunner...

Страница 13: ...n for rent model G1U based Equipped with external quick charger and optional RFID billing system Color can be customized 20 units G1X all terrain standard model Low pressure large size all terrain tir...

Страница 14: ...olf courses Color in Matt black Anodized Brilliant yellow and Blue G1UP Patrol model Based on G1U Side rack 55L hard case Alarm light siren Video camcorder with WI FI real time transmission and 4 hrs...

Страница 15: ...WindRunner self balancing electric vehicle user s manual 15 1 3 Illustration of G1U G1X...

Страница 16: ...d carefully take out the handle and put it aside Then take out the mainframe The mainframe is rather heavy carefully take it out with the help of another person Take care when picking up the wheel hub...

Страница 17: ...presentative Chassis including tire operating bar quick release 1 set Care to distinguish the all terrain type and urban type battery pack 2 sets including one charging cable Lower and upper segment o...

Страница 18: ...into effect date of warranty contact method of the seller and stamp Moreover the last page of the warranty card should have been attached with the label of serial number The serial number is the comb...

Страница 19: ...sales representatives Please login the official website of WindRunner www windrunner cn click the repair and technical support link located at the lower right part of screen and click the user registr...

Страница 20: ...ocket screw wrenches from the packaging All these tools must be kept for future maintenance and transportation You should wear the working gloves to protect your hands from dirt and scratches 2 3 2 As...

Страница 21: ...WindRunner self balancing electric vehicle user s manual 21 Insert the operating bar into the steering shaft Hold down the quick release handle...

Страница 22: ...o loose the handle may be disengaged fall off and lead to a hazard 2 4 Intelligent remote keys Each WindRunner has been equipped with two identical intelligent remote keys One is for operating and the...

Страница 23: ...LEDs 1 5 blue LEDs respectively mean 5 divisions of battery capacity if 5 blue LEDs lit up means that the battery capacity is full 1 red LED means about 20 of batter capacity is left If you press and...

Страница 24: ...disappears the WindRunner self test will be complete Keep the foot mat basically leveled then tap any one foot mat lightly with your foot You may hear a very short buzz and then the wheels of WindRun...

Страница 25: ...leased the corresponding LED light will turn off The battery indication of a new WindRunner is approximately 2 5 blue LEDs that is 40 100 battery capacity 5 Press Speed limit button and the red LED on...

Страница 26: ...on and riding are before the test has finished is unsafe The testing speed should be slower During the test it s forbidden to release the handle During the test ride if you find any abnormalities esp...

Страница 27: ...e WindRunner is tilted too high under power assistant mode overexert etc speed is too high beyond 6km h handle released and free sliding speed too high the WindRunner shall determine that it is unmann...

Страница 28: ...indRunner shall output its power about 30 and move slowly This operating mode is suitable for handling or shifting the WindRunner See 5 11 for details The WindRunner shall be in the power assistant mo...

Страница 29: ...ge or hurt 3 3 Balance mode Once you stand on the WindRunner the WindRunner will begin working and enter balance mode Balance mode is convenient for operating and riding on different road conditions T...

Страница 30: ...LED at the lowest part of display panel comes on it means that the beginner mode is entered Under this mode the maximum speed of WindRunner is limited lower and operating response will be very slow T...

Страница 31: ...rivers on good road conditions e g no pedestrian and even path This mode may be applicable for riding WindRunner Under the Speed limit mode press the Speed limit button on the intelligent remote key Y...

Страница 32: ...ndby mode and cut off the power output Just then if the driver is still on the WindRunner the driver may crash and get injured 3 4 Lock mode The lock mode is a security function of WindRunner under th...

Страница 33: ...r 5 blue LEDs on the display panel shall come on followed by a shake and buzz at the moment the WindRunner is powered on Under the power on state press the ON OFF button for 1 second Once the WindRunn...

Страница 34: ...response should be more sluggish This mode is suitable for the new or unskillful riders After its speed is beyond 5m h the WindRunner shall be faced upward pushing the driver backward to forcibly dec...

Страница 35: ...the driver backward to forcibly decelerate Display panel under Speed limit mode Rear LED shows blue Under Speed limit mode press the Speed limit button of intelligent remote key to change to normal m...

Страница 36: ...r balance mode Under standby mode or power assistant mode press lock on the intelligent remote key to activate the lock mode If touched or handled by external force its posture will change and the who...

Страница 37: ...ry indication button and the LED on the display panel will not indicate the capacity of battery When the battery capacity is reduced to a specified value the WindRunner shall gradually reduce the maxi...

Страница 38: ...please stop riding every 20 30 minutes to have a short rest to check the battery capacity Do not check while riding While riding the driver must pay close attention to the road conditions If the driv...

Страница 39: ...should be provided for the first ride This location can be indoors or outside but it should at least be 4 4m 16m2 flat and even Unlike the wet and slippery conditions of the road the site should be s...

Страница 40: ...his will help you when riding the WindRunner Wear the safety helmet and harness to protect yourself against injuries Move the WindRunner to the center of a site Adjust the operating bar to your comfor...

Страница 41: ...play panel shall glow steadily Once this happens the WindRunner has successfully powered on At the moment the WindRunner is of powered on please keep the WindRunner foot mat basically leveled When you...

Страница 42: ...the handle until the foot mat of WindRunner is basically leveled At this moment five blue LED s shall be shown on the display panel This means that the WindRunner is in the correct ready posture At t...

Страница 43: ...er the balance mode and the mainframe may suddenly shake All these may lead to potential hazards and cause the rider to fall If not the WindRunner has not passed the posture test don t be in a rush to...

Страница 44: ...owly shift your body onto the foot mat and raise the other foot 5 At this moment try to avoid the transverse moving of the operating bar Raise the other foot slowly from the ground surface and place i...

Страница 45: ...structor to help you hold the handle After a while you will adapt to riding the WindRunner and you will no longer sway 5 6 Move forward and backward 1 Slowly lean forward and feel the advancement of t...

Страница 46: ...nner Then reset You may feel the deceleration and stop of the WindRunner Repeat several times Avoid collisions and you will avoid falling Reverse riding is not a normal riding mode There is no substit...

Страница 47: ...celerate and stop the WindRunner 2 After you ve completely stopped uniformly distribute your body s weight onto the center of the foot mat to stabilize At this moment if you continue to incline backwa...

Страница 48: ...dRunner and tires to skid and thus the driver may fall or get injured 5 8 Make a turn The WindRunner shall turn according to the motion of your handle Inclining your handle left or right may cause the...

Страница 49: ...turn at site try to advance slowly and make a turn Keep your knees slightly bent and incline to the direction you want to make a turn The angle shall be consistent with that of the operating bar Repe...

Страница 50: ...ing carefully get off Please request your instructor for a help one foot a time After you get off hold the operating bar steady The detailed getting off methods are as followed 1 Firmly hold the opera...

Страница 51: ...ond foot off the WindRunner shall change from balance mode to power assistant mode or under standby mode tap the foot mat lightly once and a sound of a tick may be heard Then the power assistant mode...

Страница 52: ...se the handle under power assistant mode When in power assistant mode please grasp the handle to control the movement of WindRunner It s dangerous to release the handle under power assistant mode The...

Страница 53: ...s usually used for security guarantee when you leave the WindRunner temporarily The best method for ensuring the safety of WindRunner is parking indoor The WindRunner may be put into an elevator easil...

Страница 54: ...with the safety instructions This may maximize the safety of you and other persons even if the WindRunner has serious irreversible troubles this will ensure no serious injury to you However you shoul...

Страница 55: ...and make sure all exposed component parts are not falling damaged and are free of slackness While riding make sure you don t hear any noise or a continuous alarm Before riding ensure that you are in g...

Страница 56: ...WindRunner self balancing electric vehicle user manual 56 It is forbidden to ride in bad weather and road conditions such as heavy freezing rain snow accumulated water wet and slippery surfaces etc...

Страница 57: ...r ride across a flight of steps It is forbidden to ride in a motor vehicle lane In some countries and regions the non motor vehicle lane is also forbidden to ride this type of vehicle Please refer to...

Страница 58: ...in unsafe conditions such as places endangered by fire or explosion flammable gas steam liquid dust and fiber etc It is forbidden to violate other requirements of this manual especially those items st...

Страница 59: ...pace for passing you may pass try to avoid passing through the crowd of pedestrians When riding together with another driver on a WindRunner keep an appropriate safe spacing avoid any hazards and obst...

Страница 60: ...d and keep your body in a relaxed posture Please do not reverse unless you are certain to avoid any obstacles If your path is clear you may slowly reverse a few steps When riding keep in mind that you...

Страница 61: ...ear the gloves eyeshade shin guard and kneepad etc according to the riding situations and his her previous riding experience If you feel unwell or unable to obey all notices or warnings in this manual...

Страница 62: ...lly slow down by automatically limiting its maximum speed to a safe level Advance speed too high If you ride the WindRunner too fast beginner mode 5km h Speed limit mode 10km h normal mode 20km h the...

Страница 63: ...hanism is called the intelligent safety alarm Reverse speed too high When you ride the WindRunner and reverse too fast reverse beyond 5km h the intelligent safety alarm will be triggered Riding in rev...

Страница 64: ...into power assistant mode Otherwise the WindRunner will enter into standby mode after 5s and the driver may be fall off if he she still stands on it Low battery stamina When the battery capacity is to...

Страница 65: ...ner is under your control It is strictly forbidden to release the handle under power assistant mode Internal faults When the WindRunner detects an internal fault for example one battery power failure...

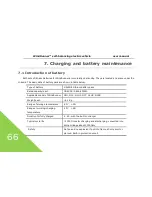
Страница 66: ...f battery LiFePO4 Lithium battery pack Rated capacity each 76 8VDC 5 6Ah 430Wh Applicable model of WindRunner G1U G1X G1UP G1T G1UR G1XR Weight each 5 1 Kg Range of storage temperature 20 50 Range of...

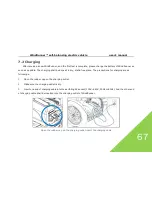
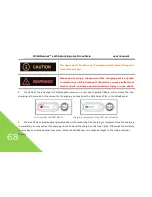
Страница 67: ...be done at a dry static free place The precautions for charging are as followings 1 Open the rubber cap on the charging outlet 2 Make sure the charging outlet is dry 3 Insert one end of charging cable...

Страница 68: ...ay panel comes on in red and regularly flickers which means that the charging is in process At the moment of charging you may hear the light noise of fan in the WindRunner In charging red LED flicker...

Страница 69: ...hall describe the basic knowledge for battery maintenance For identical battery packs whether their maintenance is correct or not their life cycle and reliability are quite different A well maintained...

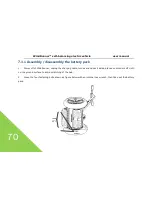
Страница 70: ...battery pack 1 Power off of WindRunner unplug the charging cable turn over and put it aside place a cushion or soft cloth on the ground surface to avoid scratching of the hub 2 Loose the four fastenin...

Страница 71: ...h and dry by inclining the WindRunner forward and backward respectively for about Ten seconds Avoid using WindRunner under 10 or above 40 Do not put the battery pack directly under the sunlight Please...

Страница 72: ...ll discharge slowly and trigger low voltage protection even if you powered off it with the remote key Even if powered off the WindRunner is also slowly consuming the electricity If not used for more t...

Страница 73: ...r A new battery together with a battery that may be expired may greatly reduce the service life of the new one and the riding performances of WindRunner for safety reasons the performances of WindRunn...

Страница 74: ...he local carrier companies for details If you want to ship a battery please pack the battery with thick poly foam and corrugated paper box Make sure the package is strong sold and water tight 8 Routin...

Страница 75: ...hed and the charge port is tightly covered by the rubber cap Otherwise you may suffer an electric shock or serious troubles It is strictly forbidden to directly spray and wash the WindRunner with a wa...

Страница 76: ...ssure of a tire too high or too low may speed up the wearing of the tire 8 4 Storage Please store indoor dry and normal temperature Try to control the storage temperature at 0 30 the room temperature...

Страница 77: ...y be damaged and possibly injure your hands 8 6 Repair Apart from retightening the screw replacing the tire fender and battery no other component parts of the WindRunner can be repaired by the users t...

Страница 78: ...nable to power on then it may be caused by the power of the WindRunner battery being fully used up It may also refer to an internal circuit failure Please retest only after the WindRunner is fully cha...

Страница 79: ...t moving the operate bar or the mainframe will pitch when rider turns left right This shows the internal sensors need re calibration Please perform the following steps Power on Let the WindRunner lean...

Страница 80: ...em test may have found hardware trouble including one of the hot back up systems failed This is usually caused by too high temperature a heavy load unsafe riding methods or hardware failure detected w...

Страница 81: ...lue and flicker red red red red blue flicker An intelligent safety alarm it is self recoverable after troubles are solved A hint of battery capacity seriously insufficient You should charge the batter...

Страница 82: ...nue riding only after troubles have been solved red red blue blue blue flicker An intelligent safety alarm it is self recoverable after troubles have been solved A hint that mainframe inclined angle t...

Страница 83: ...nspection red blue blue blue red flicker An Internal fault alarm May hint at a built in charger malfunction incorrect output or circuit failure in battery interface Please contact the factory for insp...

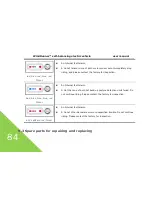
Страница 84: ...for inspection blue blue blue blue red flicker An Internal fault alarm A hint that one of both hot back up posture detection units failed Do not continue riding Please contact the factory for inspect...

Страница 85: ...onds to your inquiry please turn this manual to the last page and contact Ninebot to learn how to repair or replace the component parts 9 4 Reporting your troubles Although the WindRunner products hav...

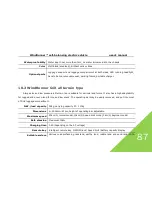
Страница 86: ...and height of operating bar adjustable Maximum speed 20km h normal mode 10km h Speed limit mode 5km h beginner mode Batt stamina Maxium 40km Charging time 2 4h depending on the AC voltage Remote key i...

Страница 87: ...uitable for various land forms It also has a high adaptability for rugged and uneven land forms and low shock The operating bar may be easily removed and put into most of SUV luggage compartment N W l...

Страница 88: ...battery Appendix A More maintenance instructions A 1 Replace the tire Replace the tire after worn to a specified extent The user may purchase the special purpose tire and then replace by his or herse...

Страница 89: ...an all terrain type tire A 2 Replace the fender If the fender is damaged the user may replace it on his or her own You can also replace it at an Ninebot authorized agent and distributor The figure be...

Страница 90: ...at hold down the decorative strips and fender Remove the fender screws then remove the fender A 3 replace the foot mat 1 release 2x screw 2 release the decoration strip 3 release the foot mat Prior to...

Страница 91: ...s manual 91 A 4 replace the gear oil About every 2000km of the total mileage charged 80 120 times please replace the gear oil The steps are as followed 1 Dismantle the tire 2 Vertically place the main...

Страница 92: ...new gear oil 75W or GL 4 gear oil for motorcycle or car 6 Check whether the O ring is in good conditions or not Put the O ring onto the oil hole sealing bolt and tighten it Apart from the battery pac...

Страница 93: ...the battery once charged Frequently accelerate and decelerate Low speed riding and maximum speed riding may shorten the stamina of the battery once charged Riding at 10 25 may get the maximum stamina...

Страница 94: ...pressure the lower the friction resistance Thus prolong the stamina of battery lower the tire pressure and lessen the stamina of battery but it may be comfortable on a rugged and uneven path Accuracy...

Страница 95: ...he WindRunner G1U urban type is suitable for common urban road conditions such as asphalt road cement road glazed tile and brick road rigid leveled earthy roads etc Under these service conditions G1U...

Страница 96: ...ty is 60 the maximum Speed limit of the WindRunner may be reduced gradually with the reducing of battery capacity If the capacity of any one of both batteries is 10 the WindRunner shall give a low vol...

Страница 97: ...be possibly happen To ensure safety two sets of individual posture sensor units are provided Through a unique control algorithm if any one sets out of function the system may avoid serious accidents...

Страница 98: ...ded into G1X all terrain type by replacing the tire and fender assembly by updating the control program firmware The G1X all terrain type may also be upgraded into G1U urban type In the future the Nin...

Страница 99: ...WindRunner self balancing electric vehicle user s manual 99 Appendix C Outline and dimensions C 1 urban model G1U...

Страница 100: ...WindRunner self balancing electric vehicle user manual 10 0 C 2 all terrain model G1X...

Страница 101: ...dress and number We hope to provide good service to you Ninebot Inc Headquarter A09 2F Liu Bai Ben building 19 Guang Shun North St Caoyang Disct Beijing China Factory Building 9 Auto Parts Industry Pa...

Отзывы:

Похожие инструкции для WindRunner