.
MICROSCOPE
.
VI Basic Operations
6 Using the Microscope Control
- 144 -
2
)
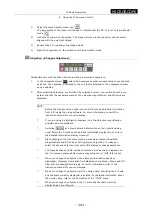
After switching filter cubes, confirm that the selected number icon is marked with a red
border and that the filter number and name are displayed.
NOTE:
*
Before this function can be used, you must first set up filter cube
information from a PC using the setup software. For more information,
consult the instruction manual for your microscope.
*
If you are using a microscope incorporating the DIH-M, only the filter name
is displayed.
*
Right-click on an icon representing a filter number, and the names of all
registered filters will be displayed. You also can select the desired filter from
within this display to change filters.
*
The names of the filters in use are also displayed on the "microscope status
display/microscopy setup menu" (MIC Info menu).
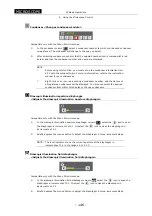
Lamp <Controls lamp>
Compatible only with the Nikon 90i microscope.
<To turn the lamp on>
1
)
When the lamp is off, select the
icon to turn the lamp on.
2
)
While the lamp remains lit, the
icon is marked with a red border.
<To turn the lamp off>
1
)
When the lamp is on, select the
icon to turn the lamp off.
2
)
While the lamp remains turned off, the
icon is marked with a red border.
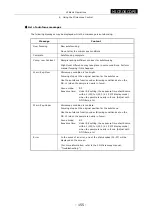
<Adjusting the brightness of the lamp>
1
)
When the lamp is lit, select the
icon and the lamp will become brighter in increments
of 0.1 V. Conversely, when you select the
icon, the lamp becomes darker in
increments of 0.1 V.
NOTE: The level meter indicating the brightness of the lamp changes in increments
of 0.1 V from 1.0 V to 12.0 V. Note, however, that the leftmost segment
(first step) of the level meter indicates the voltage level from 1.0 V to 3.9 V.
<Setting the lamp to the preset voltage (9.0 V)>
1
)
When the lamp is lit, select the preset voltage icon
and the brightness of the lamp
will be set to the preset voltage (9.0 V).
2
)
While the lamp remains set to the preset voltage, the preset voltage icon
is marked
with a red border.
NOTE: If you adjust the brightness of the lamp while it is set to the preset voltage,
the red border on the icon disappears.
Содержание DS-2MBW
Страница 2: ......
Страница 9: ...CONTENTS vii 3 DS Remote Controller DS RC 169 4 DS AC adapter 170 5 Overall Specifications 170 ...
Страница 10: ......


