2018.11 / m
17
Electric Power Generation
Installation and maintenance
LSA 40
Low Voltage Alternators - 4 pole
4455 en -
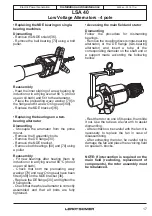
• Replacing the NDE bearing on single-
bearing machines
Dismantling
- Remove the NDE shield [36].
- Remove the ball bearing [70] using a bolt
puller.
Reassembly
- Heat the inner slipring of a new bearing by
induction or in a drying oven at 80 °C (do not
use an oil bath) and fit it to the alternator.
- Place the preloading wavy washer [79] in
the flange and fit a new O ring seal [349].
- Replace the NDE bracket [36].
• Replacing the bearings on a two-
bearing alternator
Dismantling
- Uncouple the alternator from the prime
mover.
- Remove the 8 assembly bolts.
- Remove the DE flange [30].
- Remove the NDE bracket.
- Remove both bearings [60] and [70] using
a puller.
Reassembly
- Fit new bearings after heating them by
induction or in a drying oven at 80 °C (do not
use an oil bath).
- Check that both the preloading wavy
washer [79] and new O ring seal have been
fitted [349] on the NDE bracket [36].
- Replace the DE flange [30], and tighten the
8 fixing bolts.
- Check that the whole alternator is correctly
assembled and that all bolts are fully
tightened.
• Accessing the main field and stator
Dismantling
Follow the procedure for dismantling
bearings.
- Remove the coupling discs (single-bearing
alternator) or the DE flange (two-bearing
alternator) and insert a tube of the
corresponding diameter on the shaft end or
a support made according the following
bellow.
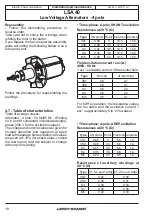
- Rest the rotor on one of its poles, then slide
it out. Use the tube as a lever arm to assist
dismantling.
- After extraction, be careful with the fan. It is
necessary to replace the fan in case of
disassembling.
- After extracting the rotor, be careful not to
damage the fan and place the revolving field
on special V-blocks.
NOTE: If intervention is required on the
main field (rewinding, replacement of
components), the rotor assembly must
be rebalanced.


