www.nextups.eu
16
E
n
g
lish
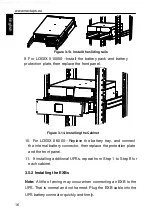
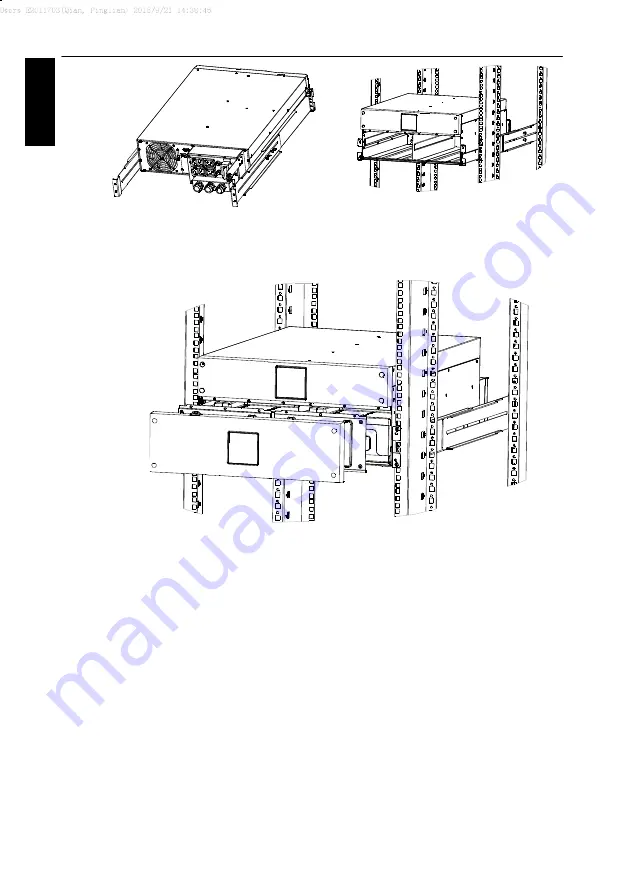
Figure 3-13. Install the sliding rails
9.
For
LOGIX II 10000
---Install the battery pack and battery
protection plate,
then replace the front panel.
Figure 3-14. Installing the Cabinet
10.
For
LOGIX II 6000
---Replace the battery tray, and connect
the internal
battery connector, then replace the protection plate
and the front
panel.
11.
If installing additional UPSs, repeat from Step 1 to Step 8 for
each cabinet.
3.5.2 Installing the E
XB
s
Note:
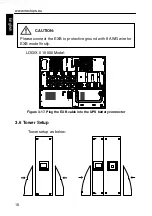
A little of arcing may occur when connecting an
EXB
to the
UPS. That is normal and not harmed. Plug the
EXB
cable into the
UPS battery connector quickly and firmly.
Содержание LOGIX II RT NETPACK 10000VA
Страница 1: ...NEXT UPS Systems LOGIX II RT 6000 10000 NETPACK Installation and user manual English...
Страница 4: ......
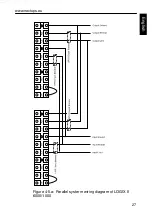
Страница 31: ...www nextups eu 27 English Figure 4 5 a Parallel systerm wiring diagram of LOGIX II 6000 1000...
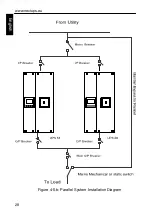
Страница 32: ...www nextups eu 28 English Figure 4 5 b Parallel System Installation Diagram...
Страница 43: ...www nextups eu 39 English...

