-39-
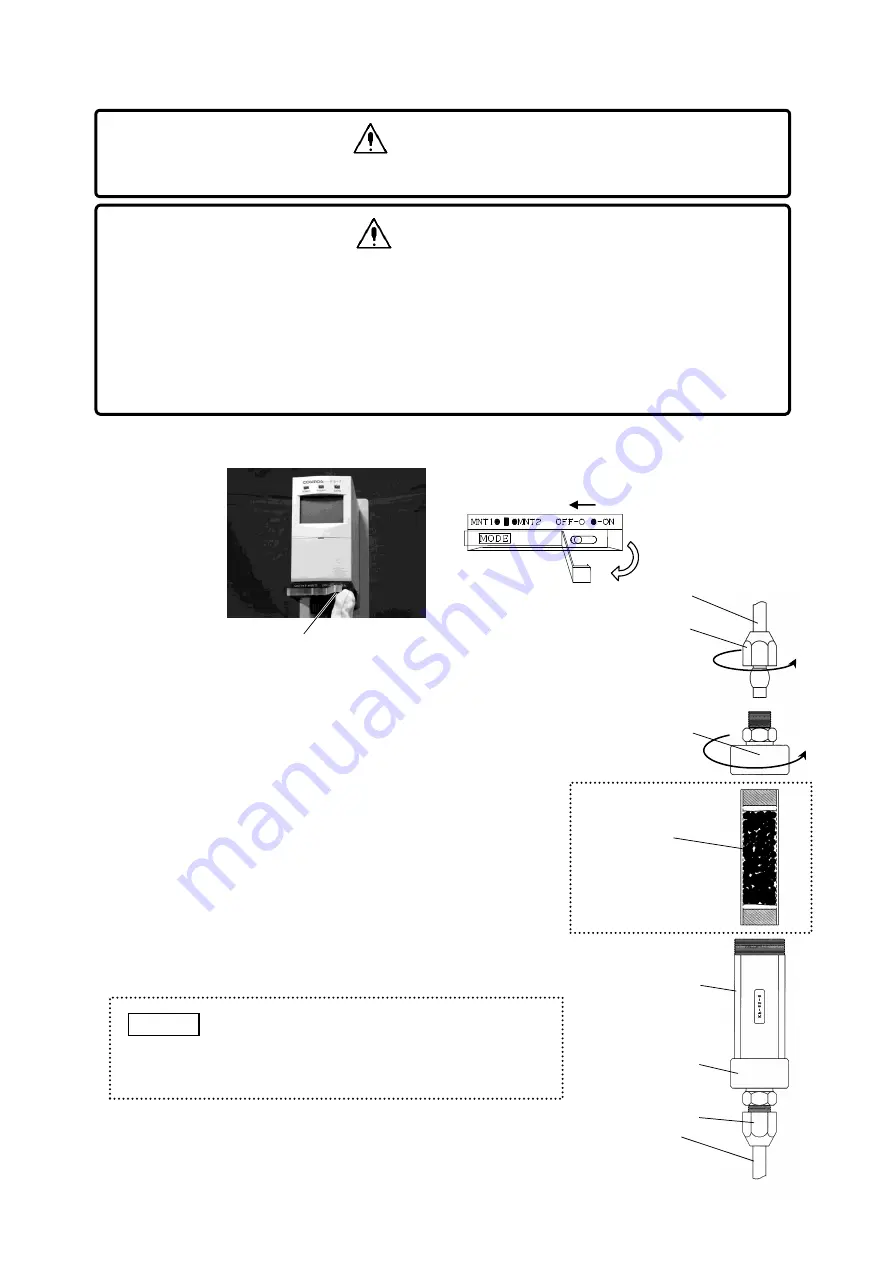
9-4. Activated Chacoal Filter Installation/Replacement
1. Set the m
ain unit’s power switch to the OFF position.
2. Loosen the nut (on either end, top or bottom). Disconnect
the tube from the activated charcoal filter.
3. Rotate the cap to remove it while holding the outer sleeve
with the other hand.
4. Take the inner sleeve (KF-6S-Y1) that contains the carbon
charcoal out of the outer sleeve.
5. Place a new inner sleeve (KF-6S-Y1) in the outer sleeve.
6. To install the cap to the sleeve, rotate it until firmly tightened
to ensure that no movement is possible. Check that the cap
on the other end is also filmy tightened.
7. Tighten the nut to connect the tube to the filter.
8. Set the m
ain unit’s power switch to the ON position. Check
the sampling gas flow rate (refer to 9 of 7-1
―Operation
Procedure
‖).
CAUTION
Replace the activated charcoal filter
’s inner sleeve (KF-6S-Y1) at the time of replacing
the sensor unit.
Turn off the gas detector before filter installation/replacement. Setting the main
unit’s
power switch to the OFF position will generate a trouble alarm output (open collector is
opened (OFF)). If the trouble alarm output is used to operate the interlocks, etc. of the
external devices, release the interlocks, etc. beforehand, as needed, to prevent a
possible activation of the interlocks during replacement.
.
WARNING
Only use an activated charcoal filter when the target gas is NF
3
.
Used activated charcoal filters must be
disposed of as hazardous waste in
accordance with the applicable local laws
and regulations.
NOTE
Main unit
’s power switch
To OFF position
Lift the cover flap open
Nut (bottom)
Cap
Outer sleeve
Inner sleeve,
containing carbon
charcoal
(KF-6S-Y1)
Tube
Cap
Tube
Nut (top)
Replace inner
sleeve as a whole.


