


Performing a Network Roaming Test
73
XIV.
P
ERFORMING
A
N
ETWORK
R
OAMING
T
EST
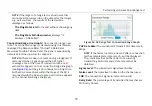
The Roaming Test indicates how well the network supports
client roaming. When you move from location to location
with AirCheck G2 during a roaming test, it will display when a
roaming event has occurred and to which BSSID it has
roamed.
NOTE:
For a roaming test to work properly, you must choose
a target that responds to ICMP Pings. If no such target is
available, you can still view roaming results, but ping loss rate
will be 100% and the roaming test’s
Connection Range
(line
graph) will report “< 1%”.
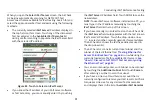
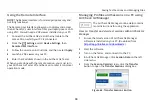
How to: Start a roaming test
Once AirCheck G2 has connected to a network, the
Roaming
Test
button appears at the bottom of the
Connect to
Network
screen (
).
1
Touch the
Roaming Test
button to open the
Select
Target
screen, which presents you with a number of
roaming test targets to choose from.
2
Select a target.
3
Touch
Apply
.
The
Roaming Test
screen opens, and live data starts to
populate the screen.
How to: Select a custom test target
1
Select
Enter New Target
.
2
Select
Apply
. The
New Target
screen opens, showing a
on-screen keyboard.
3
Select an input option.
4
Use the keyboard to enter the IP address or host name
of the target.
5
Select
DONE
.
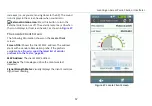
The Roaming Test Screen
The
Roaming Test
screen displays the following information:
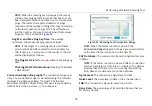
AP Name:
Shows the name of the AP to which AirCheck G2 is
currently connected.
NOTE:
When the Tester roams, the new AP is shown here.
If AirCheck G2 disconnects from the network (no APs
available), and then comes within range of the AP, it will
reconnect to the selected network's AP and continue the
ping tests.
Target:
The selected test target, which can be the default
gateway, DHCP server, primary DNS server, secondary DNS
server, hostname, or a user-defined target.


