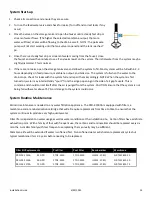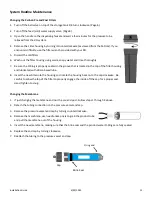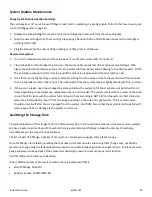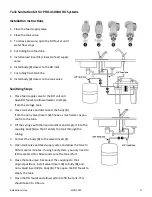
Installation Guide
6/29/2023
8
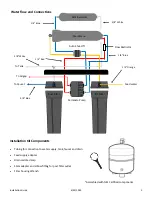
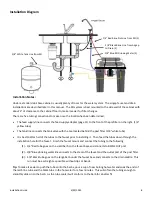
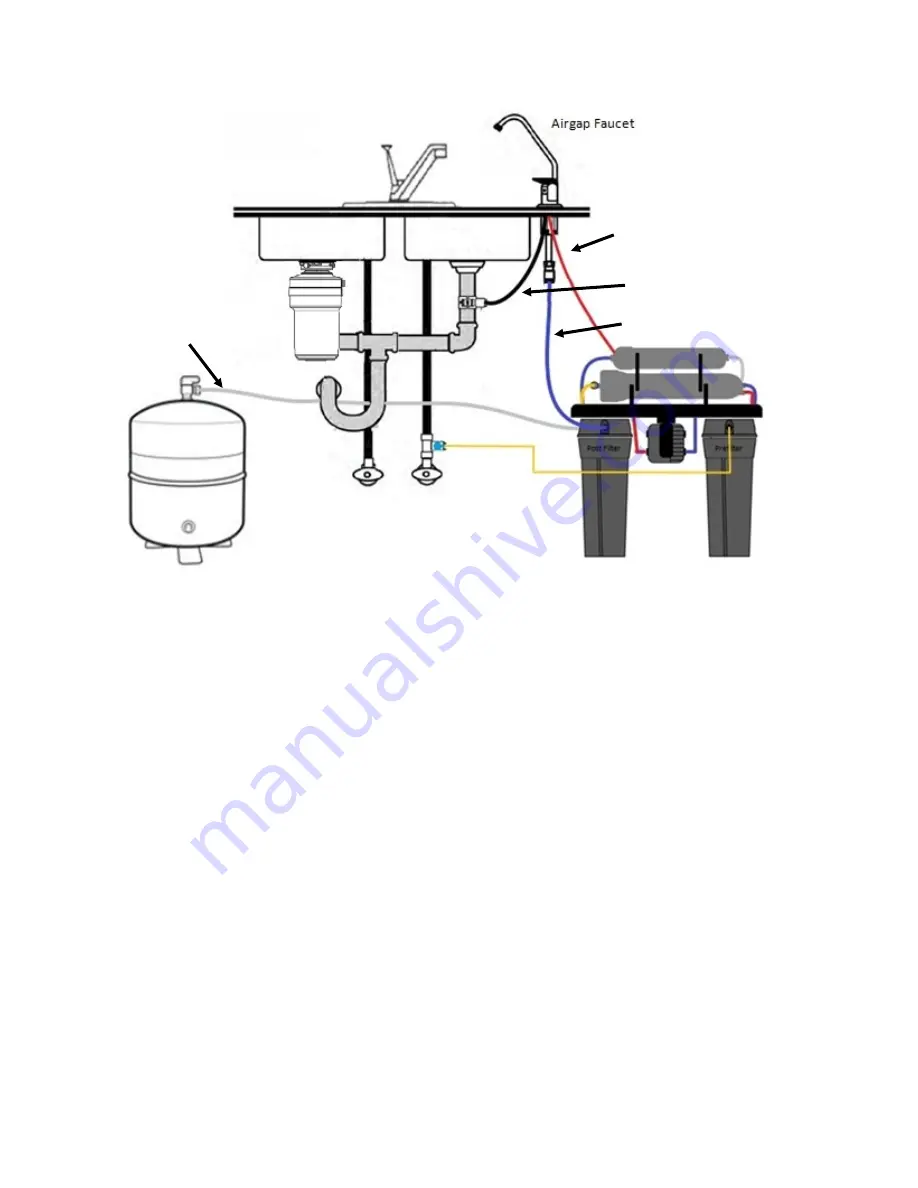
Installation Diagram
Storage Tank
1/4”
Yellow Feed
Supply Line
Installation Notes:
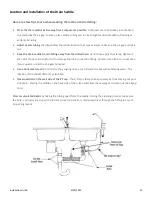
Under a standard sink base cabinet is usually plenty of room for the water system. The airgap faucet and drain
installations are described later In this manual. The RO system is best mounted to the side wall of the cabinet with
about
3”
of clearance to the cabinet floor to make it easier for filter changes.
There are five tubing connections to make once the location has been determined;
•
The feed supply line connects the feed supply adapter (page 11) to the front of the prefilter on the right.
(1/4”
yellow tube)
•
The tank line connects the tank valve with the tee located behind the post filter
(3/8”
white tube)
•
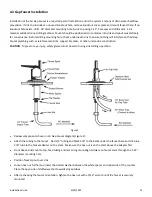
It is best to attach all of the tubes to the faucet prior to installing it. Then feed the tubes down through the
installation hole for the faucet. Finish the faucet mount and connect the tubing to the following:
(1)
-
1/4”
Red tube goes on the small barb on the faucet base and connects to BRINE OUT port
(2)
-
3/8”
Blue drinking water line connects to the stem of the faucet and the outlet port of the post filter
(3)
-
3/8”
Black tube goes on the large barb under the faucet base and connects to the drain saddle. This
run must be as straight as possible without dips or bends.
Tip:
To make it easier to push the tubes onto the barbs, pour a cup of near boiling hot water and soak the ends of
the red brine tube and the black tube in the hot water for a few minutes. This will soften the tubing enough to
smoothly slide on to the barb. As the tube cools it will conform to the barb for a better fit.
3/8”
White Tank Line from RO
3/8”
Black Brine Line from Airgap
to Drain (3)
3/8”
Blue RO Drinking Water (2)
1/4”
Red Brine Out Line from RO (1)
Содержание PRO-41000-A Series
Страница 20: ...Installation Guide 6 29 2023 20...


