


NetWare Networks
31
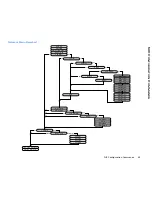
PRINTER SERVER TOPOLOGY
N
ET
W
ARE
N
ETWORKS
Configuring a Windows 3.1x Client
Computers running Windows 3.1x can be configured as a
NetWare print client after the NOS has been configured with
the NEC SuperScript 1800 Network Printer Manager,
NetWare Printer Console, or NetWare Administrator.
To configure a Windows 3.1x client, you must install a printer
driver then assign a printer port.
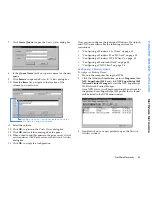
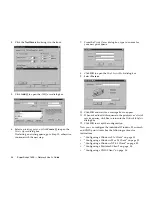
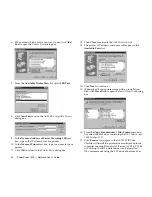
To install a printer driver:
1.
Insert the
SuperScript 1800 Solutions CD
into the client
computer.
2.
Open the
Program Manager
window.
3.
From the
File
menu, select
Run
to open the
Run
dialog
box.
4.
Click
Browse
to open the
Browse
dialog box.
5.
From the
Drives
drop-down list, select your CD drive.
The directories and files located on the
SuperScript 1800
Solutions CD
will appear.
6.
Select
Setup.exe
, then click
OK
to return to the
Run
dialog box.
7.
Click
OK
to begin installing the printer software.
When the
Select Components
dialog box appears, select
the
Printer Driver
check box then continue to follow the
instructions displayed on your monitor to finish the
install.
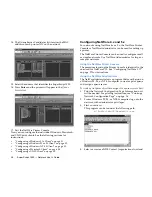
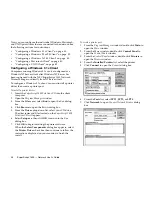
To assign a printer port:
1.
From the client computer, use a text editor to open
Startnet.bat
.
This file should be in the root directory of the client’s
hard drive.
2.
After the
login
command line, add the
capture
command.
Login
Capture /Server=
sname
/Queue=
qname
/local=
port
Sname
is the print server name,
qname
is the print queue
name, and
port
is the port number that will be created on
the client.
In a later step, the port will be selected as LPT1.DOS or
LPT2.DOS. So, depending on which port you plan to use,
use 1 for
port
if using LPT1.DOS, use 2 if using
LPT2.DOS.
3.
Save the changes to
Startnet.bat
, then exit the editor.
4.
Restart the client to capture the print queue.
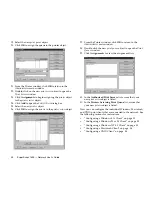
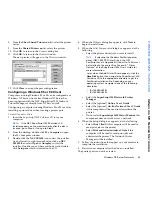
5.
From the
Program Manager
window, double-click
Printers
to open the
Printers
window.
6.
From the
Installed Printers
list, select the printer.
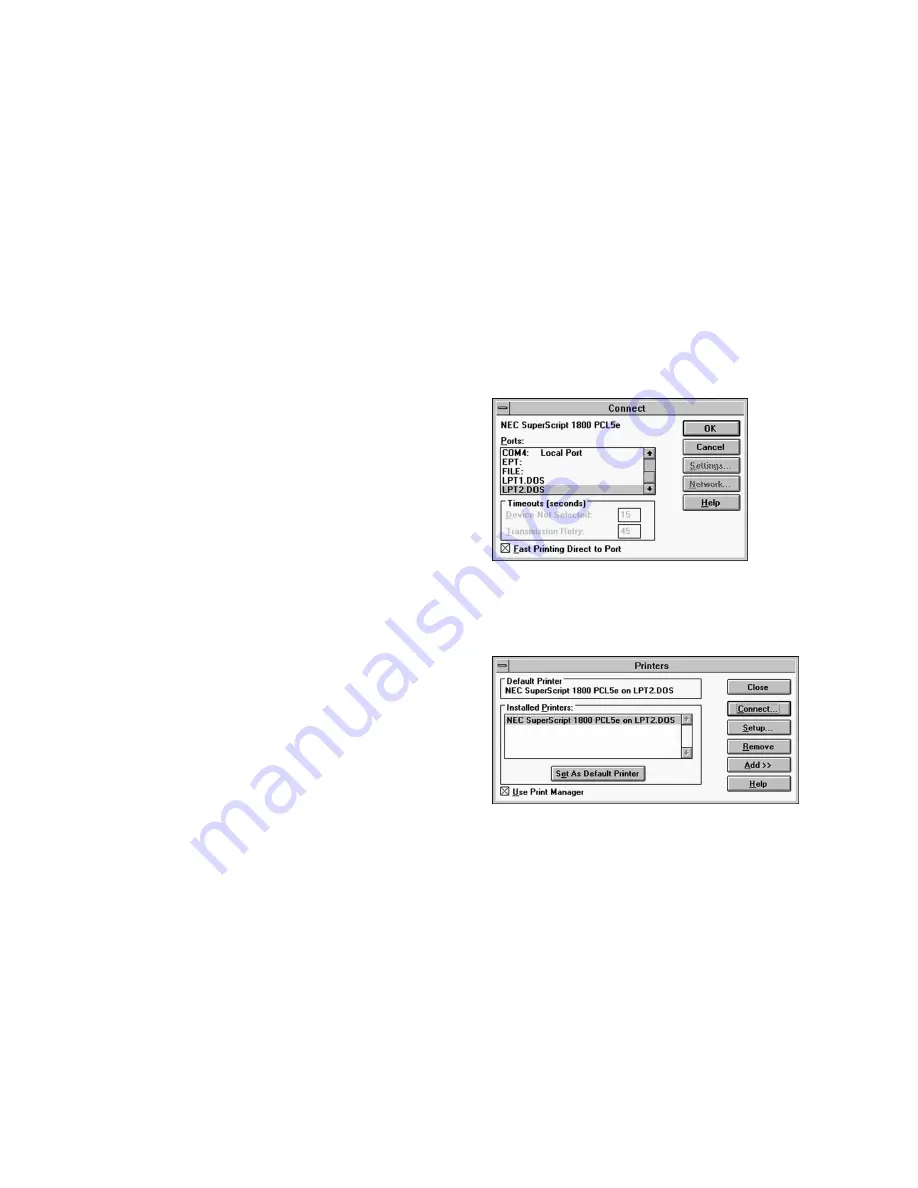
7.
Click
Connect
to open the
Connect
dialog box.
8.
From the
Ports
list, select
LPT1.DOS
or
LPT2.DOS
.
9.
Click
OK
to return to the
Printers
window.
The printer will be listed in
Installed Printers
list with
the new port.
10. Click
Close
to accept the port configuration.
Содержание SuperScript 1800
Страница 1: ...S U P E R S C R I P T 1 8 0 0 NETWORK USER S GUIDE July 1999 808 878291 011A...
Страница 6: ...vi SuperScript 1800 Network User s Guide...
Страница 10: ...4 SuperScript 1800 Network User s Guide...
Страница 14: ...8 SuperScript 1800 Network User s Guide...
Страница 28: ...22 SuperScript 1800 Network User s Guide...
Страница 52: ...46 SuperScript 1800 Network User s Guide...
Страница 62: ...56 SuperScript 1800 Network User s Guide...
Страница 76: ...70 SuperScript 1800 Network User s Guide...


