7-8 Maintenance
6.
Select [Test and diagnostics].
Select [End-User Mode] and the system diagnostics starts. The diagnostics will be
completed in approximately three minutes. When the diagnostics is completed, the screen
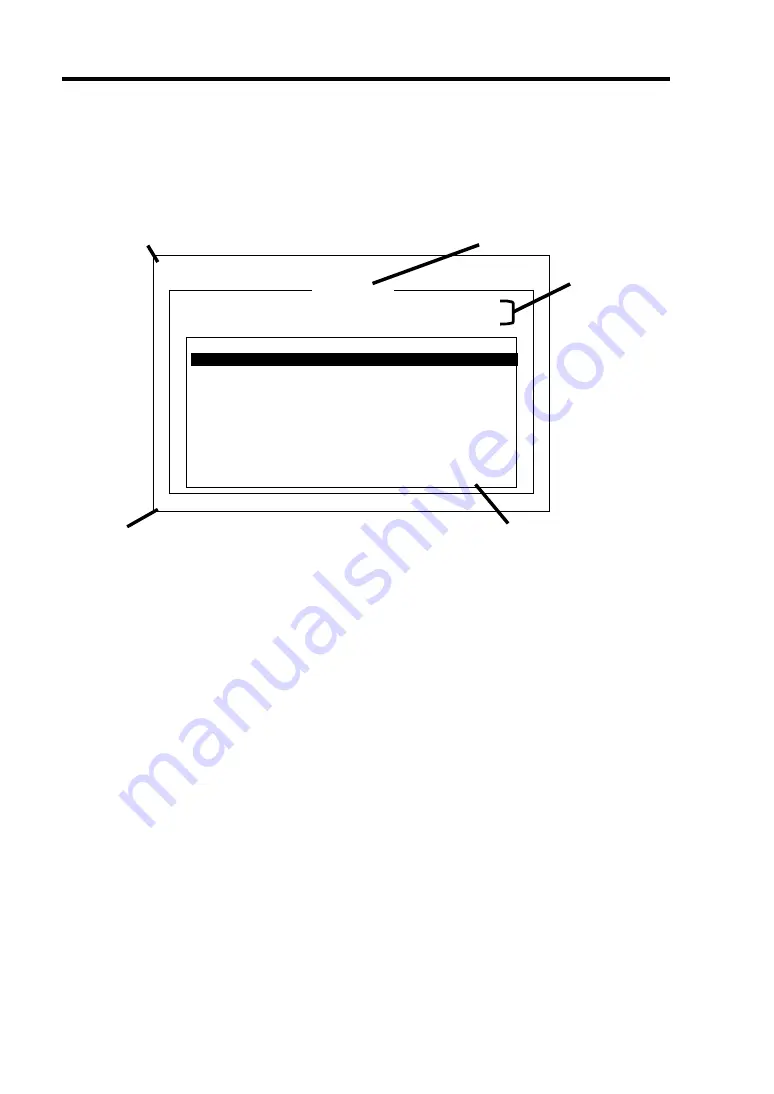
of the display changes as shown below:
Diagnostics tool title
[Enter] Detail Information [ESC] Return to Enduser Menu
Test End
TeDoLi (TEst & Diagnosis On Linux) Ver001.00 (Build020901.1.1m)
<System>
MEM
Memory
16 count
NormalEnd
CACHE
Cache
49 count
NormalEnd
<SCSI>
HDD_02:000 DK32DJ-36W
89 count
NormalEnd
Start 10:06:58 End 10:09:58 Pass 000:03:00 TestTime 000:03:00
Test End : NormalEnd 03 AbnormalEnd 00 ForceEnd 00
Guide line
Test summary window
Test result
Test window title
–
Diagnostics tool title
Shows the name and version of the diagnostic tool.
–
Test window title
Shows the progress of the diagnostics. "Test End" is displayed when the diagnostics
completes.
–
Test result
Shows the start, end, and elapsed time and completion status of the diagnostics.
–
Guide line
Shows the details of the keys to operate window.
–
Test summary window
Shows the results of each test that executed the diagnostics. Move the cursor and
press the
Enter
key on the cursor line to display the details of the test.
When an error is detected by the system diagnostics, the relevant test result in the test
Summary window is highlighted in red, and "Abnormal End" is displayed in the result on
the right side.
Move the cursor to the test that detected the error, and press the
Enter
key. Record the
error message that has been output to the Detail Information screen and contact your
service representative.
Содержание N8100-1447F
Страница 31: ...General Description 2 5 Rear View 1 2 3 2 4 5 6 7 8 9 10 12 11 13...
Страница 48: ...2 22 General Description This page is intentionally left blank...
Страница 157: ...Installing and Using Utilities 6 9 4 Click Parameter File Creator Parameter File Creator will appear...
Страница 216: ...9 6 Upgrading Your Server 3 Loosen the two screws 4 Hold the side cover securely to remove it...
Страница 217: ...Upgrading Your Server 9 7 5 Position the server until on its right side...
Страница 256: ...9 46 Upgrading Your Server This page is intentionally left blank...
Страница 266: ...10 10 Internal Cabling Diagrams This page is intentionally left blank...
Страница 268: ...A 2 Specifications This page is intentionally left blank...
Страница 276: ...C 2 IRQ This page is intentionally left blank...
Страница 328: ...F 2 Using a Client Computer Which Has a CD Drive This page is intentionally left blank...
Страница 332: ...G 4 Product Configuration Record Table This page is intentionally left blank...


