


17
Controlling the PIP image:
The secondary (
PIP
) image size is controlled by touching
PIP +
and
PIP -
buttons on the
Select
Inputs
screen (page 16). Touching the
PIP +
button will step to the next larger
PIP
image until only
the primary image (See
Full Screen
below) is visible. Touching the
PIP +
button again will display a
Small PIP
image in the upper right corner of the display. The
PIP -
button reverses the
PIP +
operation.
Touching the
Swap
button (page 16) will exchange the primary and secondary inputs on the
monitor. Touching the
Swap
button a second time will restore the inputs to their original locations.
It is not necessary for both images to be displayed in order to swap primary and secondary images.
Turn the PIP image off by touching the
Disable PIP
button (page 16).
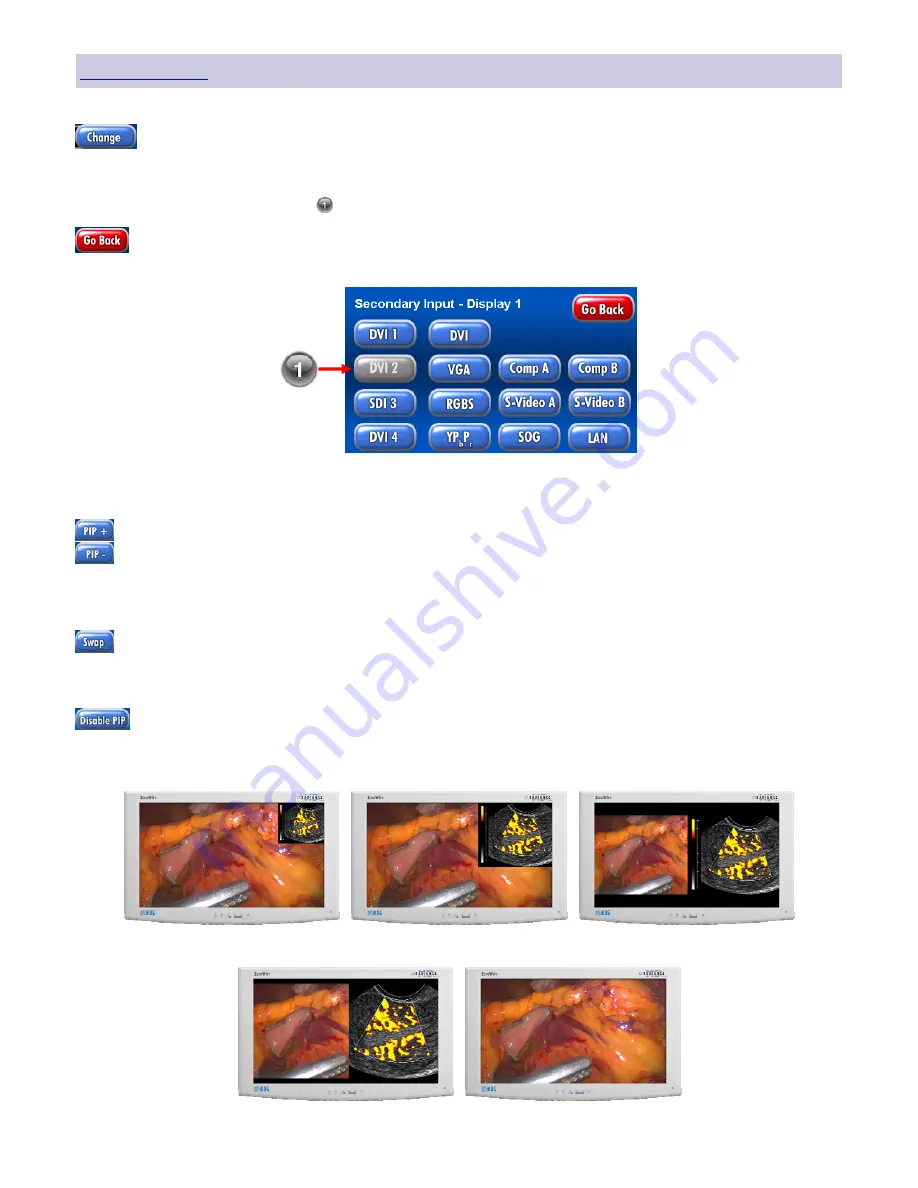
PIP and Swap
Selecting a secondary (PIP) image:
Touch this button on the
Secondary
row of the
Select Inputs
screen (page 16) to open the
Secondary Input
screen, shown below. Touch the input button whose data you want to display
as the secondary (
PIP
) image. A small
PIP
image appears in the upper right corner of the display
(see
Small PIP
below).
Touch this button to return to the
Select Inputs
screen.
A “grayed” out button may not be selected as a secondary input.
Small PIP
Large PIP
Split Screen
Split Overscan
Full Screen
Содержание ConductOR
Страница 1: ...User manual E n g l i s h OR Informatics System...
Страница 2: ......
Страница 4: ......
Страница 58: ...51 Drawing and Dimensions 11...
Страница 65: ......


