


The start and end point defined here will also be used when processing the audio of the Sam-
ple. See below for more info.
If you defined a loop in the Sample (see page 2 below), the loop will always stay within the
region defined by the start and end points of the Sample. Therefore, when moving the
Sample’s start and end points closer to each other, keep in mind that it might also shrink
the loop!
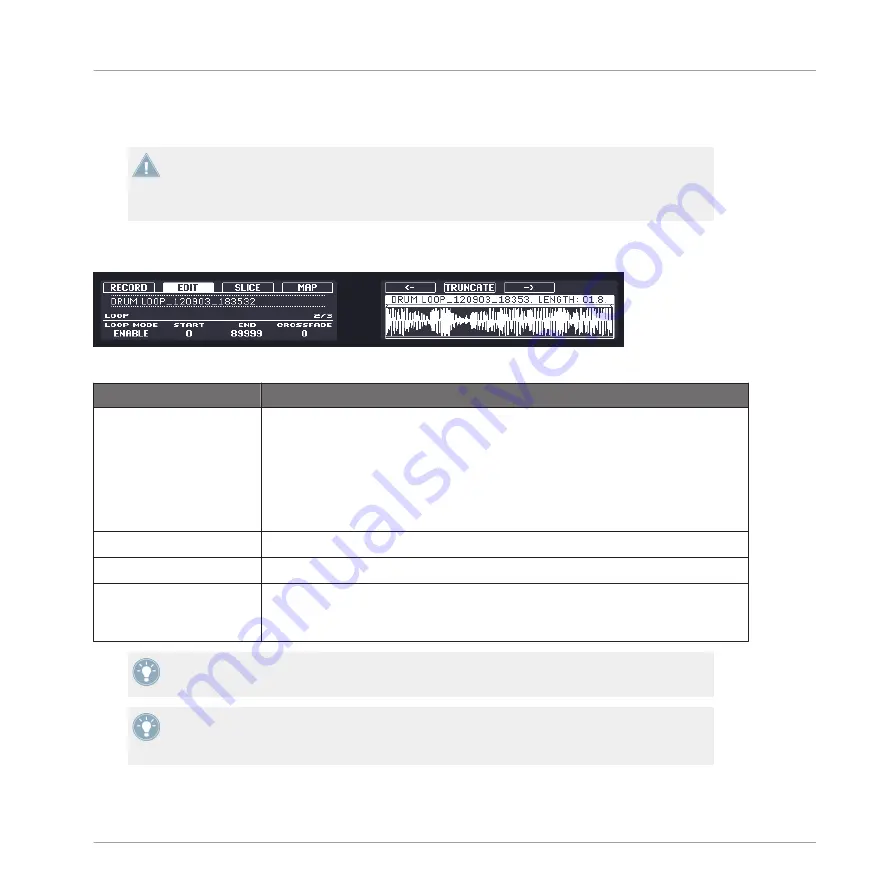
Page 2 – Loop Parameters
The EDIT page on the controller, page 2 of 3: setting a loop within a Sample.
Parameter
Description
LOOP MODE
Here you can choose to either disable or enable Loop mode by dialing Knob 1. If
enabled, you can see the loop highlighted on the right display (as pictured
above). When the play position reaches the loop, the playback is looped as long
as the note is held. This can be useful to loop either a whole Sample or part of
it, e.g., to simulate a longer tone. Note: this technique requires that you choose
either AHD or ADSR as the Amplitude Envelope in the Sampler’s Parameter pa-
ges (see
4.2.1, Page 1: Voice Settings and Engine
START
Defines the start point of the loop with Knob 2.
END
Defines the end point of the loop with Knob 3.
CROSSFADE
CROSSFADE
(Knob 4) allows you to blend a little of the material near the loop
start and end points in order to get a smoother, less abrupt loop. This is particu-
larly helpful if the loop is inducing any clicks.
Hold
SHIFT
when turning the Knobs to adjust the parameters in finer increments.
By moving the loop’s start and end points closer to each other you can shrink the loop to
very small values on-the-fly, thereby creating very interesting glitch effects in a live situa-
tion.
Sampling and Sample Mapping
Controlling Sampling from the Hardware
MASCHINE MIKRO MK2 - Manual - 283


