

2200M4JE-HO-iS2-N_2014.04.
Chapter 3 Installation
Screw Compressor i-series
3.2 Installation Works
3-2
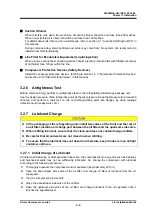
4.
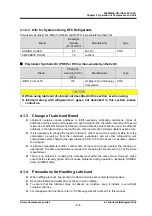
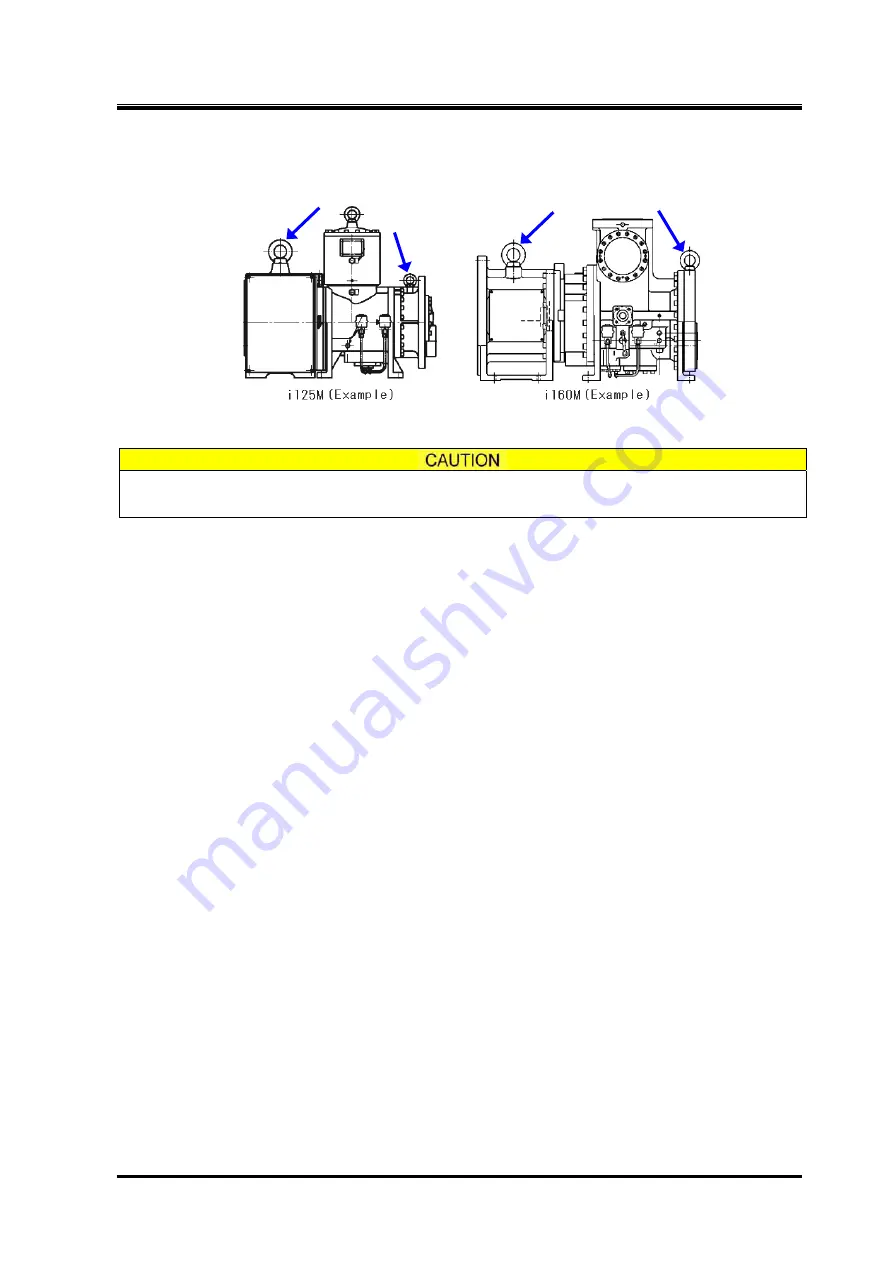
To lift the compressor, attach the wire ropes to the appended eye bolts by using appropriate
shackles and hooks. Use the eye bolts only for lifting the compressor.
Figure 3-1 Eye bolts for lifting the compressor (Arrows)
The compressor eye bolts must not be used for lifting the unit. To lift the unit, use the
lifting chains provided around the base or other lifting means provided on the base.
5.
Check path of compressor installation to make sure it is free of obstacles in consideration of the
compressor size.
6.
Before lifting, check that the hook is located above the gravity center of the compressor.
7.
Before starting to lift up the compressor, instruct all the workers to be sufficiently away from the
lifting area.
8.
Just before starting to lift up, provide the coworkers with a sign (such as a call, hand signal, etc.)
of starting the lifting action. Do not start to lift up unless the sign (such as a call, hand signal, etc.)
has been fully acknowledged.
9.
Slowly reel up the wire ropes until immediately before the compressor leaves the ground.
10.
Then, reel up the wire ropes a little further until the compressor is slightly up away from the ground.
Check that the compressor is not tilted. If the compressor is tilted, return the compressor to the
ground and correct the tilt by adjusting the wire ropes. After that, restart the lifting operation.
11.
Be sure to lift up the compressor slowly. If it is lifted rapidly, it may damage the lifting tools such as
wire ropes or a part of the compressor.
12.
When the lifting work starts, observe to see if wire ropes and lifting tools are normal. Be sure that
the compressor is not tilted.
13.
When moving the lifted compressor, always use guiding ropes.
14.
When moving the compressor, turn away workers from the movement direction and check safety.
15.
Do not lift the compressor above the safety passage unless absolutely necessary.
16.
Do not lower the compressor on the safety passage. Always keep the safety passage free of
obstacles.
17.
Remove any obstacles before lowering the compressor onto the ground. The compressor should
not be tilted or unstable.
18.
Before lowering the compressor, announce to the workers around the working area in advance.
19.
When lowering the compressor onto two or more blocks, align the tops of blocks so that the
compressor becomes stable horizontally on them.
20.
Slowly lower the lifted compressor so that it is not damaged by shock.


