Advanced fax
To create or modify an F-Code box:
1
Keep pen and paper with you as you follow these steps. As you decide on a
sub-address and enter it into your machine, write it down. Remember to: (1)
write down which box goes with which sub-address, (2) write down any pass-
words or
I
.
D
. codes you enter, (3) keep these printed records in a safe place.
2
Press
MENU
,
N
, [Enter]. The
LCD
shows the
F-Code box list.
3
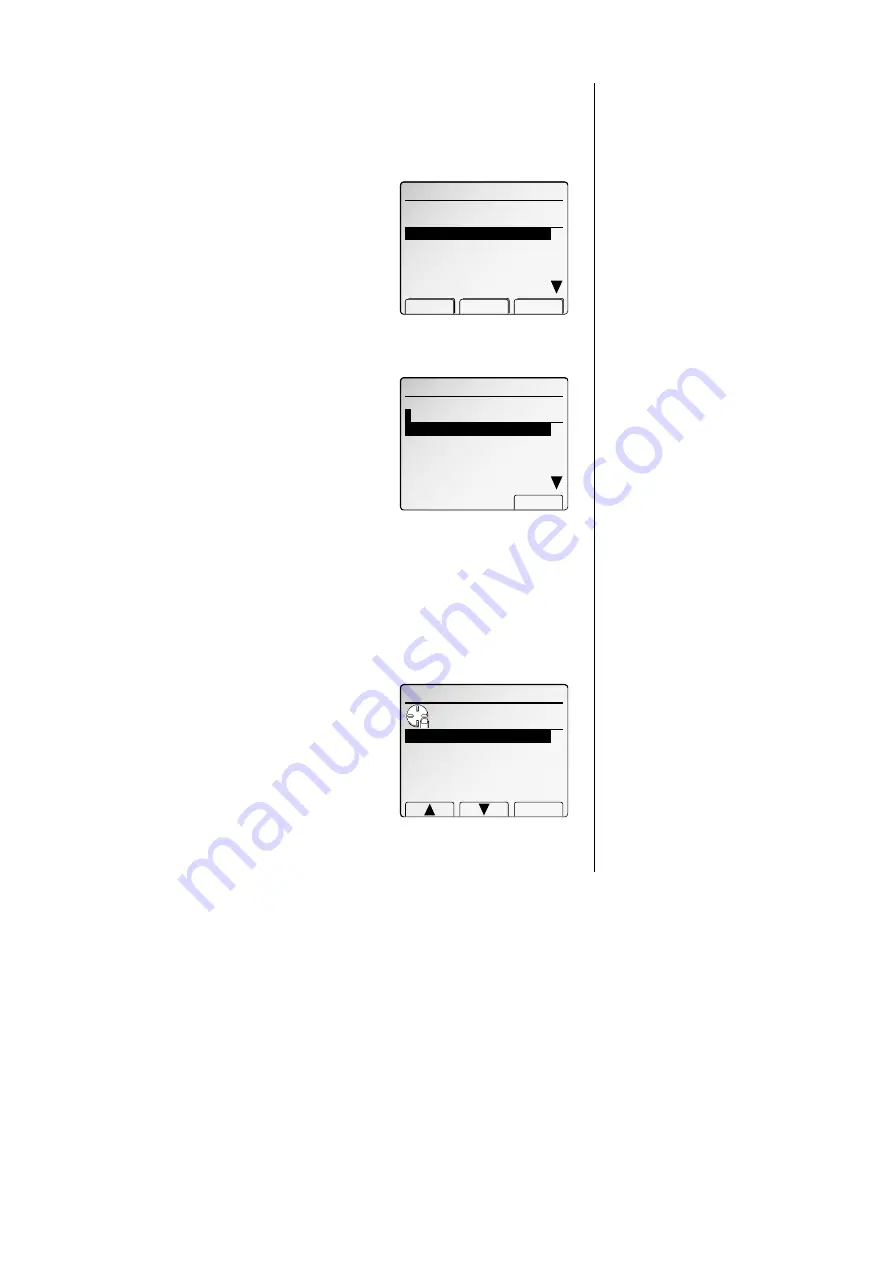
Select the F-Code box you want to create or
modify using the cursor key.
Note: You can select the F-Code box by
directly entering that two-digit identi-
fier number (01-50).
Note: You can press [Detail] to see the number which has been pro-
grammed in that speed-dial number.
4
Press [BoxSet].
What you do next depends on whether you’re
creating or modifying the F-Code box:
If creating — skip to step 6.
If modifying — the
LCD
asks you to enter the
proper
I
.
D
. code. The
LCD
shows (see right):
5
Use the numeric keypad to enter the 4-digit
I
.
D
.
code (not the
ITU
-
T
sub-address and not the
ITU
-
T
password) and then press
[Enter].
• If you modifying the Security box, go to step 7.
• If you modifying the Bulletin box, skip to step 16.
• If you modifying the Relay box, skip to step 28.
Note: You cannot change the type of an existing F-Code box. If you’re modi-
fying an existing F-Code box and want to change the box type, you
first must erase the old box, then create a new one.
6
The fax machine is asking which box type you
want to assign to this box — bulletin, security
or relay.
Select desired box type using the cursor key
and then press [Enter].
• If you chose Security, go to step 7.
• If you chose Bulletin, skip to step 16.
• If you chose Relay, skip to step 28.
If you chose Security:
7
The security box has the following settings:
• Box Name – You can enter the name for
this F-Code box.
•
ITU
-
T
sub-address – This is the numerical
identifier you must enter in order to commu-
nicate with any remote F-Code compatible
fax.
•
ITU
-
T
password – This is the password for
ITU
-
T
-compatible F-Code fax
transactions. You don’t need to have a password for the F-Code box.
However, using a password will make your F-Code communication much
more secure.
• Hold time – This setting is how long you want to keep a document stored
in your machine’s F-Code box.
•
I
.
D
. code for this F-Code box – This is the four-digit
I
.
D
. code for the
box’s security, which you use to (1) print a document any remote F-Code-
compatible fax sends to this F-Code box or (2) you enter before you can
make any changes to this F-Code box. (See step 12.)
8
To enter the Box name:
Select “Box Name” using the cursor key, and then press [Enter].
Then, enter the name the same way you entered your fax name during
EasyStart. An F-Code box’s name can be up to 16 characters in length.
Note: To erase characters, press [Clear] to erase to the left.
To change just one character in the name, move the cursor to that
character and then press [Clear] to erase it. Then re-enter the name
correctly.
Press [Enter] to save the box’s name and continue.
9
To enter the
ITU
-
T
sub-address:
Select “Sub-Address” using the cursor key, and then press [Enter].
Then, use the numeric keypad to enter this box’s
ITU
-
T
sub-address to identify
this F-Code box.
The sub-address can be up to 20 characters in length and include any combi-
nation of numbers and the * and # characters (but no other non-numeric
characters).
Note: No other F-Code box in this machine can have the same sub-address
as the one you enter here.
01:Security Box SetBox
Use cursor to select
item.
Sub‑Address :
Password :
Hold Time :00 Day
Exit Enter
Box Name
:
01:Not Stored
Use cursor to select
box type.
Relay Box
Bulletin Box
Enter
Security Box
01:Security Box SetBox
Enter
01:AABBCC
02:DDEEFF
03:GGHHII
04:
05:
Enter I.D.code
*
***
N.F‑Code Box
Detail EraseBox Set Box
Enter box number. (01‑50)
01:
02:
03:
04:
05:
3.45
F
ax F
eatures
Getting Started
All manuals and user guides at all-guides.com
Содержание Dynamo MFX-2530
Страница 3: ...Welcome All manuals and user guides at all guides com...
Страница 67: ...This page intentionally blank All manuals and user guides at all guides com...
Страница 135: ...This page intentionally blank All manuals and user guides at all guides com...
Страница 145: ...This page intentionally blank All manuals and user guides at all guides com...
Страница 146: ...Soft Keys Macros Machine settings Common s All manuals and user guides at all guides com a l l g u i d e s c o m...
Страница 163: ...This page intentionally blank All manuals and user guides at all guides com...
Страница 200: ...This page intentionally blank Appendix index AI 14 All manuals and user guides at all guides com...
Страница 201: ...This page intentionally blank All manuals and user guides at all guides com a l l g u i d e s c o m...
Страница 202: ...This page intentionally blank Appendix index AI 16 All manuals and user guides at all guides com...


