


R E D U C I N G M O N I T O R I N G L A T E N C Y
72
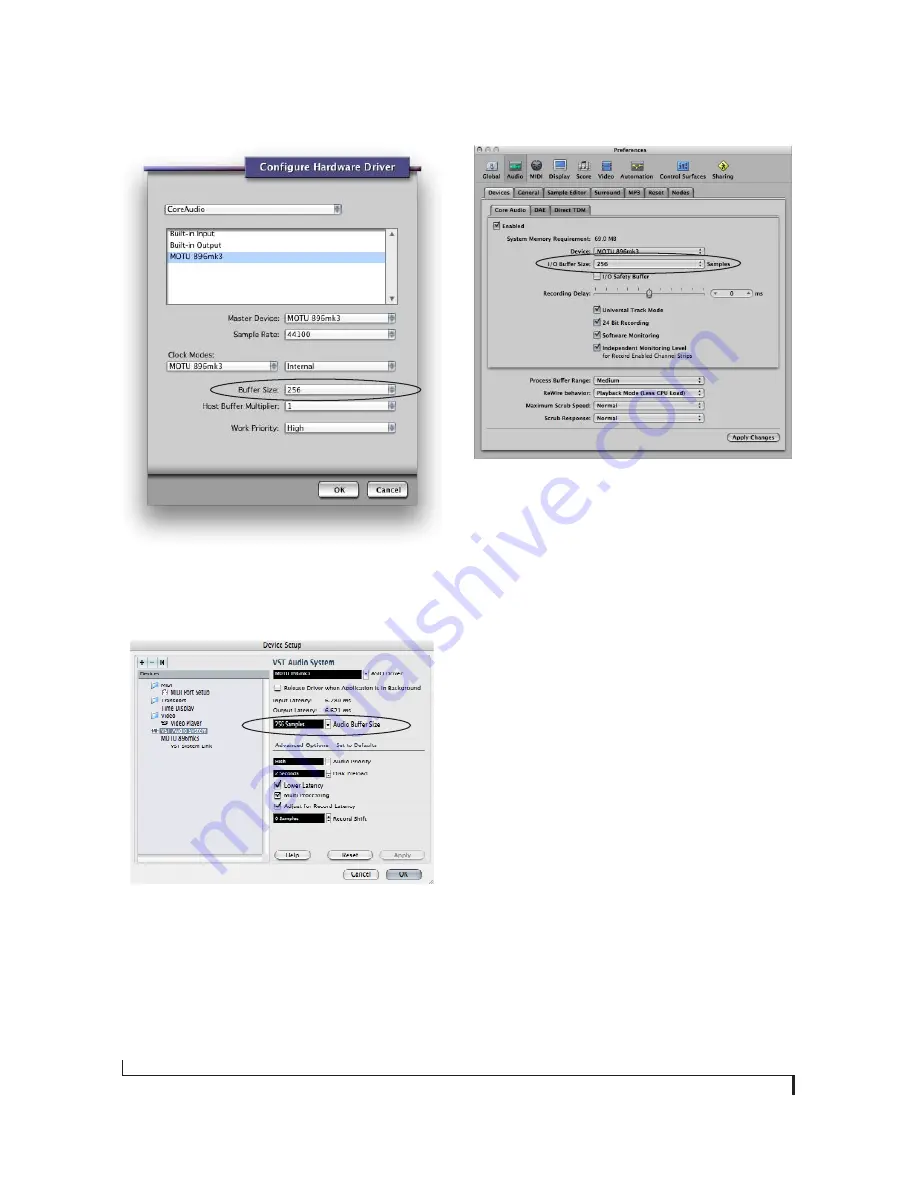
Figure 10-3: In Digital Performer and AudioDesk, choose Setup
menu> Configure Audio System> Configure Hardware Driver to open
the dialog shown above and access the Buffer Size setting. Refer to
your Digital Performer or AudioDesk manual for information about
the Host Buffer Multiplier setting.
Figure 10-4: In Cubase or Nuendo, choose Devices menu> Device
Setup and click VST Audio System to access the window above and
the Audio Buffer Size setting.
Figure 10-5: In Logic Pro or Logic Express, go to the Audio Driver
preferences to access the Buffer Size option shown above.
Lower latency versus higher CPU overhead
The buffer setting has a large impact on the
following things:
■
Patch thru latency
■
The load on your computer’s CPU
■
Possible distortion at the smallest settings
■
How responsive the transport controls are in
AudioDesk, Digital Performer or other audio
software
The buffer setting presents you with a trade-off
between the processing power of your computer
and the delay of live audio as it is being patched
through your software. If you reduce the size, you
reduce patch thru latency, but significantly increase
the overall processing load on your computer,
leaving less CPU bandwidth for things like real-
time effects processing. On the other hand, if you
increase the buffer size, you reduce the load on
your computer, freeing up bandwidth for effects,
mixing and other real-time operations.
Содержание 896mk3
Страница 8: ...8...
Страница 14: ...A B O U T T H E 8 9 6 M K 3 14...
Страница 16: ...P A C K I N G L I S T A N D M A C S Y S T E M R E Q U I R E M E N T S 16...
Страница 32: ...I N S T A L L I N G T H E 8 9 6 M K 3 H A R D W A R E 32...
Страница 42: ...M O T U A U D I O S E T U P 42...
Страница 68: ...O T H E R M A C O S X A U D I O S O F T W A R E 68...


