XG0523 - 170223
37
Operation
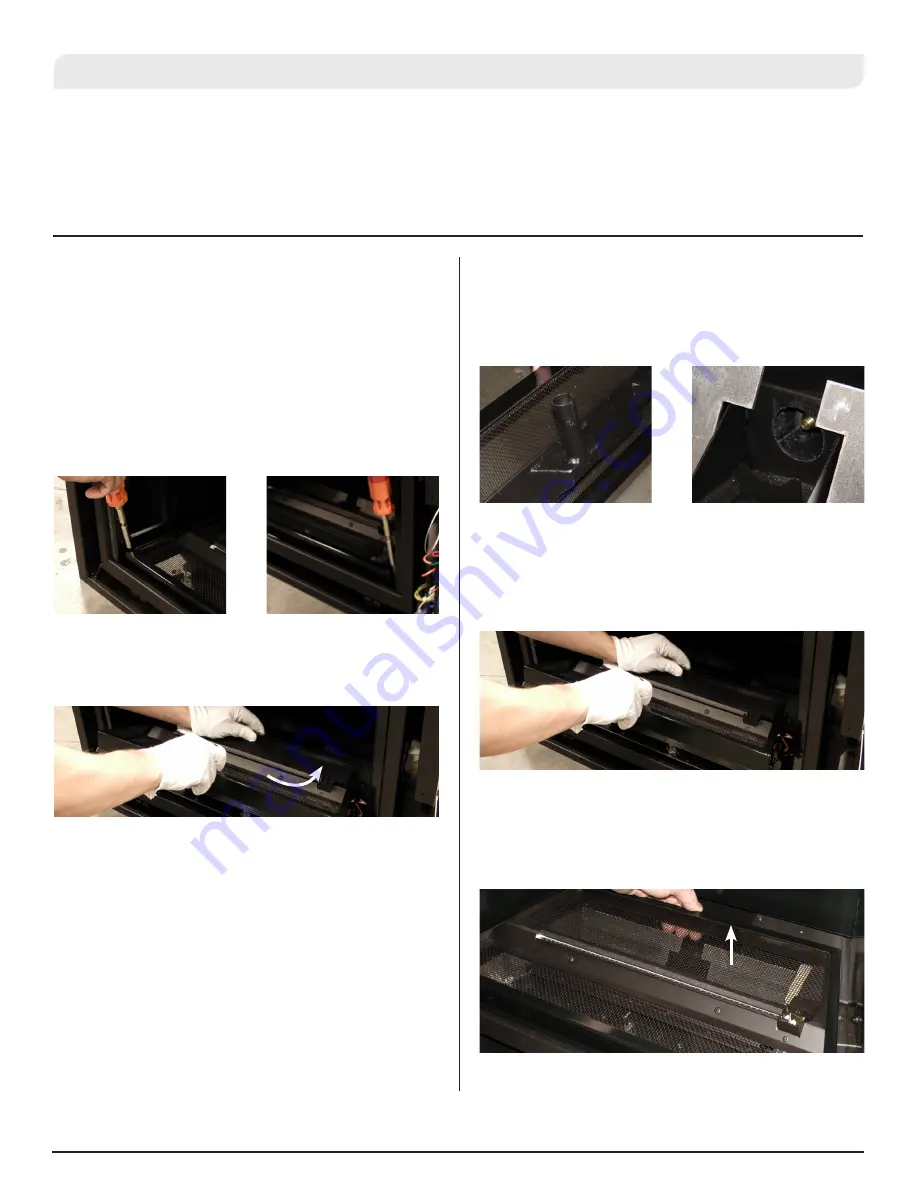
Burner Removal (Linear)
Burner Installation (Linear)
The unit is shipped from the factory with the burner installed. Should
it need to be removed for fuel conversion or some other service
requirement, follow these steps.
2. Remove 2 screws that secure the burner assembly. They are
located on either side of the burner assembly near the front of
the fireplace.
3. Lift the front of the burner assembly up over the bottom lip of
the firebox. Pull the burner assembly towards you to disengage
the mixing tube from the rear burner support.
3. When installing the burner into the fireplace, angle the burner at
the rear to insert the mixing tube into the rear burner support.
** Be careful not to knock or damage the pilot assembly during this
installation. **
4. Once this has happened, the 2 screws can be installed at the
front of the burner assembly to fasten the burner assembly
into the firebox. The screws will not line up with the holes if the
mixing tube is not inserted properly.
1. The burner assembly can be removed with or without the glass
media on top of it. If you have the driftwood log set installed, it
needs to be removed first.
1. At the rear of the burner
is the mixing tube. This
mixing tube needs to be
inserted into the rear
burner support.
2. At the back of the firebox
you will see the rear
burner support bracket.
This is where the mixing
tube is inserted
Figure 9.22
Figure 9.24
Figure 9.27
Figure 9.28
Figure 9.25
Figure 9.26
Figure 9.23
Section 6: Maintenance


