– 17 –
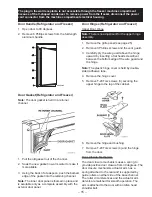
Note: The plastic hinge cover is held by double-
sided adhesive tape.
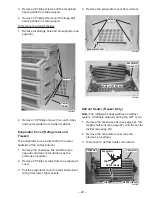
6. Remove the hinge cover (see page 15 for
detailed art).
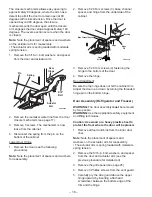
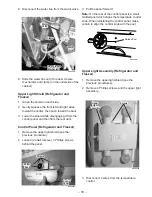
7. Remove T-20 Torx screws (3) securing the
upper hinge to the top of the cabinet.
8. Remove the upper hinge and bushing.
Note: Do not lose lower hinge bushing during
door removal.
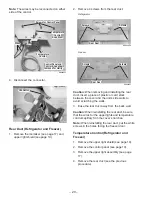
9. Pull the top of the door outward until it clears
the top cabinet frame and carefully lift the door
off the lower hinge. Place door on the
protected floor area.
Icemaker (Freezer)
The icemaker is mounted to the upper left wall of
the freezer cabinet. Under normal operating
conditions, temperatures, door openings, and food
load, the icemaker is capable of producing
approximately 100 cubes in a 24 hour period.
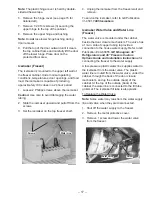
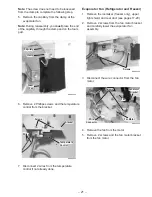
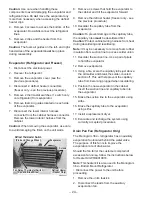
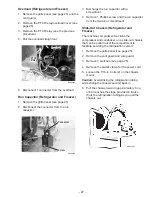
1. Loosen 2 Phillips screws above the icemaker.
Caution: Use care to avoid damaging the water
tubing.
2. Slide the icemaker upward and pull off from the
screws.
3. Set the icemaker on the top freezer shelf.
GEA00626
Screws
Screws
Water Line
Water Line
4. Unplug the icemaker from the freezer wall and
remove.
To service the icemaker, refer to GE Publication
31-4591, 1985 Icemakers.
Icemaker Water Valve and Water Line
(Freezer)
The water valve is mounted under the cabinet,
beside the door closure mechanism. The valve has
a 1/4-in. stub of copper tubing to provide a
connection to the house water supply. Refer to GE
Publication # 49-60055, GE Monogram 36”
Refrigerators and 36” Freezers Custom
Options Guide and Installation Instructions for
connecting the freezer to the water supply.
A low-pressure plastic water line supplies water to
the icemaker from the water valve. The plastic
water line is routed from the water valve, under the
cabinet, through the back of the door closure
mechanism, and up the outside (back) of the
cabinet. At the top of the outside (back) of the
cabinet, the water line is connected to the fill tube
grommet. The icemaker fill tube is also plastic.
To Replace the Water Valve:
Note: Some water may leak from the water supply
line and valve when they are disconnected.
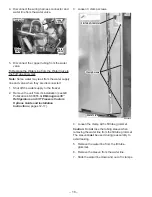
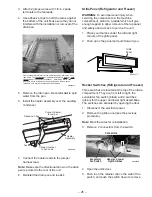
1. Shut off the water supply to the freezer.
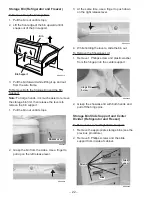
2. Remove the metal protective cover.
3. Remove 1 screw and lower the water valve
from the freezer.
GEA00666
Screw
Screw
Water Valve
Water Valve
Содержание Monogram ZIFS36N RH
Страница 7: ... 5 Specifications ...
Страница 8: ... 6 ...
Страница 11: ... 9 Notes ...
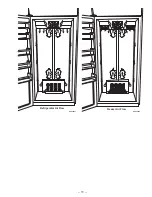
Страница 13: ... 11 GEA00637 Refrigerator Air Flow GEA00860 Freezer Air Flow ...
Страница 14: ... 12 Notes ...
Страница 30: ... 28 Notes ...
Страница 44: ... 42 Exploded parts view and list for Model No ZIFS36NDALH Refer to microfiche for other model information ...
Страница 46: ... 44 Exploded parts view and list for Model No ZIFS36NDALH Refer to microfiche for other model information ...
Страница 48: ... 46 Exploded parts view and list for Model No ZIFS36NDALH Refer to microfiche for other model information ...
Страница 50: ... 48 Exploded parts view and list for Model No ZIFS36NDALH Refer to microfiche for other model information ...
Страница 52: ... 50 Exploded parts view and list for Model No ZIFS36NDALH Refer to microfiche for other model information ...
Страница 54: ... 52 Exploded parts view and list for Model No ZIRS36NDARH Refer to microfiche for other model information ...
Страница 56: ... 54 Exploded parts view and list for Model No ZIRS36NDARH Refer to microfiche for other model information ...
Страница 58: ... 56 Exploded parts view and list for Model No ZIRS36NDARH Refer to microfiche for other model information ...
Страница 60: ... 58 Exploded parts view and list for Model No ZIRS36NDARH Refer to microfiche for other model information ...
Страница 62: ... 60 Notes ...

