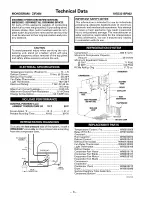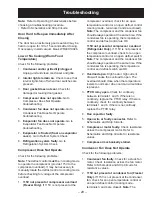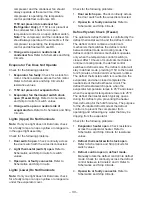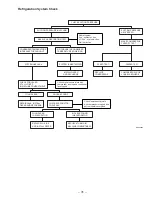
– 16 –
The closure mechanism allows easy opening to
approximately 90 degrees, where the arm has a
detent to permit the door to remain open at 90
degrees with minimal tension. Once the door is
opened beyond 90 degrees, the closure
mechanism pulls the door open until the closure
arm engages the door stop at approximately 140
degrees. The reverse action occurs when the door
is closed.
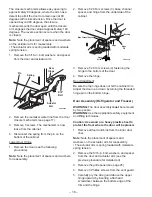
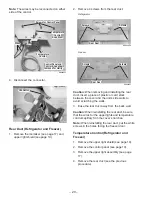
Note: Note the placement of spacers and washers
on the actuator arm for reassembly.
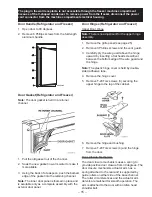
• The actuator arm is spring loaded with moderate
spring tension.
1. Remove the 5/16-in. bolt, washers, and spacer
from the door and actuator arm.
GEA00664
Door
Hinge
Spring
Pin
5/16"
Bolt
Actuator
Arm
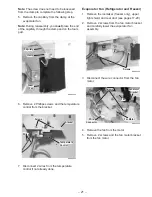
2. Remove the icemaker water line from the door
closure mechanism (see page 17).
3. Remove 5 screws. The mechanism is now
loose from the cabinet.
4. Disconnect the spring from the pin on the
bottom of the cabinet.
Lower Door Hinge
1. Remove the door (see the following
procedure).
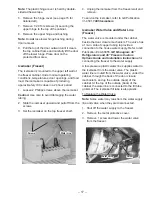
Note: Note the placement of spacers and washers
for reassembly.
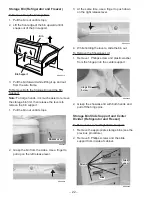
2. Remove T-20 Torx screws (3), base channel
spacer, and hinge from the underside of the
cabinet.
GEA00663
Hinge
Screws
Hinge
Hinge
Pin
Hinge
Bushing
Base Channel Spacer
3. Remove T-20 Torx screws (4) fastening the
hinge to the bottom of the door.
4. Remove the hinge.
Door Adjustment
Be sure the top hinge does not hit the cabinet trim.
Adjust the door up or down by turning the threaded
hinge pin on the bottom hinge.
Door Assembly (Refrigerator and Freezer)
WARNING: The door assembly must be removed
by two people.
WARNING: Use the appropriate safety equipment
and lifting techniques.
Caution: Use wood or a heavy plastic sheet to
protect the floor where the door will be placed.
1. Remove all food and bins from the inner door
liner.
Note: Note the placement of spacers and
washers on the actuator arm for reassembly.
• The actuator arm is spring loaded with moderate
spring tension.
2. Remove the 5/16-in. bolt, washers, and spacer
from the door and actuator arm (see the
previous procedure for detailed art).
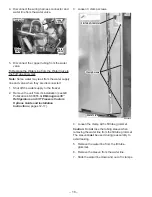
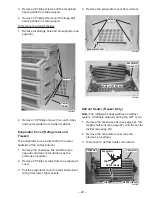
3. Remove the grille panel (see page 25).
4. Remove 3 Phillips screws from the vent guard.
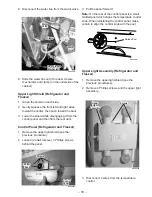
5. Carefully pry the wire guard above the upper
hinge upward by inserting a flat head
screwdriver between the bottom edge of the
trim and the hinge.
Содержание Monogram ZIFS36N RH
Страница 7: ... 5 Specifications ...
Страница 8: ... 6 ...
Страница 11: ... 9 Notes ...
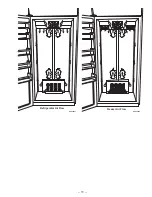
Страница 13: ... 11 GEA00637 Refrigerator Air Flow GEA00860 Freezer Air Flow ...
Страница 14: ... 12 Notes ...
Страница 30: ... 28 Notes ...
Страница 44: ... 42 Exploded parts view and list for Model No ZIFS36NDALH Refer to microfiche for other model information ...
Страница 46: ... 44 Exploded parts view and list for Model No ZIFS36NDALH Refer to microfiche for other model information ...
Страница 48: ... 46 Exploded parts view and list for Model No ZIFS36NDALH Refer to microfiche for other model information ...
Страница 50: ... 48 Exploded parts view and list for Model No ZIFS36NDALH Refer to microfiche for other model information ...
Страница 52: ... 50 Exploded parts view and list for Model No ZIFS36NDALH Refer to microfiche for other model information ...
Страница 54: ... 52 Exploded parts view and list for Model No ZIRS36NDARH Refer to microfiche for other model information ...
Страница 56: ... 54 Exploded parts view and list for Model No ZIRS36NDARH Refer to microfiche for other model information ...
Страница 58: ... 56 Exploded parts view and list for Model No ZIRS36NDARH Refer to microfiche for other model information ...
Страница 60: ... 58 Exploded parts view and list for Model No ZIRS36NDARH Refer to microfiche for other model information ...
Страница 62: ... 60 Notes ...

