Using PAYD Pro® for Android™ Reference Guide
66
Emailing a transaction receipt
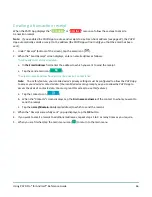
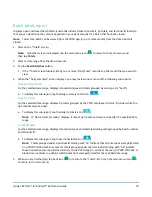
When the PAYD App displays the "
APPROVED
" or "
DECLINED
" response, follow these steps to email a
transaction receipt.
Note:
If you enabled the PAYD App to auto-send receipts to a set merchant address (see page 33), the PAYD
App automatically emails a receipt to the address (the PAYD App will not notify you that the email has been
sent).
1.
Under "Receipt" (bottom of the screen), tap the email icon (
).
2.
When the "Send Receipt" screen displays, enter an email address as follows:
To manually enter an email address:
a.
In
the Email Address
field, enter the address to which you want to send the receipt.
b.
Tap the send email icon (
).
To select an email address from your mobile device's contacts list:
Note:
To use this feature, your mobile device's privacy settings must be configured to allow the PAYD App
to access your device's contacts data. (Your mobile device may prompt you you to allow the PAYD App to
access the device's contacts data. You must grant this access to use this feature.)
a.
Tap the contacts icon (
).
b.
When the "Contacts" screen displays, tap the
Firstname Lastname
of the contact to whom you want to
send the receipt.
c.
Tap the
(email address) to which to send the receipt.
3.
When the "Receipt successfully sent" pop-up displays, tap the
OK
button.
4.
If you want to email a receipt to additional addresses, repeat steps 1 to 3 as many times as you require.
5.
When you are finished, tap the main menu icon (
) to return to the main menu.


