background image

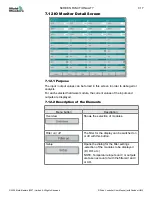
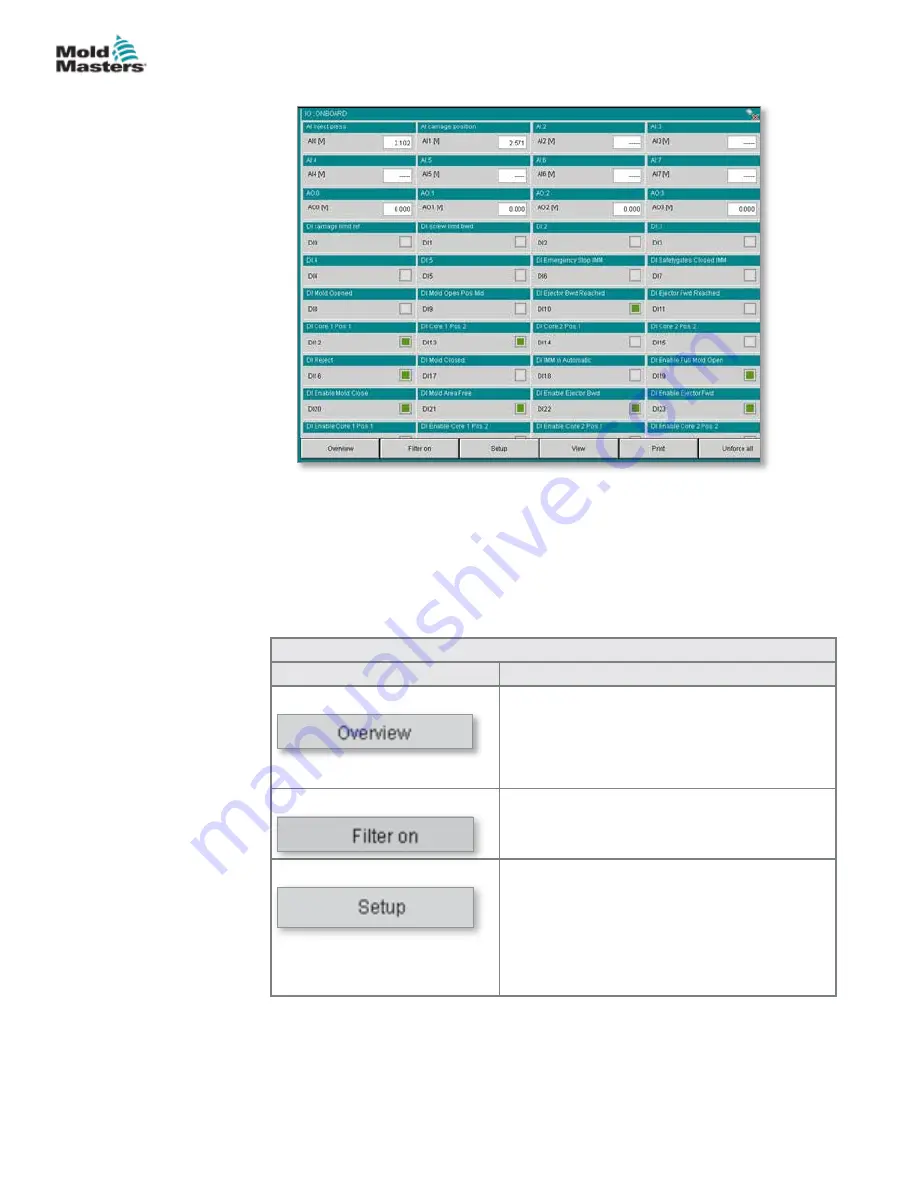
7.12 IO Monitor Detail Screen


7.12.1 Purpose

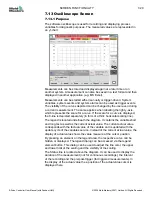
The input / output values can be forced in this screen in order to debug error 

analysis.
For each selected hardware module, the current values of the inputs and 

outputs are displayed.

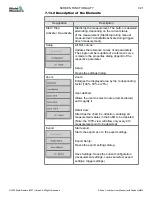
7.12.2 Description of the Elements

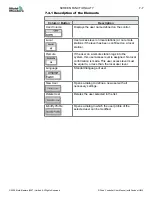
Menu button

Description

Overview

Shows the selection of modules.

Filter on / off

The filter for the display can be switched on 

or off with this button.

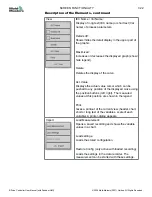
Setup

Opens the dialog for the filter settings 

-selection of the modules to be displayed 

(DI, DO, etc.).

NOTE: Temperature inputs and / or outputs 

are taken account of with the filters AI and / 

or AO.

7-17

SCREEN FUNCTIONALITY 

E-Drive Controller User Manual (with Pendant HMI)

© 2020 Mold-Masters (2007) Limited. All Rights Reserved. 

Содержание E-Drive Series

Страница 1: ...version 3 User Manual with Pendant HMI Original Instructions ...

Страница 2: ......

Страница 3: ... 3 3 General Safety Symbols 3 7 3 4 Lockout Safety 3 9 3 5 Electrical Lockout 3 10 3 5 1 Energy Forms and Lockout Guidelines 3 11 3 6 Disposal 3 12 3 7 E Drive Plus Safety Hazards 3 13 3 7 1 Operational Environment 3 13 Section 4 Overview 4 1 4 1 Specification 4 1 4 1 1 Cabinet 4 1 4 1 2 Pendant 4 1 4 2 Future Expansion 4 1 4 3 Switch On and Off 4 2 4 3 1 Switching On 4 2 4 3 2 Switching Off or Sh...

Страница 4: ...6 4 Section 7 Screen Functionality 7 1 7 1 Utilities Screen 7 1 7 1 1 Purpose 7 1 7 1 2 Description of the Elements 7 1 7 2 Utilities Screen User Button Login Dialog 7 3 7 2 1 Login Tab 7 3 7 2 2 Description of the Elements 7 4 7 3 Online Tab 7 5 7 3 1 Description of the Elements 7 5 7 4 Administration Tab 7 6 7 4 1 Description of the Elements 7 7 7 5 Modify Profile 7 8 7 5 1 Description of the el...

Страница 5: ...4 5 Settings Parameter 7 25 7 15 Settings Line color 7 26 7 15 2 Export settings 7 26 7 15 1 Torque Monitor 7 27 7 16 Factory Settings Screen 7 28 Section 8 Service and Repair the Controller 8 1 8 1 Cleaning and Inspection 8 1 8 2 Replacement Parts 8 1 8 3 Change Fuses 8 1 8 4 Upgrade Software 8 2 8 4 1 The Benefits of Upgrading 8 2 8 4 2 Implementing an Upgrade 8 2 Section 9 Wiring Details 9 1 9 ...

Страница 6: ...abinet information 4 1 Table 4 2 Pendant information 4 1 Figures Figure 3 1 Injection molding machine hazard areas 3 2 Figure 4 1 Pendant layout 4 3 iv E Drive Controller User Manual with Pendant HMI 2020 Mold Masters 2007 Limited All Rights Reserved ...

Страница 7: ...he dangers of 3 phase supplies They should know how to take appropriate measures to avoid any danger from electrical supplies IMPORTANT The E Drive is designed to be operated by the E Drive controller programmed for your order s specific system Do not swap E Drive controllers for different E Drive systems without checking the manual as controller setup must match the mechanical system 1 2 Document...

Страница 8: ... time without giving notice 1 6 Movement or Resale of Mold Masters Products or Systems This documentation is intended for use in the country of destination for which the product or system was purchased Mold Masters takes no responsibility for documentation of products or systems if they are relocated or resold outside the intended country of destination as stated on the accompanying invoice and or...

Страница 9: ...5 psi in Inch 25 4 mm kg Kilogram 2 205 lb kPa Kilopascal 0 145 psi gal Gallon 3 785 l lb Pound 0 4536 kg lbf Pound force 4 448 N lbf in Pound force inch 0 113 Nm l Litre 0 264 gallon min Minute mm Millimeter 0 03937 in mΩ Milli Ohm N Newton 0 2248 lbf Nm Newton Meter 8 851 lbf in psi Pound per square inch 0 069 bar psi Pound per square inch 6 895 kPa rpm Revolutions per minute s Second Degree C D...

Страница 10: ...6079972 6095790 6099780 6113381 6135751 6162043 6162044 6176700 6196826 6203310 6230384 6270711 6274075 6286751 6302680 6318990 6323465 6348171 6350401 6394784 6398537 6405785 6440350 6454558 6447283 6488881 6561789 6575731 6625873 6638053 6648622 6655945 6675055 6688875 6701997 6739863 6752618 6755641 6761557 6769901 6776600 6780003 6789745 6830447 6835060 6840758 6852265 6860732 6869276 6884061 ...

Страница 11: ...an Road Shiv Building Saibaba Colony Coimbatore T N India 641 011 tel 91 422 423 4888 fax 91 422 423 4800 india moldmasters com USA Mold Masters Injectioneering LLC 29111 Stephenson Highway Madison Heights MI 48071 USA tel 1 800 450 2270 USA only tel 1 248 544 5710 fax 1 248 544 5712 usa moldmasters com Mold Masters Regional Offices AUSTRIA East and South East Europe Mold Masters Handelsges m b H ...

Страница 12: ...ir Istanbul Turkey tel 90 216 577 32 44 fax 90 216 577 32 45 turkey moldmasters com Mold Masters International Representatives ARGENTINA Sollwert S R L tel 54 11 4786 5978 e sollwert fibertel com ar BULGARIA Mold Trade OOD tel 359 82 821 054 e contact mold trade com GREECE Ionian Chemicals S A tel 30 210 6836918 9 e m pavlou ionianchemicals com ROMANIA Tehnic Mold Trade SRL tel 4 021 230 60 51 e c...

Страница 13: ...peration of equipment including the use of all the safety devices Provide its personnel with all necessary protective clothing including such items as a face shield and heat resistant gloves Ensure the original and continuing competence of personnel caring for setting up inspecting and maintaining injection molding equipment Establish and follow a program of periodic and regular inspections of inj...

Страница 14: ... areas Top view with guards removed Front view with guards removed 2 10 5 3 Top View with Guards Removed 2 5 9 1 4 7 6 9 8 Front View with Guards Removed 1 Mold area 2 Clamping mechanism area 3 Area of movement of core and ejector drive mechanisms outside areas 1 and 2 4 Machine nozzle area 5 Plasticating and or injection unit area 6 Feed opening area 7 Area of the heater bands of the plasticizing...

Страница 15: ...ement of the plasticizing and or injection unit including nozzle Movements of parts of the power operated nozzle shutoff and their drives Over pressurization in the nozzle Thermal Hazards Burns and or scalds due to operating temperature of The nozzle Material discharging from the nozzle Plasticizing and or Injection Unit Area Area from the adapter barrel head end cap to the extruder motor above th...

Страница 16: ...ilure Possible release of fluid under pressure that can cause injury Thermal hazards associated with hot fluid Area Inside the Guards and Outside the Mold Area See Figure 3 1 area 10 Crushing and or shearing and or impact hazards caused by Movement of the platen Movement of the drive mechanism of the platen Movement of the core and ejector drive mechanism Clamp opening movement Electrical Hazards ...

Страница 17: ...uipment such as face shields and use heat resistant gloves when working around the feed inlet purging the machine or cleaning the gates of the mold Remove purged material from the machine immediately Decomposing or burning material could result in noxious gases being emitted from the purged material feed inlet or mold Ensure proper ventilation and exhaust systems are in place to help prevent inhal...

Страница 18: ... hot surfaces which could result in burns Keep flammable liquids or dust away from the hot surfaces as they could ignite Follow good housekeeping procedures and keep floors clean to prevent slips trips and falls due to spilled material on the work floor Apply engineering controls or hearing conservation programs as necessary to control noise When doing any work on the machine that requires moving ...

Страница 19: ...en release of high pressure gas or oil can cause death or serious injury Discharge all gas and hydraulic pressure before disconnecting or disassembling accumulator Warning Hot Surfaces Contact with exposed hot surfaces will cause serious burn injury Wear protective gloves when working near these areas Mandatory Lockout Tagout Ensure that all energies are properly locked out and remain locked out u...

Страница 20: ...ns ensure that the power and thermocouple connections have not been wired incorrectly Communications Interface and Control Sequence It is the customer s responsibility to verify functionality of any custom machine interface at safe speeds prior to operating equipment in the production environment at full speed in automatic mode It is the customer s responsibility to verify all required motion sequ...

Страница 21: ...d potential risk of electrical shock Often power sources are inadvertently turned on or valves are opened mistakenly before maintenance work is completed resulting in serious injuries and fatalities Therefore it is important to ensure that all energies are properly locked out and that they remain locked out until the work is completed If a lockout is not performed uncontrolled energies could cause...

Страница 22: ...d and appropriately locked out This can include gravity compressed air hydraulics steam and other pressurized or hazardous liquids and gases See Table 3 3 6 When the work is completed prior to removing the last lock make sure the operational controls are in the off position so that the main disconnect switching is done under no load Ensure all blocks tools and other foreign materials are removed f...

Страница 23: ...ents and tag valves Bleed off excess air If pressure cannot be relieved block any possible movement of machinery Kinetic Energy Energy of a moving object or materials Moving object may be powered or coasting Blades Flywheels Materials in supply lines Stop and block machine parts e g stop flywheels and ensure that they do not recycle Review entire cycle of mechanical motion ensure that all motions ...

Страница 24: ...om the lines and cylinders and dispose it in an environmentally responsible manner 3 The electrical components are to be dismantled separating them accordingly as environmentally friendly waste or disposed as hazardous waste if necessary 4 Remove the wiring The electronic components are to be disposed in accordance with the national electric scrap ordinance 5 The metal parts are to be returned for...

Страница 25: ...rsonnel based on local laws and regulation Electrical products may not be grounded when removed from the assembled or normal operating condition Ensure proper grounding of all electrical components before performing any maintenance to avoid potential risk of electrical shock 3 8 1 Operational Environment WARNING The display console and controller cabinet together are designed for use in the plasti...

Страница 26: ......

Страница 27: ... a lockable main isolator Input from Associated Controller A HAN4A connector accepts an Up to heat signal which is required before the E Drive is operable I O Connection and Alarm Channel HAN10E has the following functions E Drive ready output Accepts incoming trigger s to operate E Drive from a dry contact or an external 24V source Isolated closing contact to give a common alarm output signal Ser...

Страница 28: ...m is in Manual mode and if the HEAT light LED is on the remote enable signal typically connected to a Hot Runner Controller then you are ready to enable the servo motors by pressing Servo On control button located on the pendant The Motor LED will light up when the servo s is enabled Now the E Drive controller can be used in Manual and Auto mode See 5 1 Put the E Drive in Manual Mode on page 5 2 a...

Страница 29: ...ls are unaffected The button shall be turned on to restart the plate movement Control buttons that are located below the screen and to its left side Four LEDs that display the system status A central touchscreen with five main pages and on screen navigation buttons to go to them 2 3 1 1 Servo stop button 2 Status LEDs 3 Control buttons Figure 4 1 Pendant layout 4 3 OVERVIEW E Drive Controller User...

Страница 30: ...l incrementally move the pins by 0 01 mm in the open direction 2 Jog Tweak Close In Manual mode pressing this button will move the pins toward the close position using the velocity and accelerate decelerate values set on Section 6 Plate Settings on page 6 1 The pins will move as long as the button is pressed In Auto mode pressing this button will incrementally move the pins by 0 01 mm in the close...

Страница 31: ...te through the various HMI screens The dark highlighted button indicates which screen is currently active These buttons navigate you through the five main screens Main Overview This is the main operating screen There are two tabs on this screen used for the operation of the system NOTE The Control Buttons will only function when this screen is visible Alarms This is the alarm screen The alarms scr...

Страница 32: ...ll as diagnostic screens Utilities This is the Utilities screen The user can login here as well as change language Future date time metric imperial and other functions Touchscreen Layout continued 4 6 E Drive Controller User Manual with Pendant HMI OVERVIEW 2020 Mold Masters 2007 Limited All Rights Reserved ...

Страница 33: ... give further options for physical parameters like time speed and distance 3 Choose Time to set any displayed time to one tenth or one hundredth of a second The Speed and Length options may be similarly configured on this screen 4 Choose ü to accept your options or choose û to leave the screen without any of the above changes taking effect 4 7 OVERVIEW E Drive Controller User Manual with Pendant H...

Страница 34: ...3 Current user above and the User level below 4 7 1 Print a Screen from the Status Display Banner Tap the Screen capture and any screen to open the print screen dialog If you are ready to print and have previously setup the screen print options then choose to print out the current screen If you need to setup or change the print options choose Setup to open the Printer Settings window and change pr...

Страница 35: ...Print to File Output to a file MIME Type Selection of a MIME type for the print file Directory Choose the button to find a directory folder for the print file Filename Type in a name for the Filename for the print file 4 9 OVERVIEW E Drive Controller User Manual with Pendant HMI 2020 Mold Masters 2007 Limited All Rights Reserved ...

Страница 36: ......
Страница 37: ...ng machine before installation of the controller into the system DO NOT enter the cabinet without first ISOLATING the supplies There are unguarded terminals inside the cabinet which may have a dangerous potential across them Where a three phase supply is used this potential may be up to 600VAC Voltage and amperage cables are connected to the controller and the mold There is also a voltage cable co...

Страница 38: ...tton to enable the servo s 3 Acknowledge the pop up message that appears on the touchscreen NOTE The motor LED will light up green in color if the servo s is successfully enabled The E Drive is ready to use the Jog Open Close controls The indicator on the status bar shows that the servo is switched off 5 2 E Drive Controller User Manual with Pendant HMI SETUP 2020 Mold Masters 2007 Limited All Rig...

Страница 39: ... ball screw pitch 10 Min Operating Position the minimum position the operator can enter on the movement profile Max Operating Position the maximum position the operator can enter on the movement profile NOTE Reboot the controller if this value has been changed The Home Status graphic turns green after sucessful homing 5 Configure the remaining parameters on this tab but remember that homing also u...

Страница 40: ... tester or higher user needs to log in to change the factory settings a Measured Stroke the stroke that was automatically calculated by the E Drive during the homing procedure b Max Stroke from the last time the homing was done successfully c Max Physical Stroke the stroke that is entered in factory settings which is used to compare with the Measured Stroke 10 If the homing operation is successful...

Страница 41: ...s divided by the entered Degrees per Millimetre value 8 The result is the calculated plate travel 9 If the calculated plate travel is different from the current Maximum Stroke value then the confirmation dialog is displayed If it is within 1 10 of a millimetre then the dialog is not shown Homing is successful NOTE If you want the dialog to show change the Degrees per Millimetre value and re home 5...

Страница 42: ... touchscreen 4 If you are successful the Auto LED will light up green 5 You can now apply the triggers you have selected to make the servo plate move to the desired positions Auto LED 5 3 1 Return to Manual Mode To return to manual mode press the Manual button and acknowledge the pop up message that appears on the touchscreen 5 6 E Drive Controller User Manual with Pendant HMI SETUP 2020 Mold Mast...

Страница 43: ...b is added to the HMI for each plate If Master Slave configuration is selected then one Master Slave Settings tab is added Settings are applied to both the Master Plate 1 and Slave Plate 2 5 7 SETUP E Drive Controller User Manual with Pendant HMI 2020 Mold Masters 2007 Limited All Rights Reserved ...

Страница 44: ...y The E Drive will not stop operating Torque Alarm During Move The torque alarm threshold during any movement NOTE This is an alarm situation The E Drive will drop out of Auto then disable the servo motor Use the Torque Monitor to help you find the proper setting for this alarm Auto Idle Timeout The controller will be moved out of auto if no trigger is received for this amount of time To disable t...

Страница 45: ...ation both use these settings These values can only be set by the Supervisor level and higher Level 12 NOTE These values are factory set and should be fine as set If you feel it necessary to adjust these values be careful because values set too high will cause accuracy problems during homing procedure 5 9 SETUP E Drive Controller User Manual with Pendant HMI 2020 Mold Masters 2007 Limited All Righ...

Страница 46: ...et The Settings Plate 1 Tab is where the servo velocity torque etc is set NOTE If two plates are used there will be a pair of tabs for each plate If plates are slaved together the name of the tabs will change and the Master Main tab will be used to setup both plates NOTE The Control Buttons will only work when this screen is showing This is to help prevent unintended button presses 6 1 PLATE SETTI...

Страница 47: ... plate to the Opened Position The step Start Closing Trigger initiates the E Drive closing sequence The input trigger is selected from the drop down list Rising falling edge can be selected and a time delay can also be added When the trigger conditions in the step above are met the E Drive controller will move the plate to the Closed Position This also represents the starting position for the next...

Страница 48: ...ing step and an intermediate closing step Tap the Other tab of the Plate Settings Tab to see the Mid opening and Mid Closing options Check these boxes to add the desired mid steps 6 2 1 Mid Opening Step Added 6 3 PLATE SETTINGS E Drive Controller User Manual with Pendant HMI 2020 Mold Masters 2007 Limited All Rights Reserved ...

Страница 49: ...6 2 2 Mid Closing Step Added 6 2 3 Both Mid Opening and Mid Closing Step Added 6 4 E Drive Controller User Manual with Pendant HMI PLATE SETTINGS 2020 Mold Masters 2007 Limited All Rights Reserved ...

Страница 50: ...fics on the system but these cannot be changed here Further setup functions can be accessed using the button bar at the bottom of the screen 7 1 2 Description of the Elements Settings Elements Description Language Selects a system language from the languages available in this field Date and time The current date and time can be set here These are centrally managed and saved in the control Unit Uni...

Страница 51: ...see section Utilities Screen Lock Locks and releases the touchscreen operation only for KeTop and OP xxx Report Pressing this button on a local station opens a file selection dialog and the status report can be saved on a named drive The E Drives and directories which are available can be specified in the HMI configuration Pressing the status report button on a remote station will store the status...

Страница 52: ... 2 Utilities Screen User Button Login Dialog The Utilities Screen User Button opens the login dialog If one user is already logged in the user administration can be directly accessed However only the administrator has access to the full range of functions 7 2 1 Login Tab Displays for all users 7 3 SCREEN FUNCTIONALITY E Drive Controller User Manual with Pendant HMI 2020 Mold Masters 2007 Limited A...

Страница 53: ...r the user password the type of input panel can be selected in the HMI configuration Force Write Permission By selecting this check box the write permission can be forced if the maximum number of sessions with write permission on the system has been reached Read only If this check box is selected the login is made without write permission NOTE When logging in via chip card RFID the login dialog is...

Страница 54: ...y logged in Station This field displays the name IP address of the station on which the user is logged in Level Displays the access level of the user currently logged in Write Activating this check box gives the user write permission Local This checkbox displays whether the user has logged in from a local or remote station Logout This button enables a selected user to log out 7 5 SCREEN FUNCTIONAL...

Страница 55: ...ls 13 16 are reserved for Mold Masters factory settings New users can be created and existing users modified or deleted from this screen 7 6 E Drive Controller User Manual with Pendant HMI SCREEN FUNCTIONALITY 2020 Mold Masters 2007 Limited All Rights Reserved ...

Страница 56: ... access level is assigned No local confirmation is made This user access level must be equal to or less than the local user level Language Standard language of user New User Opens a dialog to define a new user with all necessary settings Delete User Deletes the user selected in the list Modify Profile Opens a dialog in which the user profile of the selected user can be modified 7 7 SCREEN FUNCTION...

Страница 57: ...ected in the HMI configuration Confirmation Repeated entry of a new password as confirmation Local User access level on local stations or on remote stations if the access level request has been confirmed on a local station Remote User access level on a remote station This user access level must be equal to or less than the local user level Language Choice of standard language for the user Administ...

Страница 58: ...This screen displays an overview of all settings made in the user administration Parameters cannot be entered or modified here 7 9 SCREEN FUNCTIONALITY E Drive Controller User Manual with Pendant HMI 2020 Mold Masters 2007 Limited All Rights Reserved ...

Страница 59: ...y under VxWorks Details This menu entry can be used to display a dialog box for further system information OK Confirms closing the dialog System Shows an overview of the configuration settings of the visualization and the start up times of the loaded screens SysVars Shows an overview of the system variables the system is communicating with Update Updates the display Logfile Saves the overview of t...

Страница 60: ...data e g calibration data number of heating zones see Kemro iecedit documentation Save machine data Loads all values of the iec system variables from the group vg_machinedata e g calibration data number of heating zones see Kemro iecedit documentation Drop Down menu Path of machine data for loading and saving e g local or USB stick Backup machine data Backs up the saved machine file as backup This...

Страница 61: ...and uploaded again The upper section contains a table used to show and or select all previously created mold data records New mold data records can be changed via the menu bar while existing records can be edited or deleted 7 12 E Drive Controller User Manual with Pendant HMI SCREEN FUNCTIONALITY 2020 Mold Masters 2007 Limited All Rights Reserved ...

Страница 62: ... size of the component data record Comment Display of comments on the mold data set Load Loads the selected component data record settings Save Saves the component data record settings currently loaded Save as Saves the settings of the component data record that was newly created and or which is currently loaded under the name specified Delete Deletes the selected component data record Rename Rena...

Страница 63: ...een lists each of the four input triggers which could be added to the open and or closed trigger list Additionally each trigger can be renamed by the user NOTE Power must be cycled to the controller for the new name to take effect 7 14 E Drive Controller User Manual with Pendant HMI SCREEN FUNCTIONALITY 2020 Mold Masters 2007 Limited All Rights Reserved ...

Страница 64: ...or more hardware modules The modules are represented hierarchically in a tree structure as they are integrated in the system connections of CPU module via bus coupler K Net K CAN SIO to the hardware modules The hardware modules can be selected by clicking on the checkbox in the right column Selecting one structure element will mark all elements located below it To deselect a module tap it again 7 ...

Страница 65: ...e g BIOS version Operation hours counter etc Select Statistics Displays all available CPUs The state of the CPU is displayed as follows CPU is started CPU is stopped 7 11 4 Description of the Buttons Button Description Start Stop The CPU is started or stopped according to its state Reset The selected CPU is restarted 7 16 E Drive Controller User Manual with Pendant HMI SCREEN FUNCTIONALITY 2020 Mo...

Страница 66: ...Menu button Description Overview Shows the selection of modules Filter on off The filter for the display can be switched on or off with this button Setup Opens the dialog for the filter settings selection of the modules to be displayed DI DO etc NOTE Temperature inputs and or outputs are taken account of with the filters AI and or AO 7 17 SCREEN FUNCTIONALITY E Drive Controller User Manual with Pe...

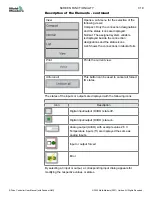
Страница 67: ...tes The states of the inputs or outputs are displayed with the following icons Icon Description Digital input output DI DO state off Digital input output DI DO state on Analog output AI AO with example value 2 5 V Temperature inputs TI are displayed the same as analog inputs Input or output forced Error By selecting an input or output a corresponding input dialog appears for modifying the respecti...

Страница 68: ...riable Underneath it the variable name and the long text for the variable are displayed 7 12 3 Description of the Elements Field Description Actual value Current value of the input output NOTE In case of a sensor failure this field will show A forced value however will still be shown with a red border Set Value Value to which the input output is forced Force active Activates the forced setting of ...

Страница 69: ...ath the diagram It contains the variable short and long text as well as the current actual value The current actual value corresponds with the factual value of the variable and is updated with the update cycle of the variables service Instead of the current actual value the display of actual value shows the value measure at the cursor position By pressing an element on the legend area the respecti...

Страница 70: ...ngs dialog Zoom Zoom Enlarges the displayed area by the corresponding factor 100 50 or 25 User defined Allows the user to select an area red bordered and magnify it Detail view Stretches the chart in x direction enabling all measurement values in the buffer to be depicted Note the 100 view will allow only every 4th measurement point to be depicted Export Start export Starts the export acc to the e...

Страница 71: ...asured values at this position are shown in the legend Print Gives a printout of the current view header chart short or long text of the variables scale of each variable A printer dialog appears Import Load Measurement Opens a saved recording and shows the variable values in a chart Load settings Loads the stored configuration Restore Config only active with loaded recording Loads the settings in ...

Страница 72: ...surement duration corresponds with the buffer size x of the corrected scan interval An automatic correction of the measurement duration is implemented if the scan interval is changed so that the measurement duration once more corrected corresponds with the buffer size x of the scan interval If a continuous measurement is set measurement duration 0 the scan interval is not corrected Example Buffer ...

Страница 73: ...vents Variable Trigger System variables that can be configured as triggers are created in the variables monitor These variable groups are available in the software oscilloscope in the same grouping as configured in the variables monitor All types of system variables that can be recorded can also be used as trigger variables If a numerical system variable has been selected as trigger a trigger thre...

Страница 74: ...corded A maximum of 12 variables can be selected The following types of system variables can be logged all INT types SINT INT DINT LINT USINT UINT UDINT ULINT all REAL types REAL LREAL all Bit types BOOL BYTE WORD DWORD LWORD TIME and TIME_OF_DAY The variables that can be selected for a measurement are configured via the variable s monitor If no groupings were created in the variable s monitor no ...

Страница 75: ...ther be explicitly terminated by the user or when the specified file count is reached The specification of an Interval 1 enables the selective omission of measurement With binary measurements exactly one file will be created in the automatic mode for an order Output under Name These are then automatically given continuous numbers by the system e g MyExportFile000 bin MyExportFile001 bin After noti...

Страница 76: ... Drive cycle occurs the Base Line torque value is captured and displayed in the Base Line column After each new cycle the torque is averaged and displayed in the Cycle Avg Column If the torque captured is the peak value since the Base Line was pressed then the peak value is displayed in the Cycle Peak column If Four Stage Mode is used the Opening and Closing rows will be enabled and torque data wi...

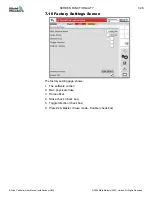
Страница 77: ...ware version 2 Max physical stroke 3 Home offset 4 Stoke check check box 5 Toggle direction check box 6 Plate 2 Master Slave mode Enable check box 7 28 E Drive Controller User Manual with Pendant HMI SCREEN FUNCTIONALITY 2020 Mold Masters 2007 Limited All Rights Reserved ...

Страница 78: ...h a light brush and vacuum cleaner If the equipment is subject to vibration we recommend you use an insulated screwdriver to check that no terminals have become loose External cable looms should be checked to see that there has been no damage to the flexible conduit plugs or sockets If the flex has been squashed if there is visible damage or if there are any exposed conductors then for your own sa...

Страница 79: ...that can be read by your controller The following instructions will guide you through the upgrade procedure 8 4 2 Implement an Upgrade Mold Masters recommends that you always wait until your controller is free before implementing any upgrade This ensures that in the event of an error or a power interruption at a crucial point normal production will not be adversely affected 1 Turn off power to the...

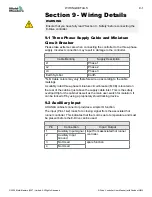
Страница 80: ...the rear of the cabinet just above the supply cable inlet This is the safety overload trip for the cabinet as well as the main user switch for isolation It can be locked off by using a proprietary shield locking device 9 2 Auxilliary Input A HAN4A cabinet connector provides a simple IO function The input Pins 1 2 looks for a closing signal from the associated hot runner controller This indicates t...

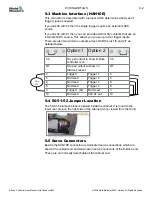
Страница 81: ... Dry pair output to show no Alarms present 2 7 4 Trigger 1 Trigger 1 4 5 Not Used Trigger 2 5 8 Not Used Trigger 3 8 9 Not Used Trigger 4 9 3 Trigger 1 0v Not Used 3 10 Not Used 24V dc out 10 9 4 50 51 52 Jumper Location The 50 51 52 jumper block is located inside the cabinet It is found to the lower rear area on the right side of the cabinet when viewed from the front 9 5 Servo Connectors Beside ...

Страница 82: ...ope Screen 7 20 Other Plate Setting Tabs 5 7 P Pendant layout 4 3 Plate settings 6 1 Plate Settings Parameters 5 8 Printing a Screen 4 8 R Repairing 8 1 Replacement parts 8 1 S Safety Lockout 3 10 Servicing 8 1 Servo Enable 4 5 SeVG Plus Safety Hazards 3 13 Specification 4 1 Status Display Banner 4 8 Status LEDs 4 4 Step Mode 4 4 Store Retrieve Settings Screen 7 11 Switching On and Off 4 2 T Torqu...

Страница 83: ... 1 248 544 5710 e usa moldmasters com MEXICO tel 52 442 713 5661 sales e mexico moldmasters com UNITED KINGDOM tel 44 1432 265768 e uk moldmasters com POLAND tel 48 669 180 888 sales e poland moldmasters com TURKEY Tel 90 216 577 32 44 e turkey moldmasters com KOREA tel 82 31 278 4757 e korea moldmasters com INDIA tel 91 422 423 4888 e india moldmasters com AUSTRIA tel 43 7582 51877 e austria mold...

Отзывы: