background image


P a g e  | 18 

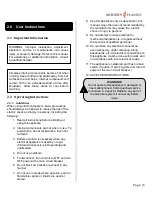
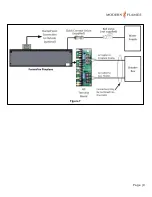
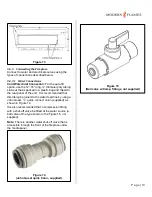
If using the direct water facilities connection option 
(recommended), connect the water supply and 
correct possible leaks before going any further.  
Once a good water connection has been verified, 
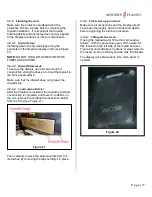
turn ON the ball valve (see Figure 23), shown in OFF 
position) and monitor the flow into the reservoir. 

Once the reservoir is full, the float valve will turn off 
the flow automatically.  Check again for leaks. 

Place the black metal media bed into position and 
screw into place (4 screws). 

Activate the AC power by turning ON the appropriate 
breaker(s) at the power panel. 

3.4.5.2


Power Up 

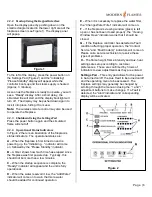
The User Display is mounted in a mechanical 
“carriage mechanism”. Push the mechanism down to 
release and allow viewing of the display. Push it 
down again to latch and hide the display from view 
(the normal operation position). 

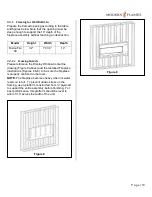
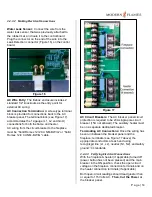
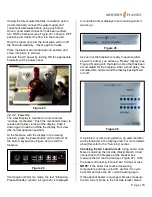
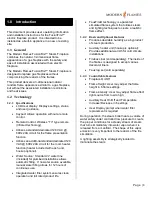
At the fireplace, with the display in the viewing 
position, press the power button on the left end of 
the built-in keypad (see Figure 24) to start the 
fireplace. 


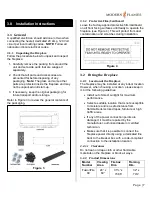
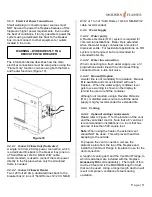
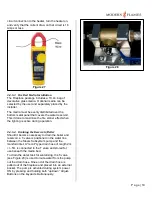
It will begin in Warm Up mode, the text “Initializing… 
Please Standby” (shown in Figure 25) is displayed.  

A countdown timer displays time remaining while it 
warms up. 


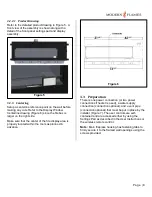
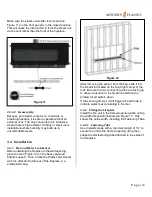
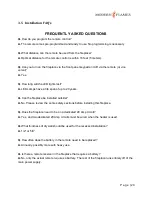
As soon as the fireplace is ready to operate (after 
about 3 minutes), you will see a “Ready” display (see 
Figure 26) along with the total run time that has been 
accumulated for the fireplace. After a short delay, the 
simulated fire will start and the display backlight will 
turn off. 


If a problem occurs during startup, an alert condition 
will be indicated in the display area. For more details 
about this refer to the “Servicing” section. 

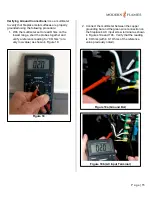
Checking the AC Load Current:

 Using an AC Amp 

Meter monitoring the hot side (black) branch circuit 
connection to the fireplace at the breaker box, 
measure the AC load current (see Figure 27).  With 
the boiler still heating, it should be 16 Amps or less. 

NOTE: 

If the boiler has reached operating 

temperature and has cycled off, wait for it to cycle 
back ON and take the AC current reading again. 

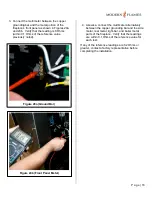
If the optional heater is equipped, likewise measure 
the AC current probe to the hot side (black) branch 


Figure 24 


Figure 26 


Figure 23 


Figure 25 

Содержание FusionFire 60

Страница 1: ...Rev 7 Copyright 2017 2018 all rights reserved U S and Foreign Patents Pending FusionFireTM Steam Fireplace INSTALLATION USER S MANUAL ...

Страница 2: ...3 Preparation 8 3 3 1 Framing for Wall Build In 10 3 3 1 1 Framing Details 10 3 3 2 Electrical Power Connections 11 3 3 2 1 Connect Flame Only No Heater 11 3 3 2 2 Connect Flame Heater 11 3 3 3 Water Supply 11 3 3 3 1 Water purity 11 3 3 3 2 Water line connection 11 3 3 3 3 Manual fill option 11 3 3 4 Venting 11 3 3 4 1 Optional venting requirements 11 3 3 4 2 Steam safety 12 3 4 Installation 12 3...

Страница 3: ...gement office NOTE The advisories on this page will be updated with the appropriate information upon completion of U L compliance testing This product is guaranteed for 2 years from the date of installation as set out in the terms and conditions of sale between Modern Flames and your local dealer This guarantee will be invalid to the extent permitted by law if the appliance has not been installed ...

Страница 4: ...ine included for plumbed installations allows automatic filling If no water source available manual water filling allows for 12 hours of continuous use Integrated water filter system ensures clean operation and full rated product life FauxFire technology is a patented simulated flame system that utilizes steam and lighting techniques to create a realistic flame effect 1 2 2 Basic and Optional Feat...

Страница 5: ... shock or injury to persons 9 Do not attempt to make electrical or mechanical adjustments or repairs without the services of qualified personnel 10 Do not make any electrical connections even temporary under carpeting along baseboards etc All electrical connections to this appliance must be done within walls and in accordance with local electrical codes 11 The appliance is hardwired and has no mai...

Страница 6: ...ed since the fireplace was first powered up Typically this should not be more than a few minutes C When the startup sequence is complete the Ready indicator will appear and the unit is fully operational D When the water reservoir it low the Add Water indicator will come on to warn that more water should be added for continued operation E When it is necessary to replace the water filter the Change ...

Страница 7: ...rfaces until ready to operate the fireplace see Figure 4 This will protect from dust contamination and scratches during installation 3 2 Fitting the Fireplace 3 2 1 Location of the Fireplace The fireplace may be installed at any indoor location However when choosing a location please keep in mind the following guidelines Install out of direct sunlight for maximum performance Select a suitable loca...

Страница 8: ...nter of the fire display area is properly located within the room as planned in advance 3 3 Preparation There is one power connection or two power connections if heater is used a water supply connection connection optional and a vent pipe connection optional that must be put in place by the installer Figure 7 The user controls are self contained and are accessed either by using the Settings Pad as...

Страница 9: ...P a g e 9 Figure 7 ...
Страница 10: ...ming Details Please reference the Display Window Centerline drawing Figure 6 above and the Installed Fireplace Illustrations Figures 8 9 to be sure the fireplace is properly centered in the room NOTE The fireplace becomes heavy when its water reservoir is full To prevent undue stress on the framing use a platform constructed from plywood to support the entire assembly before finishing For best per...

Страница 11: ...ed for extended boiler life 3 3 3 2 Water line connection When connecting to a fresh water supply use a polyurethane water line with a John Guest fitting connected to an in line ball valve 3 3 3 3 Manual fill option A water line is not mandatory for operation Manual fill is available and comes standard with each fireplace When the water supply container level gets low a warning is shown on the dis...

Страница 12: ... bottom support Then locate the Water Leak Sensor which is attached to the rear of the fireplace in a small plastic bag After removing the sensor from the bag slide it into the small slot located on the front right corner of the mat Be sure the two connecting wires are facing up to allow connection to the fireplace and face the printed circuit pattern down If the sensor gets wet it will trigger a ...

Страница 13: ...nit It is recommended that this tubing be joined to the water feed line by using a John Guest quick connect union supplied as shown in Figure 14 It is also recommended that a compression fitting with a shut off valve be fitted at the water source a ball valve of the type shown in the Figure 15 not supplied Note There is another water shut off valve that is accessible through the front of the firep...

Страница 14: ...ex 12 2 CU NM B W G or Solid Romex 12 4 CU NM B W G cable AC Circuit Breakers The AC breaker panel circuit protection is required to be 20A single pole circuit breaker 15A not allowed The auxiliary heater must be on a separate dedicated breaker Terminating AC Connections Once the wiring has been run between the breaker panel and the fireplace terminate see Figure 17 above the appropriate conductor...

Страница 15: ...he probes together and verify a reference reading for 0 Ohms or a very low value as shown in Figure 18 2 Connect the multimeter between the copper grounding bar and the green wire connection on the fireplace s AC input screw terminal as shown in Figures 19a and 19b Verify that the reading is 0 Ohms within 0 1 Ohms of the reference value previously noted Figure 18 Figure 19a Ground Bar Figure 19b A...

Страница 16: ...viously noted 4 Likewise connect the multimeter alternatively between the copper grounding bar and the side metal rear metal light bar and boiler metal parts of the fireplace Verify that the readings are within 0 1 Ohms of the reference value for each test If any of the reference readings are 0 2 Ohms or greater contact a factory representative before completing the installation Figure 20b Front P...

Страница 17: ...l stop 3 4 4 3 Construction Barrier After the fireplace is installed the drywall is finished construction is complete and there is no debris on the site remove the cardboard construction barrier from the front see Figure 21 Then carefully remove the protective film from the media bed by removing the tape holding it in place 3 4 5 Final start up procedure Make sure all connections and the fireplace...

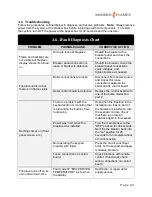
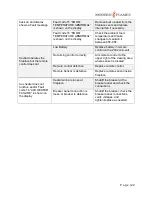
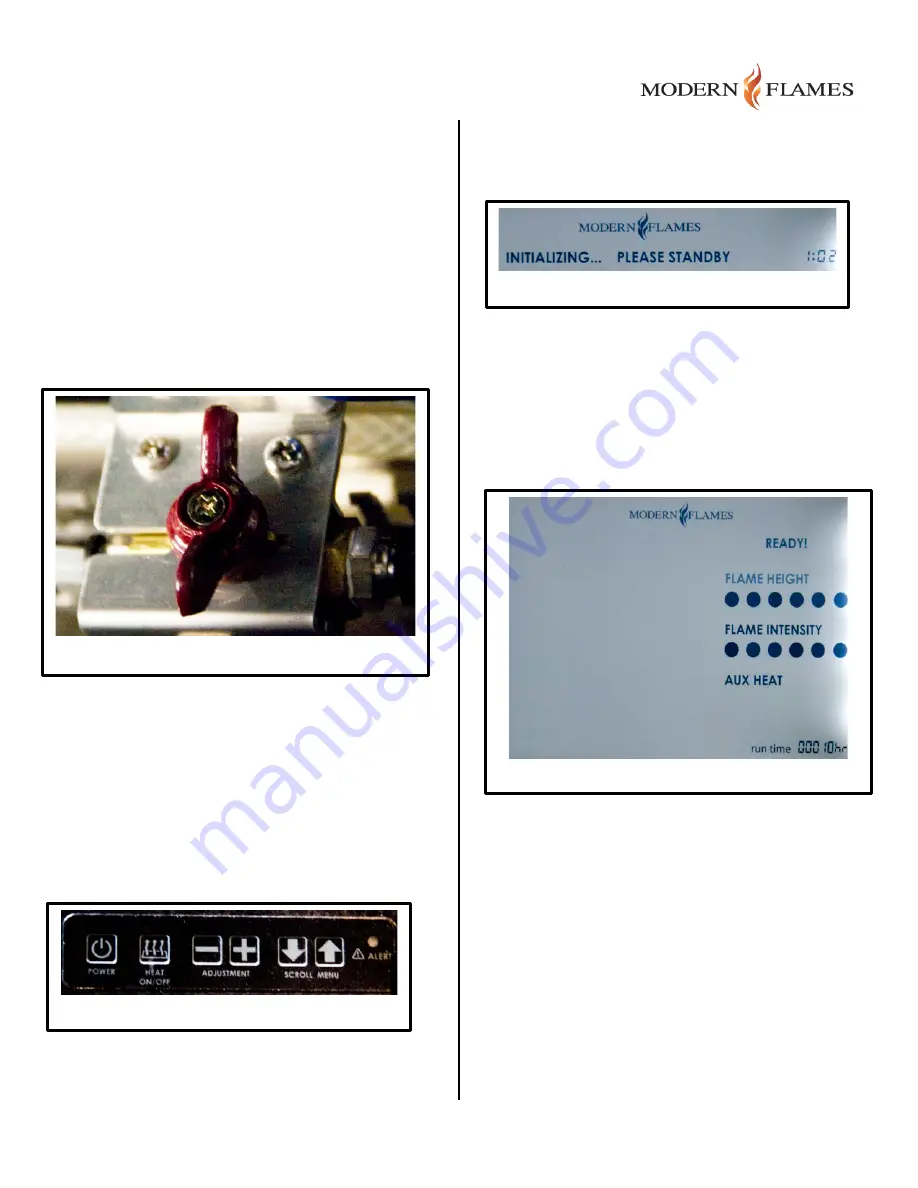
Страница 18: ... to start the fireplace It will begin in Warm Up mode the text Initializing Please Standby shown in Figure 25 is displayed A countdown timer displays time remaining while it warms up As soon as the fireplace is ready to operate after about 3 minutes you will see a Ready display see Figure 26 along with the total run time that has been accumulated for the fireplace After a short delay the simulated...

Страница 19: ...ive during operation 3 4 5 4 Draining the Reservoir Boiler Should it become necessary to drain the boiler and reservoir a T valve is positioned in the water line between the Steam Subsystem pump and the manifold inlet A recoil type drain hose of length 2m 5m is connected to the T valve and stored for use beneath the media bed To drain the water tank for winterizing the T valve see Figure 28 is use...

Страница 20: ...a life span of up to 20 years Q Can the fireplace be installed outside A No Please review the entire safety sections before installing this fireplace Q Does the fireplace need to be on a dedicated 20 Amp circuit A Yes and two dedicated 20 Amp circuits must be wired when the heater is used Q What thickness of drywall should be used for the recessed installation A 1 2 or 5 8 Q How often does the bat...

Страница 21: ...r and its control board Boiler control board is defective Replace the control board with one of the same model and part Nothing comes on front panel screen etc There is a problem with the keypad and or its mounting that is preventing the buttons from functioning Reposition the fireplace in the installation so that no part of the fireplace is interfering with the keypad controls Check that there is...

Страница 22: ...e battery in remote control with a 2032 coin cell Not aiming control correctly Aim remote control to the upper right of the viewing area where sensor is located Remote control defective Replace remote control Remote Sensor is defective Replace remote sensor inside fireplace Aux heater does not function and or Fault code 16 AUX HEATER FAILURE is shown on the display Heater wiring is loose at firepl...

Отзывы: