EN-11
Setting up your projector (continued)
When entire projected image
isn’t displayed within the screen
(E-ZOOM/SHIFT)
To adjust the projected image size and position, use
E-ZOOM/SHIFT function.
(See page 26 for menu setting.)
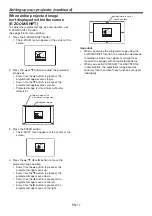
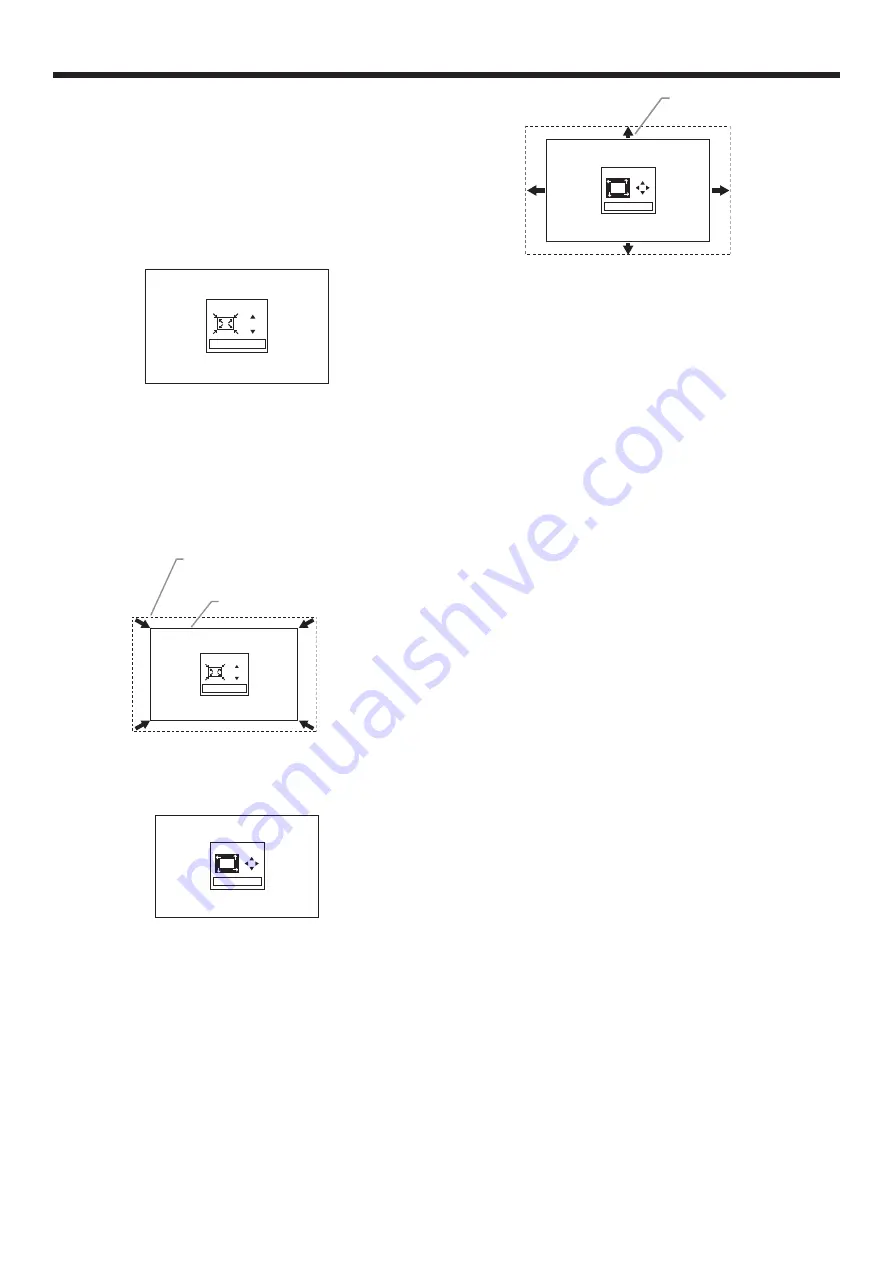
1. Press the E-ZOOM/SHIFT button.
• The E-ZOOM menu appears at the center of the
screen.
E-ZOOM
0
ENTER:E-SHIFT
2. Press the
or
button to adjust the projected
image size.
• Every time the
button is pressed, the
projected image becomes larger.
• Every time the
button is pressed, the
projected image becomes smaller.
• Projected image is a maximum as factory
default (0).
E-ZOOM
0
ENTER:E-SHIFT
Original image size
(= maximum image size)
Reduced image
3. Press the ENTER button.
• The E-SHIFT menu appears at the center of the
screen.
E-SHIFT
ENTER:E-ZOOM
4. Press the
,
,
or
button to move the
projected image position.
• Every time the
button is pressed, the
projected image moves up.
• Every time the
button is pressed, the
projected image moves down.
• Every time the
button is pressed, the
projected image moves to the left.
• Every time the
button is pressed, the
projected image moves to the right.
Adjustable in any of
four directions
E-SHIFT
ENTER:E-ZOOM
Important:
• When you reduce the projected image using the
E-ZOOM/SHIFT function, the resolution decreases.
In addition, stripes may appear or straight lines
may bend in images with complicated patterns.
• When you use E-ZOOM/SHIFT and KEYSTONE
in combination, the adjustable range becomes
narrower than that when these functions are used
individually.


