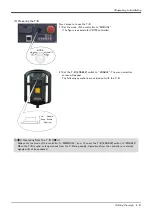
2Unpacking to Installation
Setting the origin 2-23
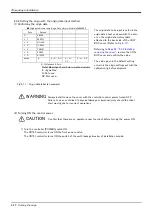
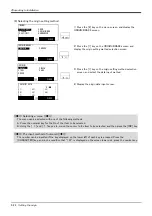
(5) Inputting the origin data
Input the value confirmed in section
.
The correspondence of the origin data label value and axis to
be input is shown in
.
Fig.2-12 : Correspondence of origin data label and axis
The method for inputting the origin data is explained below. The value shown in
will be input as an
example.
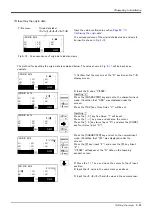
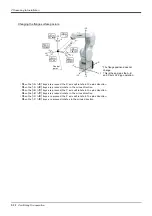
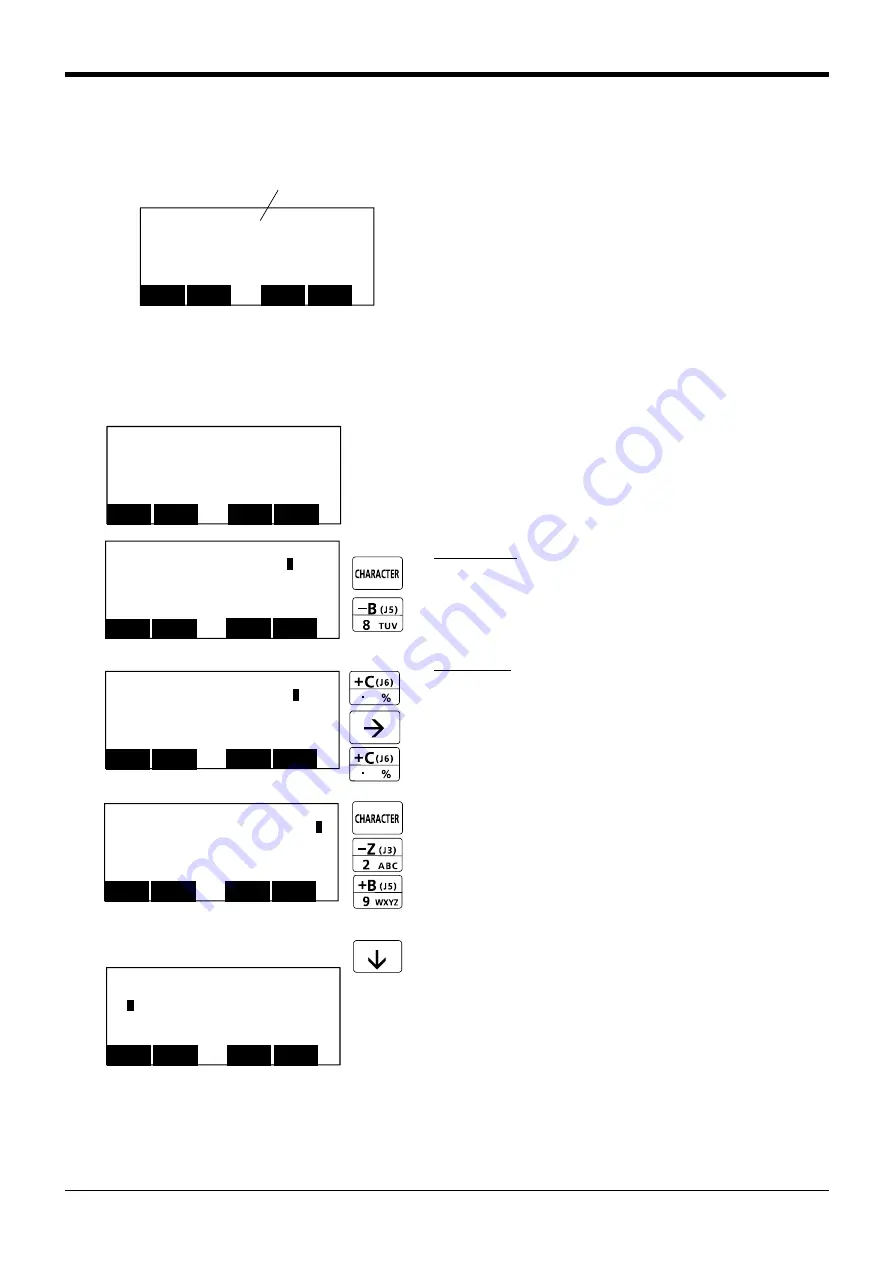
1) Confirm that the cursor is at the "D" position on the T/B
display screen.
2) Input the D value "V!%S29".
Inputting "V"
Press the [CHARACTER] key and set to the character input
mode. (Condition that "ABC" was displayed under the
screen)
Press the [TUV] key three times. "V" will be set.
Inputting "!"
Press the [ , % ] key five times. "!" will be set.
Press the [ → ] key once and advance the cursor.
Press the [ , % ] key twice (input "%"), and press the [PQRS]
key four times (input "S").
Press the [CHARACTER] key and set to the numeral input
mode. (Condition that "123" was displayed under the
screen)
Press the [2] key (input "2"), and press the [9] key (input
"9").
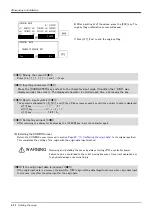
"V!%S29" will appear at the "D" data on the teaching
pendant screen.
3) Press the [ ↓ ] key, and move the cursor to the J1 input
position.
4) Input the J1 value in the same manner as above.
5) Input the J2, J3, J4, J5 and J6 values in the same manner.
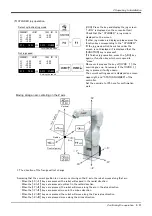
<ORIGIN> DATA
D:(■ )
J1( ) J2( ) J3( )
J4( ) J5( ) J6( )
J7( ) J8( )
CLOSE
123
Origin data label
(D,J1,J2,J3,J4,J5,J6,J7,J8)
T/B screen
,
,
<ORIGIN> DATA
D:(
V
)
J1( ) J2( ) J3( )
J4( ) J5( ) J6( )
J7( ) J8( )
CLOSE
123
<ORIGIN> DATA
D:(
V
!
)
J1( ) J2( ) J3( )
J4( ) J5( ) J6( )
J7( ) J8( )
CLOSE
123
<ORIGIN> DATA
D:(
V
!%S2
9
)
J1( ) J2( ) J3( )
J4( ) J5( ) J6( )
J7( ) J8( )
CLOSE
123
<ORIGIN> DATA
D:(
V
!%S29
)
J1( ) J2( ) J3( )
J4( ) J5( ) J6( )
J7( ) J8( )
CLOSE
123
:
:
:
<ORIGIN> DATA
D:(■ )
J1( ) J2( ) J3( )
J4( ) J5( ) J6( )
J7( ) J8( )
CLOSE
123
ABC
ABC
Содержание RV-13FM-SE Series
Страница 2: ......
Страница 138: ...Appendix 128 Configuration flag 6Appendix ...
Страница 139: ......

