EN-55
• Stop
button:
Stops the projection.
• Freeze
button:
Freezes the projected image.
• Menu
button:
Displays the menu window. (See the next step
for details.)
• Exit
button:
Exits the LAN Display System.
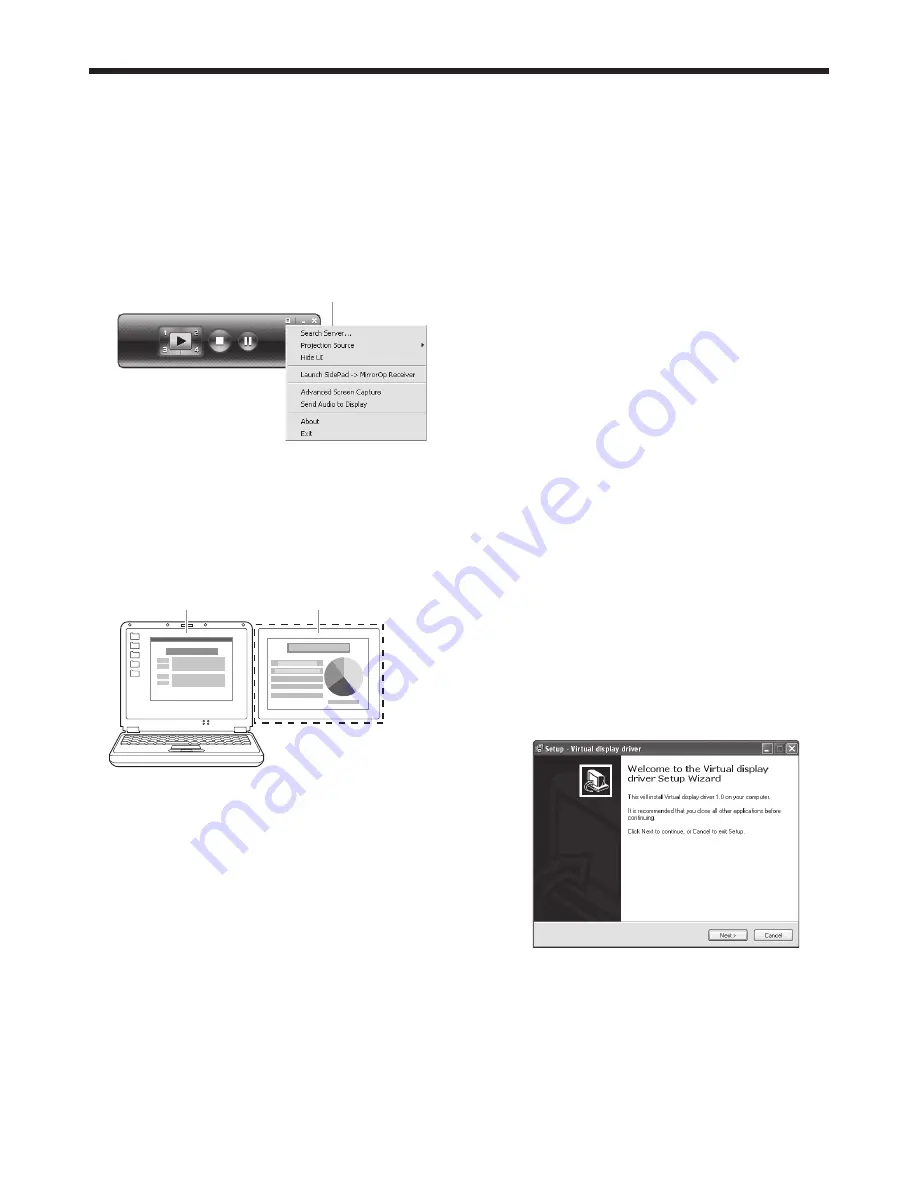
4. Click the Menu button on the main user interface to
display the menu window and select functions.
Menu window
• Search
Server
Searches for the projectors on the network.
If this function is selected, the LAN Display
projection will quit automatically.
• Projection
Source*
Chooses the computer screen to be projected,
main screen or virtual extended screen which is
activated by computer’s virtual display function.
Virtual extended screen
Main screen
Important:
• To project a virtual extended screen, the
attached Virtual display driver must be
installed.
• Hide
UI*
Hides or displays the main user interface on the
projected image.
• Launch SidePad (or Stop SidePad) - >
MirrorOp Receiver
Launches (or stops) SidePad.
• Advanced Screen Capture*
Enables or disables balloon tips and pop-up
windows.
• Send Audio to Display
Enable or disable the transfer of computer
sound.
• About
Displays the version information of the LAN
Display System.
• Exit
Exits the LAN Display System.
Important:
• The items marked with “*” are not available for
Mac OS X.
• When “Advanced Screen Capture” is enabled,
the computer mouse cursor may blink.
• To send Audio to Display, the Vertual Audio
driver must be installed in case the operating
system is Windows XP or Mac OS X.
Ending the LAN Display projection
5. Click the Exit button on the main user interface or
the menu window to exit the LAN Display System.
6. In case of the wireless LAN communication, unplug
the USB wireless LAN adapter from the projector.
Important:
• Do not switch the input source to USB VIEWER
while the computer images are projected. If
switched, the projection will be terminated.
• During wireless LAN communication, the projector
cannot communicate with the access point.
• Only infrastructure mode is available to wireless
LAN communication. Adhoc mode is not available.
Installing the virtual display driver
To project a virtual extended screen, install the Virtual
display driver as follows.
1. Double-click “Virtual display driver.exe” contained
in “C:\Program Files\LAN Display System”, and
start up the installer of the Virtual display driver.
2. The Setup window is displayed. Click [Next]
and operate according to the instructions on the
window.
3. When the installation has been completed, restart
the computer.
Advanced display utilities (continued)


