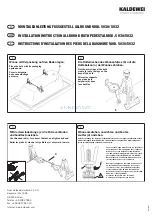
background image

0

13.

14.

15.

16.

17.

18.

_

+

0-5 secs

Set the toP control to hIGh.

the temperature will rise further.

Adjust  temperature  as  required. 

Flow rate will adjust automatically.

Press StoP and isolate power.

0-5 secs

the shower will purge water from 

its tank for a few seconds.

residual water may drain over 

a few minutes.

Power

Содержание Elite ST

Страница 1: ...These instructions are to be left with the user Uploaded on http www qssupplies co uk Document BY MIRA Installation and User Guide Pumped Electric Shower...

Страница 2: ...9 2 1 Electrical 13 2 2 Electrical checklist in detail 14 Installation 15 Mira Elite ST 15 Mira Logic Electric Shower Fittings 17 Commissioning 19 User Instructions 21 Using Your Shower 22 Fault Diag...

Страница 3: ...w adjustment The Elite ST must have its own separate cold water supply from the cistern to ensure correct operation The Mira Elite ST comes complete with a set of Mira Logic Electric Shower Fittings P...

Страница 4: ...thaw and then contact your installer before using again 1 6 There are no user serviceable components beneath the cover of this appliance Only a competent tradesperson should remove the cover If the c...

Страница 5: ...Electrical Contractors Association of Scotland ECAS 2 5 The plumbing installation must comply with the requirements of UK Water Regulations Bye laws Scotland Building Regulations or any particular re...

Страница 6: ...appropriate boxes to familiarize yourself with the part names and to confirm that the parts are included 1 Mira Elite ST 1 x Mira Elite ST 3 x Wall Plugs 1 x Compression Nut 1 x Olive 3 x Fixing Screw...

Страница 7: ...Seals 1 x Handset 1 x 1 25 m Flexible Hose 1 x Clamp Bracket Assembly 1 x Slide Bar 2 x Slide Bar End Caps 1 x Applicator 1 x Soap Dish Collar 2 Mira Logic Electric Shower Fittings 3 Documentation 1...

Страница 8: ...resetting thermal trip protection device designed to operate if the ambient temperatures become too high The maximum recommended ambient temperature for the Elite ST is 30 C 2 3 The following power r...

Страница 9: ...ff Positioned away from the ball valve with a 25 mm distance up from the base of the cistern This connection will prevent air and debris entering the shower supply 25 mm 1 2 The Elite ST is suitable f...

Страница 10: ...is designed to accept plumbing supplies from the top bottom or rear 1 7 Rear entry plumbing is accommodated without the need to recess the 15 mm inlet compression connector enabling the wall s surfac...

Страница 11: ...d This may reduce the life of the hose 1 14A hose retaining ring is supplied to prevent the handset from dropping below the spillover level of the bath or shower which could lead to contamination from...

Страница 12: ...is calculated from the table below to give you a minimum effective head of 80 mm which is necessary to produce a satisfactory shower in all conditions Example The example below is based on the diagra...

Страница 13: ...live or neutral cable cores 2 1 6 Electrical connections are tightly secured Do not strain terminal block 2 1 7 Plumbing supply completed before electrical supply is turned on Plumbing and Electrical...

Страница 14: ...mechanically protected 2 5 mm2 if mechanically protected 2 2 3 Supply cable refer to Electrical Checklist 2 2 4 As a guide only and in accordance with BS 7671 we recommend close circuit protection i e...

Страница 15: ...ON Do not drill into buried cables or pipes Drill and plug the three holes using the template Remove the cover and determine supply pipe position For rear inlet use soldered elbow Do not trap green wi...

Страница 16: ...not exert strain on the terminal block Make sure wires are clear of all mounting holes Refit the Service Tunnel and Cover Make sure they fit correctly Do not overtighten screws Do not use alternative...

Страница 17: ...tion first Button Position as shown to prevent back siphonage Depress button FULLY and assemble Clamp Bracket Release button and remove Applicator Slide the Soap Dish Hose Retaining Ring and the Soap...

Страница 18: ...hen fix the top Slide Bar support whilst pressing it down to keep the whole assembly together Fit the End Caps to the Slide Bar supports 5 6 7 8 Fit the Hose to both the Handset and the Shower Outlet...

Страница 19: ...is turned off at the mains Turn BOTTOM control to full cold Turn water supply fully on Switch on electrical supply Turn BOTTOM control to full cold Check for water leaks Turn TOP control to LOW The t...

Страница 20: ...to HIGH The temperature will rise further Adjust temperature as required Flow rate will adjust automatically Press STOP and isolate power 0 5 secs Theshowerwillpurgewaterfrom its tank for a few second...

Страница 21: ...21 Operation of the Mira Elite ST COLD Stop Start High Medium Low User Instructions...

Страница 22: ...r a few seconds before stopping Read the section Important Safety Information first _ Switch on electrical supply Press START button Set to desired position Allow 10 15 seconds for any temperature adj...

Страница 23: ...lease button and slide the Clamp Bracket assembly to the required position 4 2 Movethehandsettotherequired angle Adjusting the Clamp Bracket 3 Eco Turn the Spray Plate fully clockwise A reduced flow o...

Страница 24: ...pullcord or wall mounted switch Incoming water supply isolating valve turned down or off Turn isolating valve to fully on position No water or very low flow rate H o s e o r h a n d s e t sprayplate...

Страница 25: ...N Any ON ON Any ON ON Low or no flow Any ON ON Filter or water supply pipework restricted by a blockage or partial blockage Flush supply pipe Clean filter Any ON OFF H o s e o r h a n d s e t spraypla...

Страница 26: ...Tank and replace parts as required Any ON OFF Any ON OFF Service tunnel or cover not fitted correctly causing Start Stop button not to operate Check case inserts are cut and fitted correctly C h e c...

Страница 27: ...ctrical supply is turned off at the mains Remove the four screws and the Cover Press down on the filter cover and turn anti clockwise to release Remove the filter cover and filter Clean the filter and...

Страница 28: ...28 Dimensions Power Low Flow Low High Temperatur e Start Stop Medium 340 mm 344 mm 659 mm 266 mm 95 mm...

Страница 29: ...OWN BROWN BLUE GREEN GREEN ORANGE BLACK STOP START INLET CONNECTOR TANK CONNECTION LOW FLOW NEON POWER ON NEON THERMAL TRIP PRESSURE POWER SELECTOR SWITCH SOLENOID VALVE BLACK BLACK BLUE C 0 1u BLUE B...

Страница 30: ...nnector 1563 504 Heater Tank 9 8 kW 1563 507 Flow Valve Assembly 1563 509 Switch Assembly 1563 604 Cover Assembly 1563 605 Component Pack components identified A 1563 606 Terminal Block Assembly 1563...

Страница 31: ...30 V Mira Elite ST Spare Parts Diagram 215 12 428 62 416 38 416 41 416 43 416 48 428 64 428 59 872 28 872 01 1563 516 416 51 1563 504 1563 507 1563 509 1563 604 1563 606 1563 607 B A A A A A A B B B B...

Страница 32: ...25 m chrome 450 03 Adjuster Ring 450 06 Clamp Bracket Assembly white 450 08 Service Pack O seals components identified A 450 17 Slide Bar Wall Fixing Pack components identified B 450 26 Slide Bar Sup...

Страница 33: ...nt the backflow or back siphonage of potentially contaminated water through shower controls which are fitted with a flexible hose as part of the outlet shower fitting Available as an optional accessor...

Страница 34: ...34 Notes...

Страница 35: ...35 Notes...

Страница 36: ...36 1056830 W2 B Kohler Mira Limited July 2006 Customer Service UKAS...

Отзывы: