20
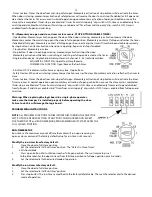
MID-STOP SETUP:
Mid-stop feature can be used to open the door to a preset point prior to full open position.
To Activate mid-stop:
1.
Close the door to full close position.
2.
Set the selector dial to “Mid-stop” position. “Mid-stop” LED starts blinking.
3.
Press open push button. Door opens. Once the door reaches the desired mid-stop
position, stop the door by activating stop push button.
4.
Set the selector dial to the desired mode of operation.
Note: When door opens to the programmed mid-stop position, “Mid-Stop” LED will illuminate.
To De-activate the mid-stop position:
1.
Close the door to full close position.
2.
Set the selector dial to “Mid-stop” position.
3.
Press the stop button, Mid-stop is de-activated.
Modify mid-stop position:
To modify the current mid-stop position, follow the same steps to activate mid-stop. The new mid-stop position will
override the old mid-stop position.
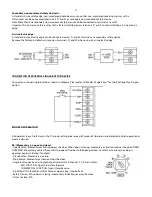
TIMER TO CLOSE SETUP:
Timer to close is enabled only in TS and T modes of operation. To adjust the timer value
turn POT1 clockwise to the desired value. The minimum value for timer to close is
3 seconds and the maximum value is 300 seconds.
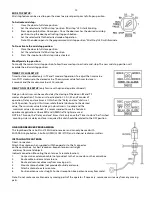
DELAY ON CLOSE SETUP
(only for use with optional apartment board):
Delay on close timer can be used to delay the closing of the door in B2 and TS
modes of operation. This timer is de-activated in C2, D1, E2 and T modes of
operation. Delay on close timer is OFF when the “Delay on close” dial is set
to OFF position. To adjust this timer, rotate the dial clockwise to the desired
value. The minimum value for delay on close timer is 1 second and the
maximum value is 60 seconds. It is recommended to use this feature in
apartment applications where RED and GREEN traffic lights are used.
NOTE: In TS mode, the “Delay on close” timer starts only once the “Timer to close” has finished
counting. Unless a delay on close is required this dial should be rotated to the OFF position
ON-BOARD RECEIVER PROGRAMMING
This logic board has a built-in 372 MHz radio receiver and can only be used with
MICANAN single button, 3-button (OPEN/CLOSE/STOP) and 3-channel radio transmitters.
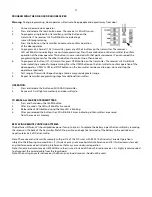
INSTALLING THE ANTENNA
Direct Connection:
Attach the antenna when supplied with the operator to the F connector
on the control box. For best reception, keep antenna wire straight
and away from metal objects.
Indirect connection (Mounting the antenna at a remote location):
1.
Connect coax extension cable (not provided) to the F connector on the control box.
2.
Route cable inside metal enclosure.
3.
Route and secure cable away from moving parts.
4.
Mount antenna holder (not provided) outside enclosure.
5.
Attach antenna to extension wire.
6.
Position antenna wire straight. For best reception, keep antenna away from metal.
Note: Do not route coax cable near any moving parts of the operator. If necessary, secure coax wire away from any moving
parts.
Содержание PRO-GH
Страница 1: ...INSTALLATION AND INSTRUCTION MANUAL MODELS PRO GH PRO GHC AUG 2010...
Страница 32: ...32...
Страница 33: ...33 33...
Страница 34: ...34...
Страница 35: ...35 35...
Страница 36: ...36 36...
Страница 37: ...37...
Страница 38: ...38...
Страница 39: ...39...
Страница 40: ...40...
Страница 41: ...41...
Страница 42: ...42...
Страница 43: ...43...
Страница 44: ...44...

