Scribe SA Standalone Series Operator’s Guide
Document Revision: 03/24/06
Page 51
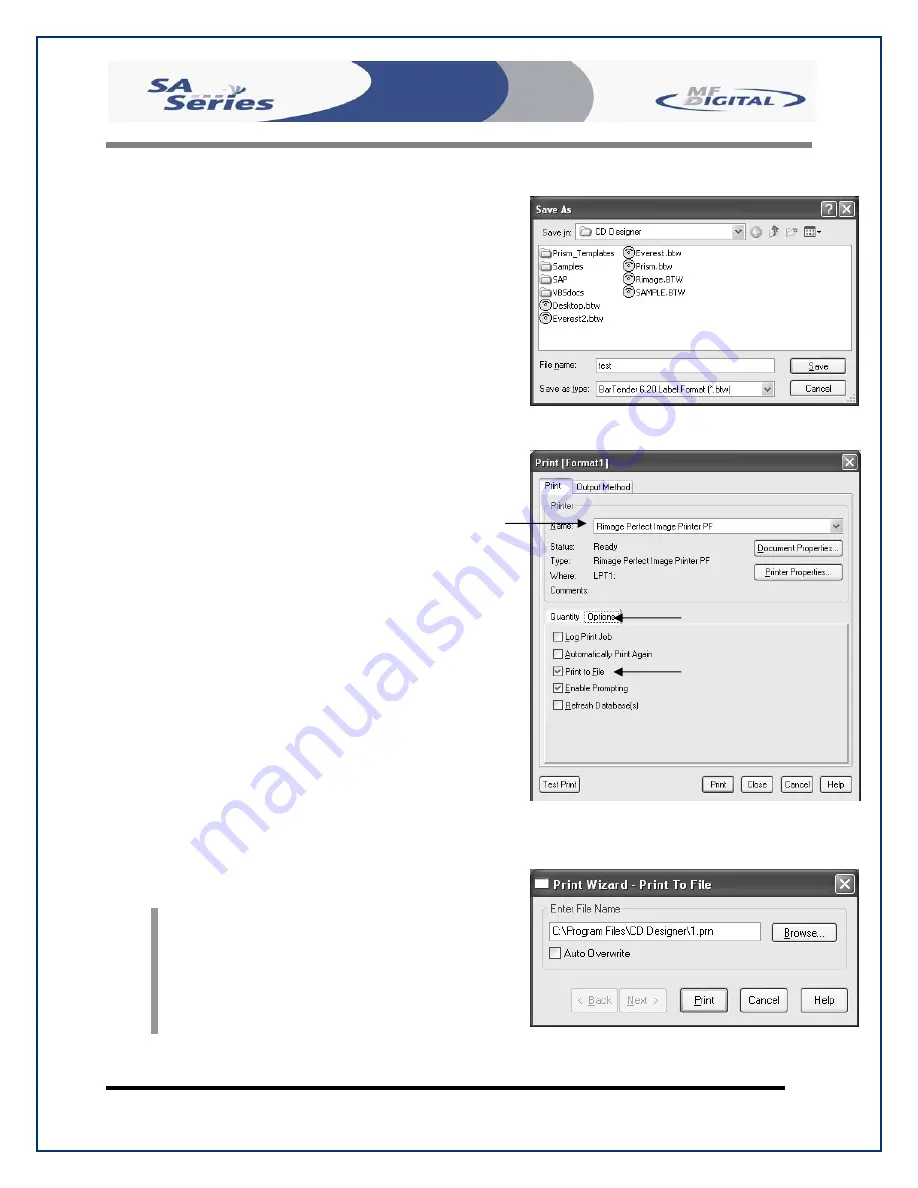
Creating .prn Files (Prism Plus Printer)
(fig. B)
•
Create a .prn by printing the document
to a file instead of directly to a printer.
You will be prompted to specify the
filename and location. This puts the
document in a format that the
Scribe SA
Standalone
uses for printing. Follow the
instructions below to create a .prn.
•
When a label file is saved in Rimage
CD Designer it is given a .BTW
extension.
This format is not usable
by the Scribe SA Standalone
. You
will however want to save your label as
a .BTW for future editing
(fig. A)
.
•
To create a .prn you must use the
feature after you have created your
label.
•
Make sure that the
Perfect Image
Printer PF
printer is selected in the
name box.
•
Select the
Print to file
option, under the
options tab
(fig. B)
and click PRINT.
•
Give your file a name
(fig. C)
.
•
Select the Labels folder that you will
use as your default, and print file to this
folder
(fig. C)
.
•
After creating PRN file, give your PRN
file the name 1.prn and burn this file to
a CD. A second idea is to use the
Command Module Application (SA
Client and transmit your PRN file
across your network, see
Utilizing the
Scribe SA Standalone Client
Application.
(fig. A)
(fig. B)
(fig. C)


