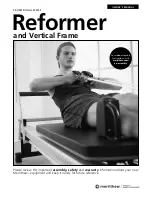


Reformer Owner’s Manual
12
Retractable Rope System
Prior to use, confirm that the retractable rope system is in good
order and rope [24] is secured through self-locking cleats [45] and
rope retaining hook [48]. (See Assembly Instructions on page 9.)
Springs
The number of springs [28] attached to the gearbar [8]
determines the total amount of resistance. Reformers are
shipped with High-Precision Springs (one 25%, one 50%,
and three 100%-tension springs).
See page 24 for more
details and available spring packages.
Adjusting Springs
w
Take care when attaching and detaching springs.
w
For safety, place one hand on gearbar.
w
Firmly grasp spring, (not spring ball), and stretch
it to hook to or unhook from gearbar.
w
Ensure ball rests securely in concave indentations of gearbar.
Headrest
adjustment block
The headrest [16] adjusts to three positions: flat, half-raised
or fully raised. It should be adjusted on an individual basis to
ensure neck and shoulders are comfortable and tension-free
when lying supine.
In exercises where the hips are lifted higher than the shoulders,
the headrest should be flat – even when beginning from a supine
position. In some exercises it is raised to provide a brace for the feet.
Adjusting the Headrest
w
With no weight on headrest, lift it and hinge adjustment block
to rest securely onto wooden edge of carriage.
Shoulder Rests
Shoulder rests [17] are removable for specific exercises or
for stacking of the Reformer (SPX Max only).
Attaching the Shoulder Rests
w
Slide square posts into receptacles in the carriage [15].
Padded sides face footbar [7] and handles are positioned
closest to edges of carriage.
w
To remove, pull directly up on handles.
NOTE:
To avoid injury, do not pull shoulder rests upwards
while standing on or over the Reformer. These are made to fit
snuggly. To remove them may take force. Keep body, particularly
face and head positioned to the side and not directly above
the shoulder rests.
Pulley Posts
We recommend a starting height of the pulleys [26] at the same
height as the top of the shoulder rests [17]. You may wish to
adjust based on the size of the client or exercise being performed.
Adjusting the Pulley Posts
TRADITIONAL
w
Loosen star knobs [36] to adjust pulley posts [27] to desired
height.
w
Ensure eyehooks [52] on top of pulley posts are parallel to rails
[14] and the posts are at the same height.
w
Tighten star knobs securely.
QUICK-SET
w
Pull out plunger button [50] and adjust pulley posts
to desired position.
w
Release the plunger button and lock the pulley post in place.
w
Ensure the plunger button has reset fully into the slot.
Removing the Pulley Posts
w
Loosen star knobs [36] or pull out plunger buttons [50]
(where applicable) and remove pulley posts from receptacles.
Setting Up the Reformer
cont’d
ASSEMBLY & SET-UP


