26
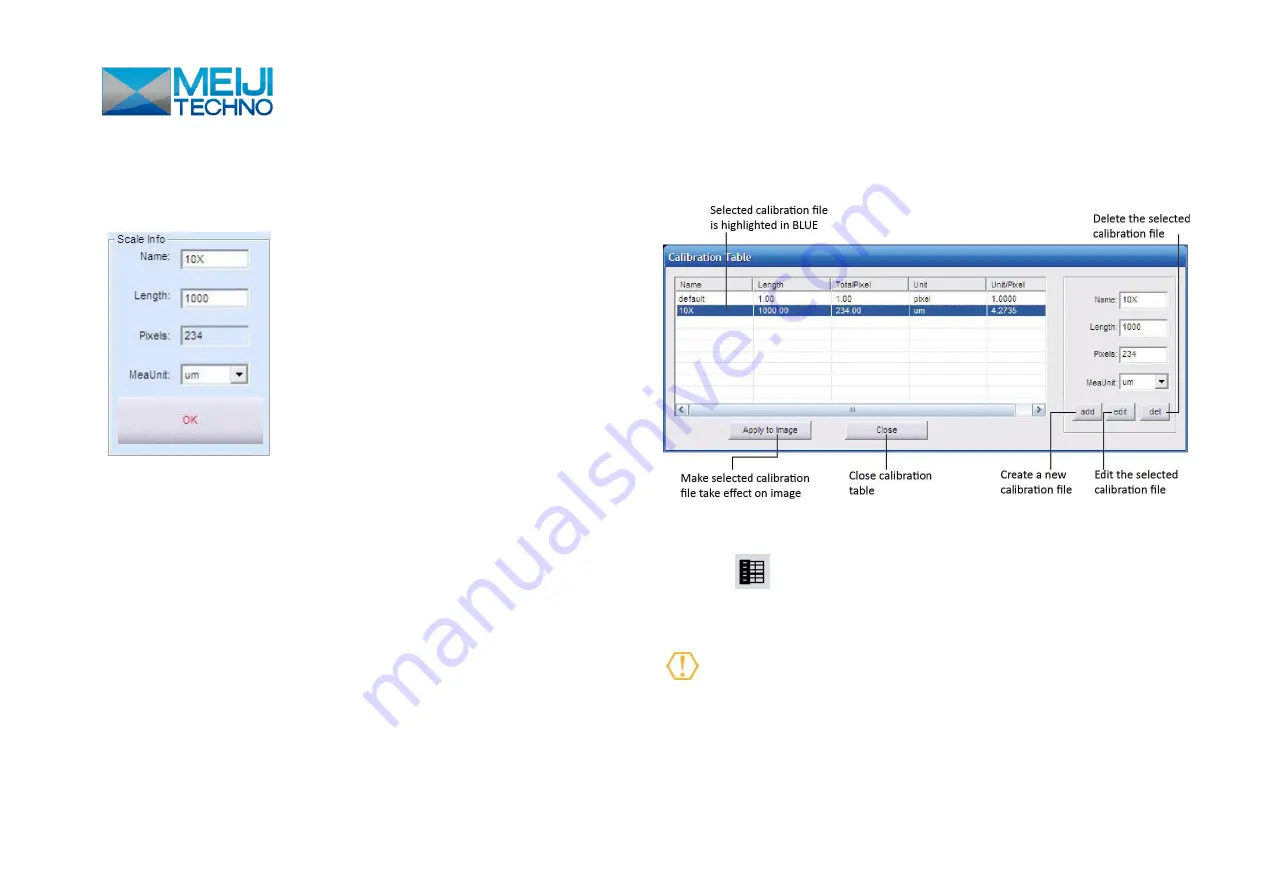
the calibration scale unit is 0.1mm; the Measure Unit is selected as
µm; and the reference length is 10 scale units, so the length should
be 10 x 0.1mm x 1000 = 1000 µm.
6. Click [OK] to confirm the calibration. The new calibration file
named “10X” is created in the [Calibrate Table].
Calibration Table
Click
[Calibrate Table] to open the calibration table.
Select the correct calibration file for current image
measurement.
Using the WRONG calibration file will make the
measurement result
innacurate
. Please make sure the calibration
file is correctly corresponding to the current image. Hence, it is
Содержание HD1500MET
Страница 22: ...22 Measurement List ...


