background image


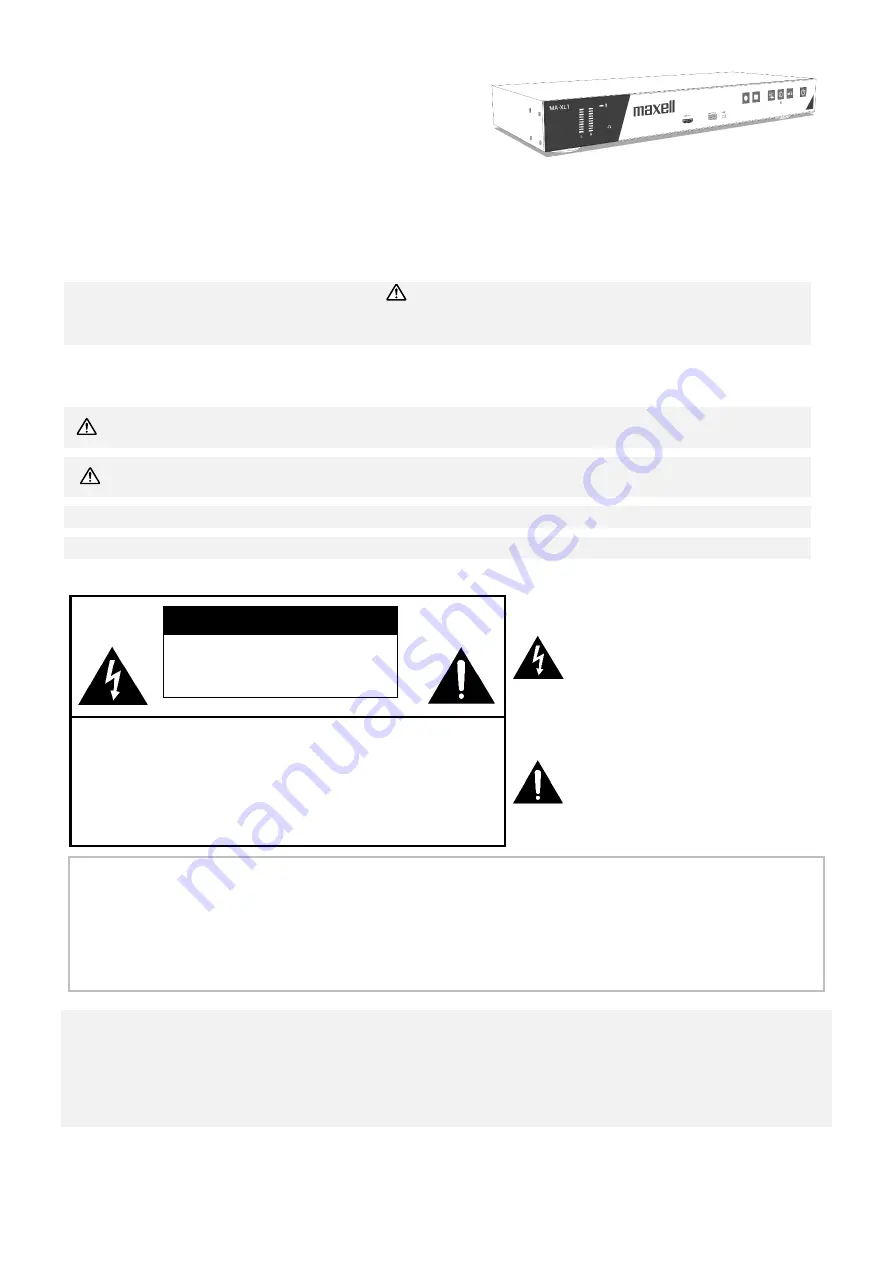
Lecture Capture Station 

MA-XL1 
 

User’s Manual (

detailed) 

Operating Guide 


Thank you for purchasing this Lecture Capture Station. 
Please read this manual thoroughly before using the product. 
 

Our website: Please see the attached sheet


WARNING


• Before using this product, please read all manuals for this product. Be sure to read “Safety Guide” 

first. After reading them, store them in a safe place for future reference. 


About this manual


Various symbols are used in this manual. The meanings of these symbols are described below. 

WARNING


This symbol indicates information that, if ignored, could possibly result in personal 
injury or even death due to incorrect handling. 


CAUTION


This symbol indicates information that, if ignored, could possibly result in personal 
injury or physical damage due to incorrect handling. 


NOTICE


This entry notices of fear of causing trouble. 




Please refer to the pages written following this symbol. 


Do not open 


CAUTION 

RISK OF ELECTRIC SHOCK 

DO NOT OPEN


The lightning flash with an 
arrowhead within a triangle is 
intended to tell the user that 
inside this product may cause 
risk of electrical shock to 
persons. 

CAUTION / TO REDUCE THE RISK OF ELECTRIC SHOCK 

DO NOT REMOVE COVER(OR BACK) 

NO USER-SERVICEABLE PARTS INSIDE 

REFER SERVICING TO QUALIFIED SERVICE PERSONNEL 


The exclamation point within a 
triangle is intended to tell the 
user that important operating 
and/or servicing instructions are 
included in the technical 
documentation for this 
equipment. 


[

NOTE

]   

• The 

information in this manual is subject to change without notice. 

• The illustrations in this manual are for illustrative purposes. They may differ slightly from your 

product. 

• The manufacturer assumes no responsibility for any errors that may appear in thi

s manual. 

• The reproduction, transfer or copy of all or any part of this document is not permitted without 

express written consent. 


NOTICE 

When recovering the product for repairing or replacing the product, the data, account ID, 

account password, and setting data saved in the HDD will be deleted immediately after 

recovery, for the purpose of protecting personal information. Since it is impossible to restore 

the data saved in the HDD, be sure to back up the necessary data and settings.


If we recover the product, you are deemed to have agreed to the above.


Содержание MA-XL1

Страница 1: ...o tell the user that inside this product may cause risk of electrical shock to persons CAUTION TO REDUCE THE RISK OF ELECTRIC SHOCK DO NOT REMOVE COVER OR BACK NO USER SERVICEABLE PARTS INSIDE REFER SERVICING TO QUALIFIED SERVICE PERSONNEL The exclamation point within a triangle is intended to tell the user that important operating and or servicing instructions are included in the technical docume...

Страница 2: ... Administrator Inc in the United States and other countries Trademark PJLink is a trademark applied for trademark rights in Japan the United States of America and other countries and areas The Bluetooth word mark and logos are registered trademarks owned by Bluetooth SIG Inc and any use of such marks by Maxell Ltd is under license Other trademarks and trade names are those of their respective owne...

Страница 3: ...erview of the Web Interface 47 Administrator 48 Media I O 48 Video inputs 49 Network camera manager 54 PTZ control port 55 Audio 55 Video 57 Recording 57 Streaming 60 Content 62 Theme 63 Storage 64 Scheduler 64 Upload 67 Conference 68 System 72 System settings 72 Network 75 Configuration 76 Service 78 Display 79 Account 80 Online Director 81 Director Page 81 Recording Controls 84 Cameraman Page 92...

Страница 4: ...herever You Are By Streaming Or Uploading The Lecture Operate with your smartphones or tablets Checking the contents of package Please see the Contents of package section in the User s Manual concise which is a book Your product should come with the items shown there Contact your dealer immediately if any items are missing NOTE Keep the original packing materials for future reshipment Be sure to u...

Страница 5: ...ar 19 7 Spacers 8 Exhaust vent 9 Intake vents WARNING Do not touch around the exhaust vents during use or just after use since it is too hot CAUTION Maintain normal ventilation to prevent the product from heating up Do not cover block or plug up the vents Do not place anything that can stick or be sucked to the vents around the intake vents ...

Страница 6: ...1 port 6 HDMI IN 2 port 7 HDMI IN 3 port 8 HDMI IN 4 port 9 MONITOR OUT port 10 HDMI OUT port 11 AUDIO IN port 12 MIC IN port 13 AUDIO OUT port 14 Front audio output port 15 AUDIO IN port Balanced 16 AUDIO OUT port Balanced 17 USB TYPE A port x2 18 USB TYPE A port 19 USB TYPE A port Interactive 20 USB TYPE B 1 port 21 USB TYPE B 2 port 22 WAN port 23 LAN 1 port 24 LAN 2 port 25 LAN 3 port 26 CONTR...

Страница 7: ...acket to the main unit be sure to use the provided screws Please follow the manual of the rack to mount Please take a distance of more than 2 cm between the product and the wall Attach rack mount bracket 1 Attach one of the brackets to the 4 screw holes at the side of the product Using 4 screws in accessory box to fix the bracket on the side of the product 2 Do the same steps to complete another s...

Страница 8: ...the product anyplace where it may get wet Getting the product wet or inserting liquid into the product could cause fire electric shock and or malfunction of the product Do not place the product in a bathroom or the outdoors Do not place anything containing liquid near the product Do not place the product where any oils such as cooking or machine oil are used Oil may harm the product resulting in m...

Страница 9: ...g a connector to a port make sure that the shape of the connector fits the port Tighten the screws to connect a connector equipped with screws to a port Use the cables with straight plugs not L shaped ones Before connecting this product to a network system be sure to obtain the consent of the administrator of the network Do not connect the WAN LAN port to any network that might have the excessive ...

Страница 10: ... computer consult the computer s manual and check the compatibility of the signal level the synchronization methods and the display resolution output to the product Some signal may need an adapter to input this product Some computers have multiple screen display modes that may include some signals switch are not supported by this product Continued on next page ...

Страница 11: ...supported monitor without passing through this product The HDMITM supports the following signals Video input signal 1920X1080p 60 50 30 25 24Hz 1280X720p 60 50Hz 1024X768p 60 70 75Hz Video output signal 1920X1080 60Hz Audio signal Format Linear PCM Sampling frequency 48kHz 44 1kHz 32kHz This product can be connected with another equipment that has HDMI connector but with some equipment the product...

Страница 12: ...nsent of the administrator of the network Do not connect the WAN LAN port to any network that might have the excessive voltage Connect detachable terminal block When using balanced audio or DIDO use the supplied detachable block connector Loosen the screw of block connector and insert the cable into the port Then tighten the block connector screw to fix the cable Connect the block connector to the...

Страница 13: ...A 5 SDI IN x 3 HD SDI input 6 Rear HDMI IN x 3 HDMI input source 7 COMPUTER IN VGA input source for PC 8 MONITOR OUT VGA output for display 9 HDMI OUT HDMI output for display 10 AUDIO IN Line audio input 11 MIC IN Mic audio input 12 AUDIO IN Line audio output 13 AUDIO IN L R Differential line audio input Refer to below chart for the pin define 14 AUDIO OUT L R Differential line audio output Refer ...

Страница 14: ...RJ 45 Ethernet connectors for network camera input source accessing to web management setting pages and projector ON OFF 20 CONTROL 1 Mini DIN connector for camera Refer to below chart for the pin define 21 CONTROL 2 Mini DIN connector for other devices Hitachi Maxell Projector Computer etc 22 DIDO Refer to below chart for the pin define 23 Bluetooth antenna port Antenna for Bluetooth speaker micr...

Страница 15: ...15 Product connection continued RS 232 DIDO Terminal block Pin No I O Description 1 GND 2 O H while recording L while recording stop 3 Reserved 4 Reserved 5 Reserved continued on next page ...

Страница 16: ...connected the pin assignment may be different Before connecting please refer to the manual of the device to be connected and check the pin assignment CONTROL1 port of the product RS 232 port of the camera CONTROL2 port of the product CONTROL2 port of the product CONTROL port of the projector ...

Страница 17: ...ne Never modify the power adapter and the power cord Only plug the power cord into an outlet whose voltage is matched to the power cord The power outlet should be close to the product and easily accessible Unplug the power cord for complete disconnection Do not distribute the power supply to multiple devices Doing so may overload the outlet and connectors loosen the connection or result in fire el...

Страница 18: ...18 Connecting the power supply continued NOTICE Do not unplug the power cable during recording There is a possibility of breaking the recorded data and breaking the product ...

Страница 19: ...For details refer the manual of the security tool WARNING Do not use the security slot to prevent the product from falling down since it is not designed for it CAUTION Do not place anti theft chain or wire near the exhaust vents It may become too hot NOTE The security bar is not comprehensive theft prevention measures It is intended to be used as supplemental theft prevention measure ...

Страница 20: ...ed devices prior to the product After turning off the power if the indicator is light in red it is possible to turn on the power This product has the function that can make the product automatically turn on off Please refer to section System setting 72 items of the System settings Turning off the power 1 Press the POWER button on the product The message Shutdown appears on the screen for about 10 ...

Страница 21: ... menu bar will not be displayed Also when starting this product for the first time connect the mouse to the front USB port to calibrate the touch module For detail refer to section Calibration of Touch Module 22 Connect audio devices both input and output ex Speaker Microphone Use RJ45 to connect WAN port with the external network Connect camera via HDMI SDI RJ45 Connect several cables to reserve ...

Страница 22: ...Interactive finding a USB mouse and insert into the front USB port Press information button on the front panel to call information dialog Moving the mouse cursor to click on calibration icon Then go through the calibration process with your figure or the dedicated optical pen of the touch module After all the settings finished start enjoy the easy interface of the product Mirror placement of all i...

Страница 23: ...ng RJ45 cable to connect PC with the LAN port of the product Set the PC s IP address to 192 168 11 XX Then open the web browser and input 192 168 11 254 as the URL to access the product setting page Log in web page with default username admin and password lcsadmin then entering the system Administrator webpages XX is any number between 1 and 253 ...

Страница 24: ...n web page with default username admin and password lcsadmin then entering the system Administrator webpages Language switching The product automatically detects PC s system language and selects the coordinate language to display The product also provides Language options on the top right corner of the webpage for changing NOTE Be sure to change the user name and password of the Administrator Onli...

Страница 25: ...VIF before the setting Then check if the RJ45 is well connected with the product LAN port and the camera is ON Check Camera s product label and remember the MAC address of the camera Come back to Administration webpage Go to Media I O Network Camera Manager Press Refresh button The network camera should be listed in the table and using MAC address to identify the one in use Press Login button and ...

Страница 26: ...Video Source drop down list select Network Camera Then you will be able to assign the correct camera as the video source via IP address and press Apply Press icon to enter advanced configuration page and check the video source For details of advanced configuration please refer to section Content Group Cam1 Group Cam2 Group 51 ...

Страница 27: ...another product already set as the internal conference server To join into the same contact list input the IP address of the product which is set as the internal server When the connection built the conference icon in the toolbar will turn from disable to be available Scroll down to find Encoder Settings Change the video compression profile if necessary Then Go to System System settings find Devic...

Страница 28: ...28 Settings of the conference function continued ...

Страница 29: ...rest one or the strongest one or the first one would be paired in pairing mode The product s Bluetooth module can pair with only one Bluetooth device at a time And only one paired device could be kept for auto connection next time Bluetooth Auto connection When any of the Bluetooth devices disconnected the product would auto connect to the remembered Bluetooth device The retry interval is 5 second...

Страница 30: ...w the recording time Page Up Control presentation slide page up Icons appear only when the Presentation tool connected with the product via PC For details refer to section Presentation tool 101 If it s not in full screen mode click either on Page Up icon or Page down icon could enter full screen mode Page Down Control presentation slide page down Snapshot function Allow users to do snapshot of the...

Страница 31: ... Besides during the conferencing mode it also allows users to select the video sources from the remote site Furthermore the whiteboard groups offer 4 types for selection Use video switch icons to choose target video source and show on the display for sharing In addition icons that were not assigned are grayed out You can also switch video by using the video switch button on the front panel of the ...

Страница 32: ...es to show on the display device HDMI 1 2 3 4 SDI 1 2 or IP camera encoder for selection Channel 3 group for Camera 2 Select one of the local camera sources to show on the display device SDI 3 or IP camera encoder for selection Remote Sources group Select one layout of the remote sources to show on the display device Totally 12 layouts for selection For detail refer to section Conference 39 Whiteb...

Страница 33: ...nt recording video from the start recording time Existing files all the videos saved in assigned storage could be selected and playback After click snapshot preview or existing video icons a dialog window would pop up to show Image List or Video List Using page up and page down to review Image List or Video List and select the folder file you want to playback continued on next page ...

Страница 34: ...list Click to jump to different folder index page Current recording video While recording playback current recording video from start time Not recording playback latest saved video file Existing videos Show all videos saved in hard disk drive 4 videos in one page Video list Dialog Choose any file in the list to playback Show Thumbnail Date Start End time Video duration Page up file list page up Pa...

Страница 35: ...rst Image Previous image Show previous image Next image Show next image Last Image Jump to the last Image Folder information Show the date when the folder built Image number Show the current image number from total images in the folder Annotation toolbar Eraser Eraser the part mouse move over Clear all Clear all the annotation on playback mode Pen color Change color to white black yellow blue gree...

Страница 36: ...36 Playback continued Video playback mode continued on next page ...

Страница 37: ...urce while playback Only available if the recording video include individual source files Last Index Skip to last Index time stamp to playback Play Pause Playback chosen video While the video is playing click to pause and click again to resume Next Index Skip to next Index time stamp to playback Time bar Show playback progress in bar Click any point on the bar will jump to correspondent time Time ...

Страница 38: ...nu ball Toolbar will flash one time to show captured Record Start recording Click to Pause while recording Recording icon on toolbar change to yellow while recording Pause Click to resume recording Stop Stop recording Layout selection Click to select recording layout Single source Display content Picture in Picture Display content big Camera 1 small Picture by Picture Display content Camera 1 Trip...

Страница 39: ... front USB storage If front USB storage is FAT32 format the maximum file size is 4GB If front USB storage is NTFS format maximum recording time would be based on USB storage free space recording profile Recording will be stopped under below conditions Remaining time is zero HDD or front USB storage cannot be access HDD or front USB storage cannot be read write Conference The product provides an ea...

Страница 40: ...all is waiting for acceptance the product would keep playing a ring tone If anyone is in a conference call in the list you cannot call out If the call doesn t be accepted within 15 seconds the dialog will disappear and the ring tone will stop After the call been accepted the ring tone would be stopped and a bar shows the remote name at the top area of the display an icon shows when collaboration i...

Страница 41: ...ote content Remote playback Play Remote content Remote CH1 B Local content Local CH1 B Remote camera Remote CH2 b Local camera Local CH2 b Local content Remote content Local CH1 Remote CH1 A B Remote content Local content Remote CH1 Local CH1 A B Local content Remote camera Local CH1 Remote CH2 A b Remote content Local camera Remote CH1 Local CH2 A b Local camera Remote content Local CH2 Remote CH...

Страница 42: ...re Left Local content Right Remote content Local content remote camera 1 Local CH1 Remote CH2 Picture by picture Left Local content Right Remote camera 1 Local camera 1 remote content Local CH2 Remote CH1 Picture by picture Left Local camera 1 Right Remote content Local camera 1 remote camera Local CH2 Remote CH2 Picture by picture Left Local camera 1 Right Remote camera 1 Local camera 1 remote ca...

Страница 43: ...nnotations Eraser Eraser the part mouse move over Clear all Clear annotation on display Long click 2 sec Could pop out dialog to confirm if clear all annotation for each input source Pen color 8 colors Change color to white black yellow blue green red orange purple Pen width 4 sizes Pen 3 6 9 12 pixels Eraser 16 32 48 64 pixels Default Pen size 3 pixels Default Eraser size 64 pixels NOTE The produ...

Страница 44: ...e white Information Button Push the Information button on the product front panel could show device information and allow device manager to do VGA H position adjustment HID calibration USB control switch and power off Info List Item Description Host Name For network management use Device Description ID to show on conference contact list IP Address For accessing to the web control interface Model S...

Страница 45: ...k this icon HID Calibration icon See below illustration VGA H Adjust icon Adjust the VGA input H offset position Adjust the VGA input H offset phase Close icon Close information dialog HID calibration some of the interactive projector touch monitor need to be calibrated before use Use USB mouse device to click the calibration icon to start First appears the Touch Module list select one and then st...

Страница 46: ...cter string after Content Information Title Organization Department Event_date Semester Topic Level Audience Room Category Presenter Section Description 4 Insert the USB storage into the product front USB port The product will recognize the data with pre defined format and import the data to combine with recording file and show in video manager UI 5 After the product read and confirm the data a di...

Страница 47: ...t username director and password lcsdirector This user also could access to Video Manager web pages and recording related pages in administration Video Manager If you only need to access to the recordings log in Video Manager with default username video and password lcsvideo Log in Authorization Administrator Online Director Video Manager Administrator V Default page V V Online Director V Video se...

Страница 48: ... configuration file For details on backing up the configuration file refer to section Configuration 76 Media I O Media I O settings help you assign video inputs to each video channel camera authentication PTZ control setting and audio related adjustment The functions within Media I O include the following Item Description Video inputs Select video source to do settings enable disable video capture...

Страница 49: ...me time The name of each input could be defined by administrators the default value is Content Cam 1 and Cam 2 The icon on display could also be changed default icons show CH1 CH2 CH3 Click on the icon one dialog carries all the options would pop up for selection continued on next page ...

Страница 50: ...der the copyright law When using a device such as a camera please take responsibility for the subject s privacy portrait right copyright on your responsibility Appropriately respond to privacy portrait right copyright etc by getting consent beforehand from the person who becomes the subject at your own risk as necessary The manufacturer does not assume any responsibility for infringement acts on p...

Страница 51: ...s HDMI VGA and SDI input options Content Group can select HDMI 1 HDMI 2 HDMI 3 HDMI 4 VGA Cam 1 Group can select HDMI 1 HDMI 2 HDMI 3 HDMI 4 SDI 1 SDI 2 Cam 2 Group can select SDI 3 only While connect with PC via USB type B it is necessary to assign USB host to be USB 1 or USB 2 Note For HDMI1 4 port when anyone be assigned in CH2 it would not show in CH2 for selection continued on next page ...

Страница 52: ...ons are RTP RTSP or RTMP Enter the primary and secondary URL which provided by the encoder or stream server Primary stream would be used for recording where secondary URL would be used for director preview PTZ control The product web interface could control PTZ cameras and provides two control methods Over IP or via Serial port Serial port When PTZ cameras connect with the product via RS 232 port ...

Страница 53: ...in out Click the zoom in out icons or drag the control bar Preset positions Click the icons to drive camera to the preset position Change preset positions Click the icon to change the preset positions Select any of the P01 P08 move the camera to the new position by using the direction control panel and the zoom in out control Click Save icon to complete the change or click Cancel icon to give it u...

Страница 54: ... status then changes to OK which indicates it is available for video input selection NOTE If you fail to find your camera by clicking on Refresh it means the camera may not comply with standard ONVIF If the camera supports RTSP streaming you could try in another way to get the video stream Select Signal type as Encoder in the Video Inputs and check the camera s manual to find out camera s RTSP str...

Страница 55: ...aud rate 2400 4800 9600 and 115200 Audio Adjust the volume and select the input source Press Default icon the volume will be back to factory default Input volume control Adjust the volume of each audio input The configurable range is 0 125 The volume meter indicates the energy of the current volume In addition you can set it to mute by clicking the icon Click for advanced settings In advanced sett...

Страница 56: ... configurable range is 0 125 The volume meter indicates the energy of the current volume Output volume control Adjust the audio output via HDMI Line out Bluetooth volume Switch Audio output loop through ON OFF NOTE When speaker is connected via Bluetooth it will be output in monaural sound ...

Страница 57: ...de Available options are MP4 Mixed video only MP4 Mixed video with original sources and OFF Video compression There are 7 compression profiles for selection Refer to the table below Select one to see the detail information at the right side You may also choose User defined for advanced settings Front USB recording Switch between ON OFF to enable disable the product front USB recording function Mak...

Страница 58: ...on Full HD 1080p 4Mbps Dynamic scene and large local hard disk recording Internet Full HD 1080p 3Mbps General scene and medium local hard disk recording HD 720p 2Mbps Static scene and small local hard disk recording Internet HD 720p 1 5Mbps Live broadcasting through the Internet SD 480p 800kbps Static scene for live broadcasting through the Internet Mobile SD 480p 500kbps Live broadcasting for por...

Страница 59: ...h Each video switch Playback mode Enter Esc playback mode Conference mode Connection start Hang up On and off Menu ball Snapshot icon Playback mode Snapshot icon Web Director Snapshot icon Web Director Presenter Input text press Snapshot icon Mobile controller Input text press Snapshot icon Video Manager Add delete Index Add prefix to video filename Item Description Prefix setting This description...

Страница 60: ... bitrates Select a proper one to see the detail information at the right side Remember to click Apply icon after settings finished Click icon for more options and click Save icon after making any change NOTE The product does not protect streaming contents Take security measures by yourself It s not allowed to choose the resolutions of the streaming larger than recording one For example if you alre...

Страница 61: ...servers provide the server URL and key separately Please connect server URL and the key together with Click on for RTMP name password if necessary Protocol The available protocols on the product are RTP and RTMP the URL format is as follows RTMP In the protocol setting field copy and paste the Server or Stream URL and Stream name provided by your CDN Content Delivery Network or server administrato...

Страница 62: ...egory Presenter Section Descriptions Only 256 Unicode characters for Description the others are 24 Unicode characters These texts messages will be saved and attached with the recording files NOTE This setting would not be applied to the existing recording files only for the coming recording event To edit or check the existing files information refer to section Video Manager 94 ...

Страница 63: ...fer to section Overlay Background Selection 90 Item Description Overlay Allow users to select and delete the overlay files Or click icon and select the file in the open dialog to upload for more options Background Allow administrators to select and delete the background files Click icon and select the desired file in the Open dialog box NOTE The overlay file must be in PNG format maximum size 1920...

Страница 64: ...is product supports only Partition style MBR As GPT is not supported it is not possible to connect GPT format HDD or USB storage NOTE Because format function will overwrite all the existing data saved in HDD make sure all the data is backup well or deleted before clicking the icon Please upload the data recorded with this product to the server within 24 hours HDD is for temporary storage Manufactu...

Страница 65: ...ply The product will try to connect with Opencast server then show successful message If it show failed please check the network condition or contact the manager of the opencast server 2 Go to Opencast server s administration interface and double check if the product is correctly registered on Opencast Manual Calendar import Importing iCalendar files manually 1 Click Import An Open window pops up ...

Страница 66: ...ents only accept one time event Furthermore Scheduler also cannot allow more than 2 events to start at the same time When two events time periods are partially overlapped the product would only pick the earlier one and drop the other Click Open Scheduled Events page Content information When users set content information in platform s interface it will be synchronized to the product s content info ...

Страница 67: ...n for testing after the setting completed Item Description Auto upload Select from OFF or enable uploading After recording is completed Followings to be configured according to the upload destination Mode Select network server type FTP SFTP Kaltura Panopto OpenCast HTTP OpenCast HTTPS For the operation method of Kaltura Panopto OpenCast refer to the manual of each service IP address port or domain...

Страница 68: ...ttings it follows server clients structure Max 100 products can join one internal service unit including itself 99 other products will show on contact list and only one conference connection allowed at the same time As a service server this product needs to be assigned as Internal from the drop down list When act as a client the other product need to be set as external continued on next page ...

Страница 69: ...st all the other products connected to this product Click Clear All to clear all the registered products The contact list would be blank until administrators registered new units external Set the product as client IP address Fill in the conference server s IP address Port Fill in the same number as the Internal conference server s port number continued on next page ...

Страница 70: ...ption Internet Full HD 1080p 3Mbps Dynamic scene and good bandwidth for high resolution quality of audio video Conference Full HD 1080p 1 5Mbps General scene and enough bandwidth for high resolution video Internet HD 720p 1 5Mbps Static scene and enough bandwidth for HD resolution video Conference HD 720p 1 2Mbps Fit to normal network environment with HD resolution video SD 480p 800kbps Limited ba...

Страница 71: ...cription Device description Displays the Device description of the product This is the device name displayed in the contact list Device description can be changed For details refer to System settings 72 Conference version Conference version is displayed ...

Страница 72: ...re version and provides web based way to update firmware download system log and restart Display Settings related to local display projector System settings Device identification Allow administrator to change the host name and description Remember to click Apply in the bottom area Item Description Host Name As a network device the product would be identified by other network devices by host name D...

Страница 73: ...NTP server URL Manually set Users could press the icon to synchronize with PC or manually input date and time Set Date Time Click on to call calendar for setting Or click on the time blank to get the cursor and use keyboard to key in directly Switch to time setting page Close the window If users click on other area outside this window also the window will be closed Switch to previous next month or...

Страница 74: ...minutes and seconds the options use 5 as the interval Totally 12 numbers to choose Boot image Item Description Boot image Change the boot screen image file The boot screen is the image you will see when booting up the device Click Browse icon and select the image file from your PC to upload Then click Apply NOTE The boot screen file must be in PNG format maximum size 1920x1080px continued on next ...

Страница 75: ...h means the product would automatically try to obtain an IP Address from a router or any other DHCP server It also allows administrator to assign a static fixed IP address manually Item Description IP assignment Select DHCP to be dispatched IP address by a router or any DHCP server being connected or Select Static IP and fill in the IP address subnet mask default gateway DNS server NOTE The system...

Страница 76: ...ns or specific items only to export the config This file would be saved in administrator s PC When All configurations is selected all settings excluding the Network setting are exported Import Select a config file from administrator s PC to import the configuration into the product After import the original settings will be overwritten continued on next page ...

Страница 77: ...keep your network settings and click Reset The dialog pop out and ask you System will reboot after updating continue Make sure the system is not busy and click Confirm to start reset NOTE The configuration file contains important items of the system Please handle with care ...

Страница 78: ...It might take a few minutes Until the menu ball and toolbar appear again it s ready for use Service data Log file is used for problem analysis while the product cannot work properly Export the log file to your PC and send to the service center for further investigation Totally 3 files would be downloaded Including device configuration data service data and debug log Restart Device Allow the admini...

Страница 79: ... screen graphic interface Turn on off the GUI Show Hide menu ball toolbar and annotation layer on the display Resolution mode Display the output resolution Projector control Protocol None TCP Select between Hitachi and PJLink projectors IP address IP address of projector Password Password of projector RS 232 only support Hitachi maxell projector ...

Страница 80: ...ut password again to make sure it is correct Video Manager Allow to access Video Manager Input username and new password and then input password again to make sure it is correct NOTE Be sure to change the user name and password of the Administrator Online Director Video Manager after first logging in to the administrator page Please be careful in managing user name and password For details refer t...

Страница 81: ...n Administrator webpage indicates the device description For the setting refer to section System settings 72 3 Director tag 4 Cameraman tag For details refer to section Cameraman Page 92 5 Presenter tag For details refer to section Presenter Page 93 6 Switch to administration webpage without log in If using administrator to log in can access whole administration function tags If using director to ...

Страница 82: ...of layouts overlay background would be invalid 19 Stop recording All above four recording control icons from 16 19 will disappear and replace by a scheduling icon when scheduling function enable 20 Snapshot To get a snapshot image and automatically add an Index while recording 21 Audio volume meter Indicates the audio volume of the content being recorded and streamed 22 Auto layout functions For d...

Страница 83: ...ructions Unzip the downloaded installer and run the installer file Follow the instructions on the screen to install FBVLC plugin After installation completed re open the browser and video will show in the Window Temporarily stop the firewall and anti virus software etc during installation Some of software interfere with the installation of plugins Suggested SW environment Internet Explorer 11 Wind...

Страница 84: ... sources if the main window is switched to CH2 camera 1 then another camera window will be replaced with CH1 content source When the layout has 3 video sources and the main window is switched to an existing source which already in another window To avoid from double video the system will automatically pick another available source to fill into the other window Auto layout assign rule continued on ...

Страница 85: ...85 Auto Layout continued continued on next page ...

Страница 86: ...86 Auto Layout continued continued on next page ...

Страница 87: ...87 Auto Layout continued continued on next page ...

Страница 88: ...88 Auto Layout continued continued on next page ...

Страница 89: ...89 Auto Layout continued ...

Страница 90: ...nt recording streaming layout Once users click auto layout or change layout by display toolbar manual layout function will be invalid NOTE Basically all the layouts are applied as aspect ratio except two layouts The 2 small windows in layout and are applied as fit to all Overlay Background Selection Allow users to select 1 out of max 5 overlay background images for recording streaming Overlay imag...

Страница 91: ...125 levels HDMI for CH2 input 125 levels Line in Mic in Bluetooth mixed input 125 levels Streaming Conference input 125 levels Recording Streaming mixed output 125 levels Move the bar leftward and rightward to adjust the volume Click on the speaker icon could switch between mute and resume ...

Страница 92: ...lick the icons to command that the camera go to the preset position For details on registering the preset position refer to section Advanced configuration 53 5 Recording layout indicator Show current recording layout 6 Channel selection Select between Content CH1 Cam1 CH2 Cam2 CH3 7 Source monitor window Display live video of each channel source NOTE From No 1 4 items are enable only when the vide...

Страница 93: ... output adjustment Adjust master out volume of local audio output 4 Index with text Fill in text for Index title insertion 5 Snapshot Click to get a snapshot manually and insert an Index with filled text while recording 6 Display Video source switch Switch video source on display only one source can be selected at the same time CH3 group will be replaced by remote group when conferencing Video sou...

Страница 94: ...nager webpage via Administrator or Online Director by clicking the icon or log in with the initial login page with default username video and password lcsvideo The Video Manager includes the following features upload download delete playback edit recording information and Index title NOTE Video Manager would be invalid during the recording After recording stop refresh this page to restore the Vide...

Страница 95: ...xit Log out Video Manager webpage 8 Storage capacity Show used total HDD space 9 Upload Upload selected files to backup server 10 Download Download selected files to PC 11 Delete Delete selected files 12 Video file Show thumbnail image and video information 13 Check box For file selection 14 Thumbnail 15 File name 16 Creating time 17 Video length 18 File size 19 Page indicator Show file list page ...

Страница 96: ...k for the confirmation Click Confirm to permanently remove the files from mounted HDD The list may not be updated immediately Refresh the webpage to show the updated list Playback the video file Click the file for playback and you will be directed to the content information page Use the control panel at the bottom of the playback window to watch the video There might be more than one files listed ...

Страница 97: ... to switch playing different channel sources and check the box for download Both mixed and each channel source videos will generate thumbnail automatically The thumbnail of each channel source will be determined by the first recording second of an assigned video source 10 Data set Check the box to download Users would get a zipped file with the file name DataSet zip Un zip the file would get Index...

Страница 98: ...Index Move the bar of the video player in the playback window and find the target time to add the Index Click Add Index button and open the dialog with following features and information 1 Show the thumbnail of the Index 2 Show the target time of the Index which should be the same with the time stopped on the video player 3 Fill in the title of the Index 4 Click Apply to insert the new Index into ...

Страница 99: ...from video list to photo list All the image files are archived in folders by daily base Each folder shows the established date image numbers and the folder size Same as the video list all the folders are listed in descending order by the established date Check the box to select the folders to upload download and delete Choose and click any folder to get into the photo snapshot list continued on ne...

Страница 100: ...100 Photo Snapshot List Preview continued Click thumbnail on photo snapshot list photo preview dialog will show ...

Страница 101: ...l new version User Interface Device Search UI After click on the application will start searching all the products in the same local network environment Then all the found devices would be listed as below Click on or X of the window could close the application Monitoring UI After selecting one product from the list to link the software would show a monitoring window It shows the information regard...

Страница 102: ...ame local network with target product through WAN port Open a PowerPoint file and run Presentation tool and vice versa Choose and click the target product by the device descriptions or IP addresses Monitoring UI pop up and the connection is ready The GUI on display for Presentation slide page up and down then appear for control NOTE If the slide display time is short the Index may not be added Tem...

Страница 103: ...ot USB switch and video channel switch Make sure the mobile device is in the same local network and open the browser to input the product s IP address to log in Users could login with Administrator or Online Director accounts admin lcsadmin or director lcsdirector Log in UI Recording Controls Video Source Switch continued on next page ...

Страница 104: ...OFF 9 Recording controls Streaming record pause stop Live icon only enable when Independent streaming control setting For details refer to section Streaming 60 All four icons will disapear and replace by a scheduling icon when scheduling function enable 10 Index title 11 Snapshot Click to get a snapshot manually and insert an Index with filled Index title while recording 12 Switch USB HID to exter...

Страница 105: ... device and ready for use Remote client APP About client application please prepare by customer side Connection Server The product IP address Port 5900 Username Password N A Input Mode Direct Hold Pan Function Control the product by VNC client including GUI annotation drawing Freeze local display and preview on device When VNC login the product will call back toolbar for control if it is disable o...

Страница 106: ...106 Remote Desktop UI Same graphic user interface as shown by local projector All functions on GUI are workable with finger touch ...

Страница 107: ...t playback channel CH1 CH2 CH3 Mixed Video 2 Play Go to playback window and Play newest on recording video 1 ESC ESC from playback to normal screen 0 Ext USB External USB Host Switch USB HID to external host devices ON Control external host device Menu ball and toolbar on screen disappear OFF Menu ball and toolbar appear External hosts cannot be controlled Screen Source switch Check assigned sourc...

Страница 108: ...ch has no signal Useless operation 2 sec While under scheduling mode click on record buttons on front panel Mounted HDD error keep Mounted HDD cannot be access The power indicator flashes in red Mounted HDD status error Keep When S M A R T doesn t report Healthy The power indicator flashes in red USB storage error keep When the product is writing data into USB storage but fail Network error keep W...

Страница 109: ... Screen Display Icons continued Display dialog list Applying settings Firmware Update Fail Firmware Updating Overheat Diagram System will be shut down in 60 sec CPU Fan Error Dialog System will be shut down in 60 sec ...

Страница 110: ... Recording Red Flash ON 600ms OFF 600ms Pause Red OFF Non recording 3 USB LED GREEN Green Steady Mass Storage in Green Flash ON 200ms OFF 200ms Read Write Green OFF No Storage in 4 Bluetooth LED BLUE Blue Steady Paired Blue Flash ON 200ms OFF 200ms waiting for pairing Blue OFF Not paired 5 Audio volume meter GREEN Green ON Show audio level 1 2 Main Power button RED Flash ON 200ms OFF 200ms FAN err...

Страница 111: ... for repair the service personnel delete the HDD data for the purpose of protecting personal information When requested for repair the service personnel set the administrator setting to default for the purpose of protecting personal information ...

Страница 112: ...or x1 HDMI IN 2 HDMI connector x1 HDMI IN 3 HDMI connector x1 HDMI IN 4 HDMI connector x1 COMPUTER IN D sub 15 pin mini jack x1 MONITOR OUT D sub 15 pin mini jack x1 HDMI OUT HDMI connector x1 AUDIO IN 3 5 mm stereo mini jack x1 MIC IN 3 5 mm stereo mini jack x1 AUDIO OUT 3 5 mm stereo mini jack x1 AUDIO IN L R detachable terminal block x1 AUDIO OUT L R detachable terminal block x1 USB TYPE A USB ...

Страница 113: ...h button Video source switch cycling switch for each assigned source 7 Information button Short push Information list appears and USB mouse control switch back from PC to the product Long push Approx 2 sec Bluetooth pairing start 8 Projector power button Power on off button of PJLink compatible projector or Hitachi Maxell projector 9 Main power button Power on off button for MA XL1 10 Power connec...

Страница 114: ...ction Command Code Parameter ASCII Code c t x x 0 x xx x Byte number 1 2 3 4 5 6 7 8 9 Please refer to the below description for the detailed information Header 1 Header code Two bytes ASCII code ct 2 Data length Two bytes ASCII code for data byte length Range is 00 99 3 Reserved One byte reserved for future use Data 1 Action One byte ASCII code as below a Get Get operation for Media Station b Set...

Страница 115: ... c t 0 3 0 P 2 Playback Stop Play c t 0 3 0 P 3 Playback Select Channel c t 0 3 0 P 4 Playback Skip Forward c t 0 3 0 P 5 Playback Skip Backward c t 0 3 0 P 6 On Screen Menu On Off c t 0 6 0 O S x x x Screen Source Switch c t 0 3 0 S W Volume parameter range 000 125 000 mute Gain parameter range 000 003 000 mute Line in Mic in Bluetooth mic in mixed audio On Screen Menu On Off 000 Off 001 On Get a...

Страница 116: ...ata length 4 The parameter is command specific Please refer Response Code and Parameter for more information NOTE When the product receives the invalid protocol data ie the protocol data that product cannot understand It returns NAK code Hex 0x15 only Response Code and Parameter Response after receiving Set operation command Example as below Header Data Header Command Code Result Code Parameter Se...

Страница 117: ...n green HID Human Interface Device power is OFF Is HID turned on USB cable is not connected to Interactive USB Type A port Is USB cable connected to Interactive USB type A port The product does not support the HID being used Are you using the HID that the product supports The product does not recognize HID Unplug the USB cable and reconnect it Toolbar control setting is OFF Is toolbar switch setti...

Страница 118: ...etooth device power is OFF Is the Bluetooth device turned on The product is not started pairing Is the Bluetooth indicator on front panel blinking For details refer to section Indicator in Operating Guide If it is off long push the info button on the front panel For details refer to section Button Control in Operating Guide If Bluetooth indicator on front panel is lit it is paired with another Blu...

Страница 119: ...nnected to the product For details refer to section Lecture information import in Operating Guide Record cannot start by the key or webpage The schedule recording has been set Is the schedule recording set For details refer to section Scheduler in Operating Guide Display problem Input image is not output to monitor The product power is OFF Is the product turned on Is the power indicator lit in gre...

Страница 120: ...et phase adjusted For details refer to section Information Button in Operating Guide Image distorted or color is abnormal You use the resolution that this product does not support Check problem Input image is not output to monitor Content other than the camera is input to Ch2 Make sure that contents other than camera are not entered in Ch2 Web login problem Cannot login to Administrator User name ...

Страница 121: ...et to Static IP Login to the Administrator user mode via the LAN port and check For details refer to section Network in Operating Guide The setting of IP address is incorrect Only for static assignment by yourself Is the IP address corresponding to the external network set up Login to the Administrator user mode via the LAN port and check Consult your network administrator The setting of subnet ma...

Страница 122: ...for automatic assignment by the product Is the IP address of the PC s network adaptor set to automatic acquisition The network settings of PC network adaptor are incorrect Only for static assignment by yourself Make sure that the network settings such as IP address etc are correctly set The IP address entered in the Web browser is incorrect Make sure that the address you enter in Web browser is 19...

Страница 123: ...sure that the status of the network camera is OK display with Network camera manager of administrator setting When Login display please enter ID and PW and login to network camera For details refer to section Network camera manager in Operating Guide PTZ camera problem Cannot PTZ operate the network camera The power of PTZ camera is OFF Is PTZ camera turned on Network camera does not support ONVIF...

Страница 124: ...ing remaining amount Make sure that the Online Director page Conference problem Cannot start video conference When the conference service setting is Internal Communication between ports 5070 and 1935 is blocked with a router etc Make sure that the router allows communication ports 5070 and 1935 Consult your network administrator The router etc has not forwarded the data received at ports 5070 and ...

Страница 125: ...e and next recording start time is 5 minutes or less Is the next recording start time set after 5 minutes or later from the stop time Device current date and time setting incorrect Make sure that the device current date and time is correct For details refer to section System settings in Operating Guide Incorrect time zone setting Is the time zone set correctly For details refer to section System s...

Страница 126: ...re that the recording is started Streaming is not started When Live streaming setting is Independent streaming control For details refer to section Streaming in Operating Guide Make sure that the streaming is started The set URL is incorrect Make sure that the URL settings on the product side and the client side For details refer to section Streaming in Operating Guide Other Other problems such as...

Отзывы: