Page 17
MITER CONTROL
ADJUSTMENT
WARNING Before performing any
assembly or adjustment, always
disconnect from power source. Failure
to unplug your saw could result in
accidental starting causing serious
injury.
The miter-lock handle and miter-latch
button allow you to miter the working table
of your saw from 0° to 55° left/right.
1. Unplug the saw.
2. To miter the working table:
a) Lift the miter-lock handle to unlock
the working table and grip it to rotate
the working table.
b) Use thumb to push the miter-latch
button down and rotate the working
table to the miter angle desired on the
miter scale.
c) Push down the miter-lock handle to
lock the working table.
3. To override the common angle detent:
a) Lift the miter-lock handle to unlock
the working table and grip it to rotate
the working table.
a) Use thumb to push the miter-latch
button down and push the miter-latch
override button inside.
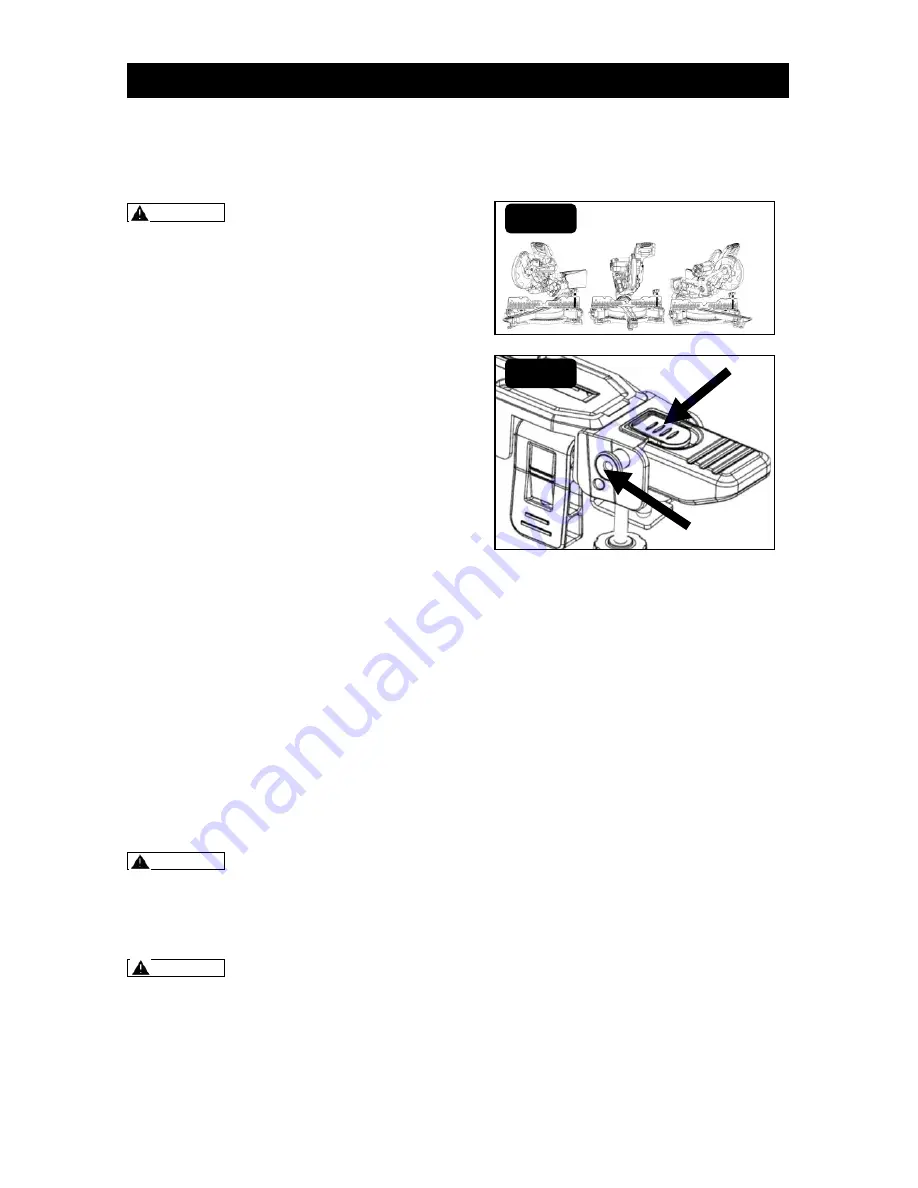
4. To reset the override function (Fig. 13)
a) Use thumb to push the miter-latch
button down (A).
b) Pull out the miter-latch override
button (B) to reset the override
function.
SETTING THE MITER ANGLE
WARNING Before performing any
assembly or adjustment, always
disconnect from power source. Failure
to unplug your saw could result in
accidental starting causing serious
injury.
WARNING To avoid risk of personal
injury, if movement is tight or if there is
play in the adjustment, have your saw
serviced by an authorized service
center before using or contact (866)
902-9690 for assistance.
The miter angle of this saw ranges from
left 55° to right 55° (Fig. 12). There are 9
often used angles on this saw, these
angles include: 0°, 15°, 22.5°, 31.6°, 45°
left and right. The miter-latch button is
used for setting the often used angles (Fig.
13).
To adjust the miter angle without the
miter latch button being used:
Step 1: Unplug the saw.
Step 2: Lift the miter-lock handle to unlock
the working table and grip it to rotate the
working table.
Step 3: Push the miter-latch button down
with thumb.
Step 4: Turn the working table to required
angle.
Step 5: Push down the miter-lock handle to
lock the working table in place.
Adjust the miter angle with the Miter
angle detent lever being used:
Step 1: Unplug the saw.
Step 2: Lift the miter-lock handle to unlock
the working table and grip it to rotate the
working table.
Step 3: Push the miter-latch button down
with thumb.
Step 4: Turn the working table to required
angle, release the miter-latch button, and
continue turning the miter table until the
detent pin engages into required miter
detent automatically.
Step 5: Push down the miter-lock handle to
lock the working table in place.
FIG. 12
FIG. 13
ASSEMBLY AND ADJUSTMENT
B
A


