Setting GPS Makers
1
Activate
GPS Option
and set
GPS Para-
menters
See
in the
section for information
about how to activate this functionality and the
section of information about setting GPS parameters.
2
Commence GPR profile scan
Position the MALÅ Easy Locator HDR at the start of the
scan traverse and follow the procedure described in the
section to start collecting GPR profile data.
3
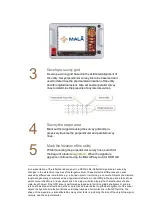
Set GPS markers
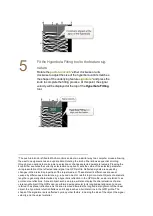
When a feature
signature
1
is identified in the GPR profile
during the scan, reverse the MALÅ Easy Locator HDR cart
until the
Vertical position cursor
is over the feature and
use the
push-turn knob
2
to select and press the
GPS
Marker
button and insert a marker into the profile. Continue
selecting and pressing the
GPS Marker
button to set mark-
ers at points of interests while traversing the survey area.
Note:
A green circle in the
(next to
the battery indicator) indicates a high level of
DGPS
3
accuracy.
As the differential signal deteriorates this circle will turn yellow,
indicating a decreasing in the accuracy of the GPS data. Con-
sult the
section for more information on
reading the
GPS precision indicator
and to change the setting
for the precision ranges.
1
A representation of the reflected radar signal in a GPR profile. Reflected signals are caused by
changes in the dielectric properties of the target medium. These dielectric differences are usual
caused by differences in materials, e.g., a buried object or reinforcing in concrete. Objects of a discrete
length are generally characterized by a hyperbolic reflection in the GPR profile, and are referred to as
point source reflections. A linear object, such as a pipe, will also display the characteristics of a dis-
crete-length object if the GPR scan is performed perpendicular to its longitudinal alignment, and are
referred to as planar reflections. As the scan is moved towards the longitudinal alignment of the linear
object, the hyperbolic refection flattens until it approaches a horizontal line in the GPR profile. The
shape of the signature is also affected by many other factors, including the size of the object, the signal
velocity, and the object material.
2
The push-turn knob is fitted to MALÅ monitors and acts in a similar way to a computer mouse allowing
the user to navigate menus and update data. Rotating the knob either allows sequential scrolling
through menu options to make a menu selection or changes selected parameter values. Pressing the
knob either executes the currently selected menu option or sets the value of the selected parameter.
3
Differential GPS, uses satellites and a correction from a reference station/satellite, accuracy around ±
0.5-2 m. The available systems for the Easy Locator are currently EGNOS (Europe), WAAS (USA),
GAGAN (India) and MSAS (Japan).
Содержание Easy Locator HDR
Страница 1: ......
Страница 2: ...MAL Easy Locator HDR User Manual Guide for Operating MAL Easy Locator HDR...
Страница 4: ...MAL Easy Locator HDR User Manual by MAL Geoscience MAL Geoscience Press...
Страница 49: ...See the GPS Parameter Menu section for more information about setting these parameters...

