


OPERATING & MAINTENANCE INSTRUCTION MANUAL
MODELS 427A (R-1), 428A (R-2), AND 429A (R-3) WELD HEADS
REV. AB
MODEL 514 TUBEMASTER OR 515/516 PIPEMASTER POWER SUPPLY
34
THESE DOCUMENTS, AND THE CONTAINED INFORMATION HEREIN, ARE PROPRIETARY AND ARE NOT TO BE REPRODUCED, USED OR DISCLOSED TO
OTHERS FOR MANUFACTURE OR FOR ANY OTHER PURPOSE, EXCEPT AS SPECIFICALLY AUTHORIZED, IN WRITING, BY MAGNATECH, LLC
9.13
Pre-wrap the Torch Cable
Declutch the torch rotation and rotate the torch one or more revolutions - opposite to the direction of
welding. Pre-wrapping the cable in this fashion will prevent undue wear and tear on the torch cable and will
also decrease the possibility that the torch cable will "hawser" on the pipe and restrict the rotation of the
Weld Head. (The Head can also be motored into position using the jog switch if so desired.) Locate the
torch in the desired circumferential position for starting.
CAUTION:
Ensure that the clutch is properly engaged at this point. The clutch must be in "drive" position.
Push the clutch shaft in (when looking from the torch side of the Head) to engage the drive. If in doubt, try
to rotate the rotary plate manually.
9.14
Recheck Arc Gap and Torch Centering
Recheck the tungsten to workpiece distance and torch centering.
9.15
Purge the Gas Lines
If this is the first installation of the system, or the first use during a shift, purge the lines for ten (10) seconds
with Argon using the Purge Switch mounted on the front of the controller.
When welding stainless steel or high nickel material be certain that the pipe ID has been adequately purged
with inert gas. The ID purge requires a vent hold to prevent a buildup of pressure in the pipe ID.
9.16
Start Welding
Check to insure that all parameters have been properly entered in the controls. Push the START Weld
switch to initiate the welding sequence.
9.17
Welding/Downslope
At the completion of the weld sequence downslope will automatically occur. Push DOWNSLOPE switch to
manually override the timed sequence.
9.18
Unclamp Head
To remove the Weld Head from the pipe move the rotary plate back to "open throat" position using either the
jog switch or by declutching the drive. Unclamp the Head by rotating the clamping lever.
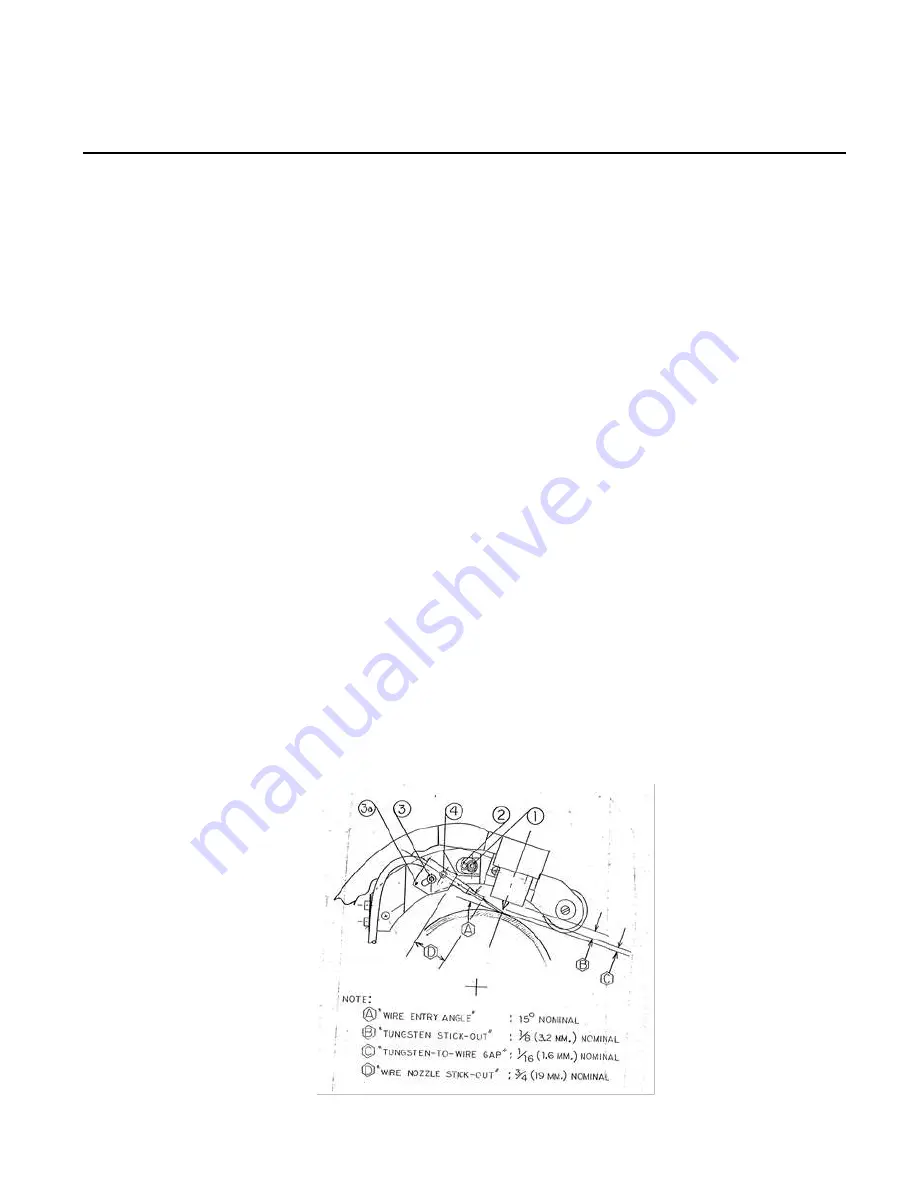
Figure 6 - Filler Wire Aiming Adjustments