


L25-012 Rev 1 (08/02)
5
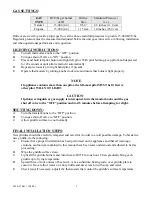
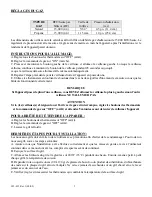
GAS SETTINGS:
GAS
TYPE
BTU/hr per burner
(kW)
Orifice
Size
Manifold Pressure (
w.c.)
Natural
15,000 (4.4)
5/64 “
4.5 inches (11.4 cm)
Propane
15,000 (4.4)
1.15 mm
10 inches (25.4 cm)
Orifices are sized to provide proper gas flow at the above manifold pressures to provide 15,000 BTU/hr.
Regulator pressure must be measured and adjusted before the unit goes into service, following installation
and when operational performance is in question.
LIGHTING INSTRUCTIONS:
A.
Turn all thermostat knobs to the “OFF” position.
B.
Turn gas shut off valve to “ON” position.
C.
Press and hold left pilot button and light left pilot. With pilot burning, keep pilot knob depressed
for 45 seconds or until pilot remains lit automatically.
D.
Repeat previous step for right hand pilot, if present.
E.
Operate thermostats by turning knobs clockwise and insure that burners light properly.
NOTE
If appliance contains more than one pilot, the left-most pilot MUST be lit first or
other pilot WILL NOT LIGHT.
CAUTION
If pilot(s) extinguish or gas supply is interrupted, turn thermostat knobs and the gas
shut off valve to the “OFF” position and wait 5 minutes before attempting to relight.
SHUTTING DOWN:
A.
Turn thermostat knobs to the “OFF” position.
B.
Turn gas shut off valve to “OFF” position.
C.
Allow griddle surface to cool normally.
FINAL INSTALLATION STEPS:
New griddles should be carefully tempered and cared for in order to avoid possible damage. To break in a
new griddle, do the following:
A.
Ensure that a proper installation has been performed on the appliance and that all warnings,
cautions, and notices contained in this manual have been read, understood and adhered to before
proceeding.
B.
Wipe the griddle surface clean.
C.
Light all the griddle burners and turn them to 200°F for one hour. Then, gradually bring each
griddle up to frying temperature.
D.
Spread three or four ounces of beef suet, or as a substitute, baking soda, over griddle plate to
season it. Never allow water on a hot griddle and never wash it with soap and water.
E.
Check (and, if necessary, adjust) the thermostats that control the griddle’s surface temperature.