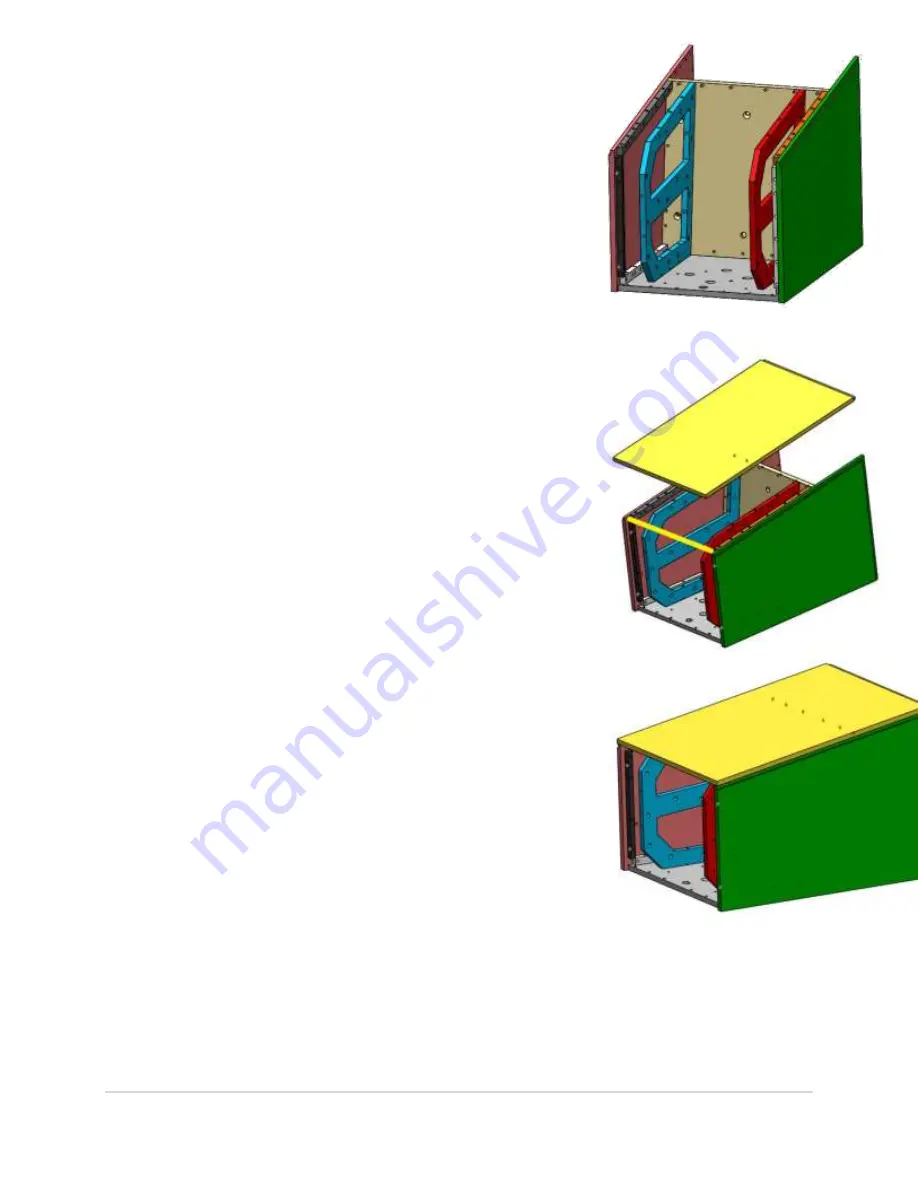
Slide the Q7-19 plate down in
between the two side plates and
fasten it to the two Q7-20 braces with
1 ¾” ¼-20 fasteners.
Use ¼-20 2” fasteners when fastening
brace into the -19 and -13 plates.
Set down the Q7-23 (represented by the yellow
line in the figure to the lower right) It does not
fasten in to anything yet, simply set it here to
help spread the cabinet to its ideal width. This
will attach to the rear underside of the -09. If
you look at the holes on this batten you will
notice that they are not in the center of the
batten, they are offset slightly. The side of the
batten that has more, the side with the offset,
should be facing towards you, which should be
the rear of the cabinet, the side of the batten
where the through holes are closer to the edge
should be facing the -09 rabbit / the front side
of the cabinet.
Unwrap and QC the Q7-09. Check all
corners and rabbit for flakes/damage/
any defects. If the -09 passes your QC,
carefully install it to the upper cabinet
assembly. The front of the -09 is the
side with the rabbit, the front of the
assembly is the tall side.
Use 1 1/8” ¼-20 fastener to fasten the -
09 to the assembly via side battens.
Thread 1 ¾” through the -20 braces
upward in to the -09 with washers and
red Loctite.
Fasten down all bolts that were left
loose in the -20 braces.
28 |
P a g e
Содержание Q7
Страница 1: ...Q7 Assembly Procedure 1 P a g e...
Страница 7: ...6 P a g e...
Страница 12: ...10 P a g e...
Страница 17: ...14 P a g e...
Страница 19: ...15 P a g e...
Страница 23: ...18 P a g e...
Страница 25: ...19 P a g e...
Страница 38: ...31 P a g e...
Страница 48: ...Install BH5 in all places shown 41 P a g e...
Страница 49: ...42 P a g e...
Страница 69: ...62 P a g e...


