26
SeCtion b
SoFtware Manual
RetuRn to toC
MaCe HydRoMaCe 3000
Product Manual
27
RetuRn to toC
16.0 Installing the software
Download FloCom
+
from our website
www.macemeters.com
1.
Run the
“FlocomPlus_[version number].exe”
file to start the installation
process.
2.
Follow the instructions on the welcome screen then click the
“Next”
button to move to the next screen.
3.
Choose a location on your computer to install FloCom
+
. FloCom
+
will setup
a folder in your program files called
“Mace\FlocomPlus”
. This is the default
option. Click the
“Next”
button to continue
4.
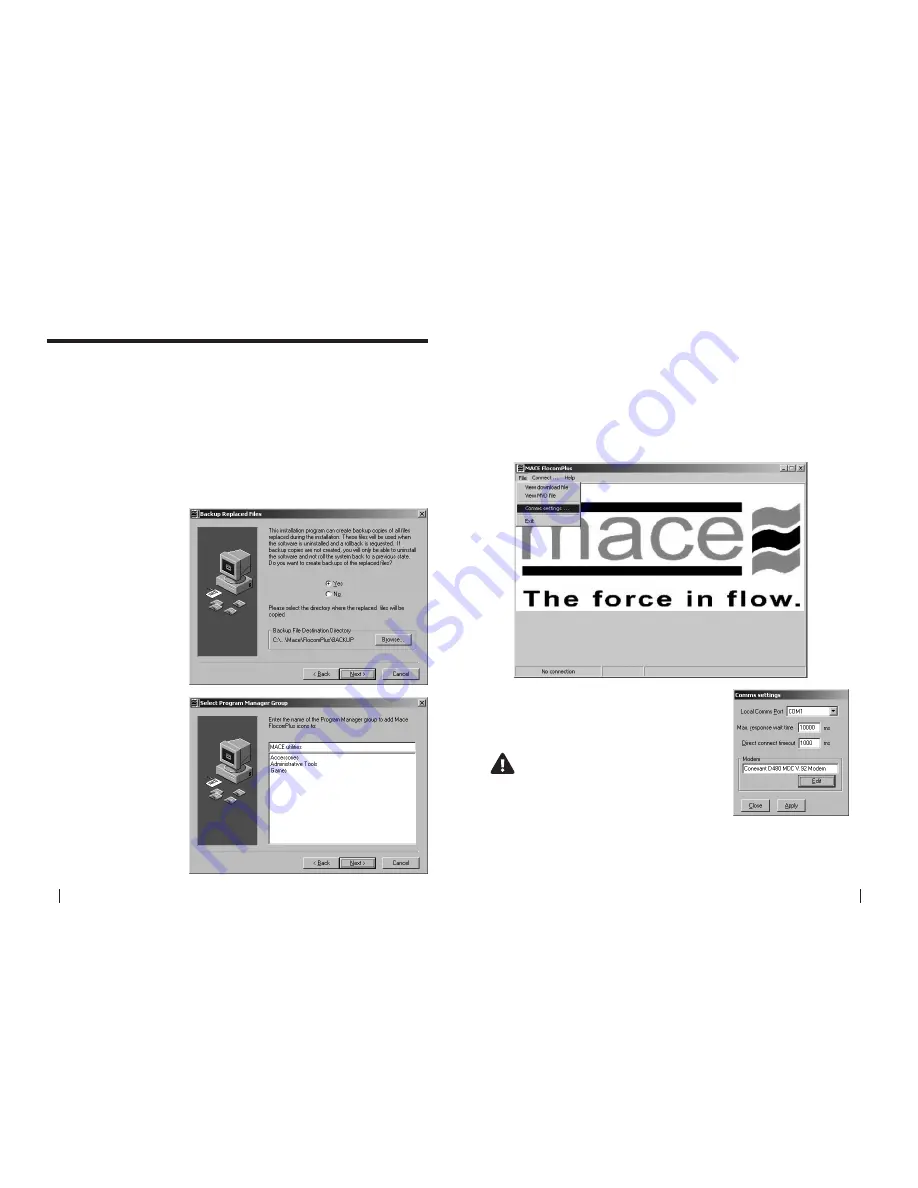
Backing up replaced files. FloCom
+
will ask if you wish to create backups of
replaced files. We advise you to click
“Yes”
and then click the
“Next”
button.
5.
Selecting a Program
Manager Group.
“Mace
utilities”
is the default
group and we suggest
leaving this as is.
6.
Starting installation.
Click
“Next”
to begin
installing FloCom
+
.
7.
FloCom
+
will now install. Once the software installation is complete click
the
“Finish”
button to exit the setup program. FloCom
+
is now ready to be
used.
8.
Run FloCom
+
using the shortcut provided on your desktop. The startup
menu will appear as shown below. Click
“File>Comms settings...”
to
configure FloCom
+
for your computer.
9.
Select the serial port of your computer which will
be used to communicate with the Flo Series3 device
when a local connection will be made (i.e with a
serial cable directly connected to the device).
If using a USB to Serial adapter please
refer to the product documentation
supplied with the adapter to ensure the
correct driver is installed
If one is present, select the modem which will be
used if remote communication will take place with
the device. (The Flo device must also have a modem
attached to it at the remote site).
Click
“Apply”
to save the settings.


