Page 21
3.4.8.5
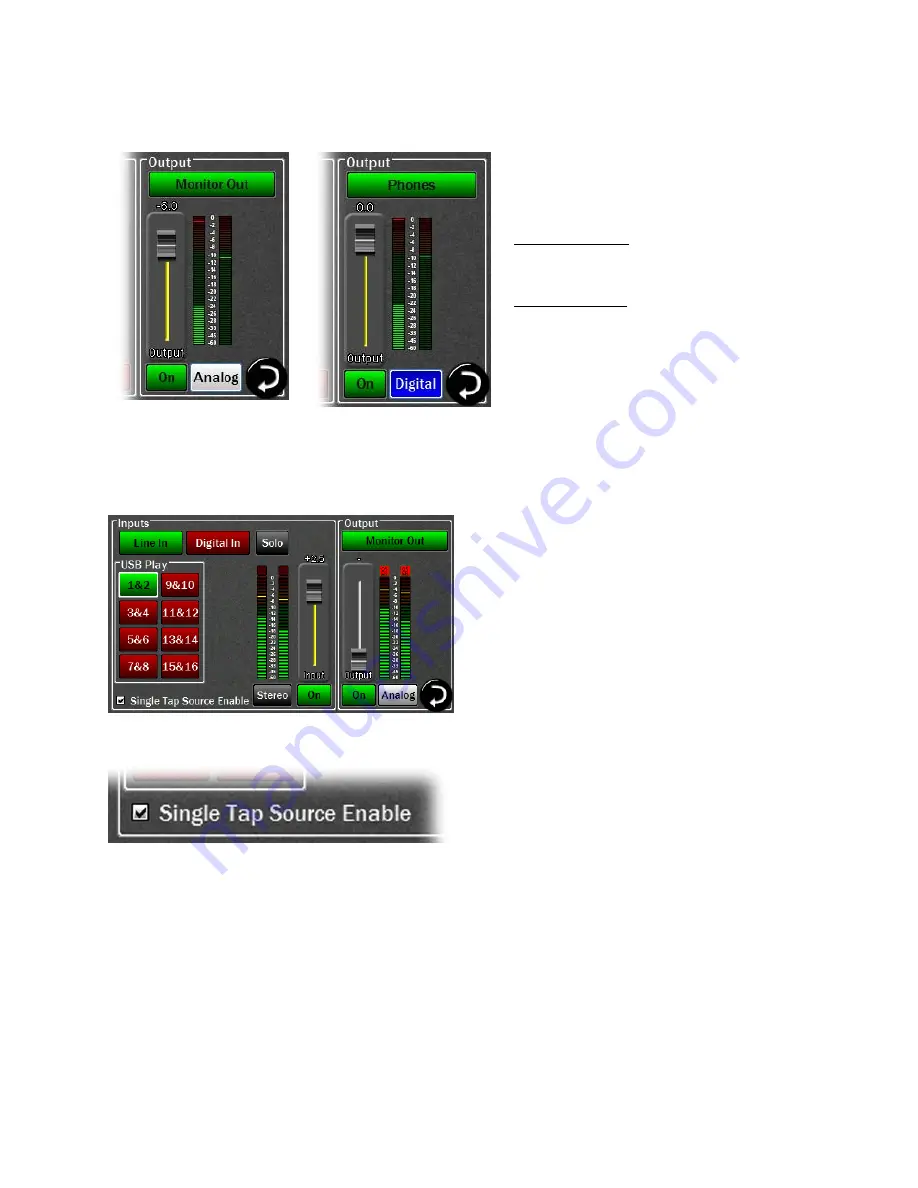
Analog and Digital Level Controls for Monitor and Headphones
When the Monitor Out and Phones Outputs are selected in
the Output Mix Routing Page, you will see an additional
button. For these two outputs you can control both the
Digital output level and the Analog output level.
Analog Output Level – This is your primary monitoring
level control. You can control this level / volume using the
fader or the knob on the front panel.
Digital Output Level – Your default for this level is all the
way on, at 0 dBFS. This provides the best possible signal
to noise ratio, and therefore the best audio quality.
However, since Hilo offers you the option of routing several inputs to these outputs, you may overload the digital output and cause
distortion. When this is the case, use the Digital Output control to lower the level feeding the D/A converter. Note, this control is NOT
for setting the volume level of the Monitor or Phone outputs, but to attenuate the digital signal to reduce distortion. Once the digital
overload has been lessened, you can set the listening volume with the Analog level control. Note: dither is enabled automatically when
Digital attenuation is performed – this improves sonic performance and reduces digital artifacts.
There is an overload at indicator at the top of these meters. When
potentially distortion-causing clipping occurs, this indicator turns
red and the associated text reads “OVER”. For an input, the Over
indicator will activate when there are three full-scale samples in a
row, which indicates a high probability that clipping has
occurred. For the outputs, the Over indicator is an accurate
reflection of an actual overload condition and the attenuation
should be performed on the input sources or digital outputs
themselves when this occurs. The overload indicators will clear
after 3 seconds when the overload condition stops.
Before we explore how to route sources, we need to take a look at
the “Single Tap Source Select” button, because this impacts the
way that sources are enabled.
3.4.8.6
Single Tap Source Select
One of the advantages of the Touch Screen GUI, is that we can offer
user-preferred options for the way onscreen buttons behave, a big
advantage over standard, fixed-function hardware buttons. This is
one such option.
1.
For this parameter, Checked is the default
. In this state, pressing an INPUT source button will instantly turn that source OFF
to ON or ON to OFF, the same function as the ON/OFF button below the fader. This allows for quicker one-touch selection and
muting of INPUT sources. However, the selected source will be present instantly with full volume on first press or a previously
set volume level.
2.
When Unchecked, pressing an input source will only bring that source into focus. One must then press the ON/OFF button to
make the source active. The advantage is that you would have the opportunity to adjust the level of that source before it is sent to
the output. This mode would be typical for live use, where making an input source live at full volume could have ear-shattering
consequences.
For the remainder of this section, when mention is made of enabling sources whether this is accomplished by the
Single Tap
method
(Single Tap Source Select = ON) or
Two Tap
(Single Tap Source Select = OFF) will be left up to the reader.


