7.5
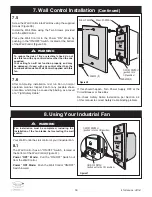
Screw the Wall Control into Wall Box using the supplied
Screws (Figure 30).
Install the Wall Plate using the Two Screws provided
with the Wall Control.
Place the Wall Control in the Power “ON” Mode by
pushing in the “ON/OFF” Switch, located at the bottom
of the Wall Control (Figure 30).
7.6
After completing installation, test run Fan in normal
operation manner. Inspect Fan for any possible shake
or wobble, which may be caused by binding, as a result
of a “Tight Safety Cable”.
18
ETL Model No.: HF1161
To reduce the risk of fire or electrical shock, do not
use this fan with any control device other than the one
supplied.
Your ceiling fan will not function properly, and may
be damaged, if used with any control other than the
Luminance Brands Fan Wall Control Supplied with this
fan.
WARNING
!
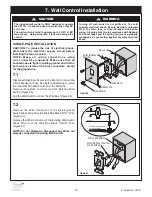
7. Wall Control Installation
(Continued)
SCREWS (2)
SCREWS (2)
OFF
WALL CONTROL
WALL PLATE
ON/OFF SWITCH
(pushed in to
ON position)
Figure 30
Fan installation must be completed, including the
installation of the fan blades, before testing the wall
control.
WARNING
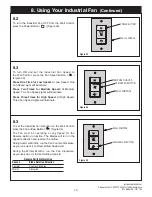
ON/OFF SWITCH
(pulled out to the OFF position)
ON/OFF SWITCH
(pushed in to the ON position)
OFF
Figure 31
8. Using Your Industrial Fan
Your Wall Control has full control of your Industrial Fan.
8.1
The Wall Control has an “ON/OFF” Switch, located at
the bottom of the Wall Control (Figure 31).
Power “OFF” Mode: Pull the “ON/OFF” Switch out
from the Wall Control.
Power “ON” Mode: Push the Wall Control “ON/OFF”
Switch inward.
!
If this should happen, Turn Power Supply OFF at the
Circuit Breaker or Fuse Box.
Re-check Safety Cable Installation per Section 4.4
of this manual to correct Safety Cable binding problem.

