1
TAKING INTO OPERATION
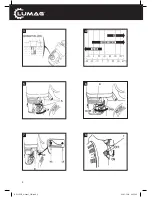
7.3 Starting the motor (Fig. 5 – 10)
• Open the fuel tap (5) by pushing to the right.
• In cold condition, push the choke lever (4) to the left, to the position “closed/geschlossen”.
• In warm condition, put the choke lever (4) in right position, “open/geöffnet”
• Push the gas lever (9) somewhat to the left.
• Put the power switch (1) in position “ON/EIN”
• Make a light pull in the starting wire (2) until a firm resistance is detected. Then, make a quick
and hard pull in the starting wire. Let it roll back slowly.
• Open the choke (4) while the motor runs warm.
• During operation, open the gas lever in full, or adjust to required rotation speed.
7.4 Shutting down the motor (Fig. 11 – 13)
• Put the gas lever (9) in idle speed “SLOW/LANGSAM”, to the right.
• Put the power switch (1) in “OFF/AUS”
• Close the fuel tap (5) by pushing to the left, “OFF/AUS”.
7.5 Operation
Run the motor at full speed; adjust with lever (J). The compactor now starts to move forward by
itself and in normal speed. Working uphill, push the compactor gently forwards. When working
downhill, reduce the speed by pulling back.
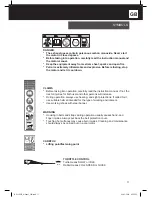
WARNING
At sloping surfaces, first only work uphill. An uphill surface which is easy to cultivate, can also
be cultivated downhill in an easy way. The operator of the equipment may never stand in the
direction of sliding.
The slope of the ground surface may never exceed 20°. If this slope is exceeded, the lubrication
of the motor is affected which will cause damages on important parts of the motor.
7.6 Recommendations at compacting
Moisture and extremely soft foundations will also result in poor friction. This may increase the
risks for accidents.
• To achieve optimal compacting, usually 3 – 4 turns are necessary, all depending on moisture,
grain size and so on.
• A foundation which is too wet can never the less be compacted with a good result. Before
compacting, let the surface dry up.
• A surface which is too dry will create much dust at cultivation. Irrigation prior to the cultivation
will improve the result and reduce the need of cleaning the air filter.
NOTICE
NOTICE
GB
RP-110HP_manual_GB.indd 17
04.02.2010 09:23:02
Содержание RP-110HP
Страница 4: ...4 6 7 8 5 5 4 9 1 3 4 RP 110HP_manual_GB indd 4 04 02 2010 09 22 48...
Страница 5: ...5 9 10 2 4 11 12 9 1 13 5 RP 110HP_manual_GB indd 5 04 02 2010 09 22 48...
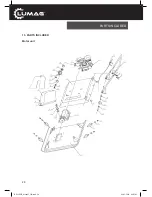
Страница 28: ...28 13 PARTS INCLUDED Motor unit PARTS INCLUDED RP 110HP_manual_GB indd 28 04 02 2010 09 23 05...
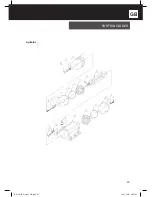
Страница 29: ...29 GB Agitator PARTS INCLUDED RP 110HP_manual_GB indd 29 04 02 2010 09 23 05...
Страница 31: ...31 GB RP 110HP_manual_GB indd 31 04 02 2010 09 23 06...

