


- 46 -
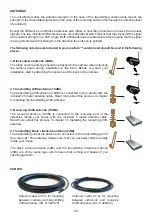
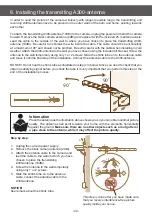
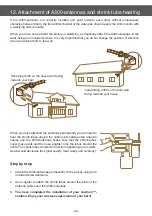
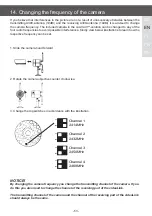
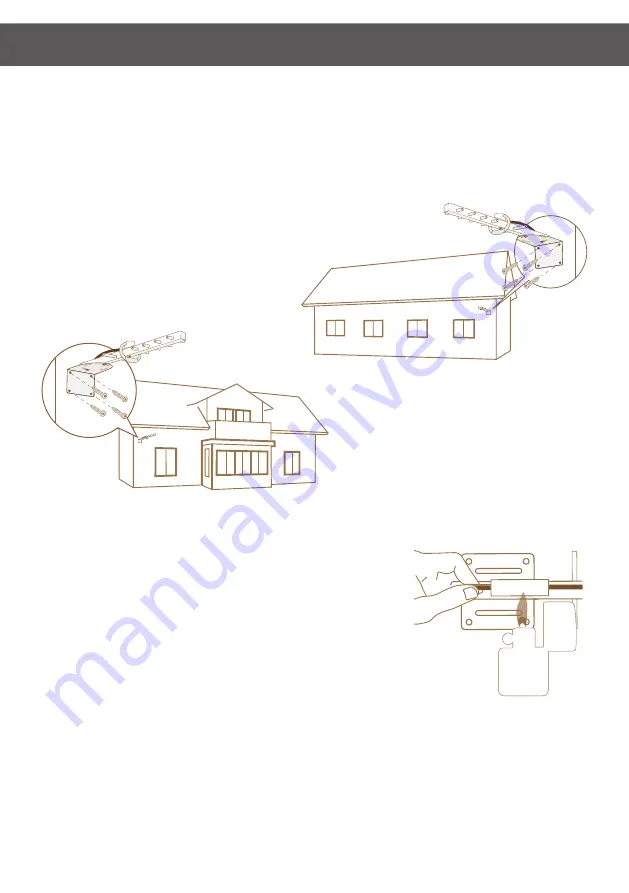
12. Attachment of A300-antennas and shrink tube heating
If the A300-antennas are correctly installed and point towards each other without unnecessary
obstacles between them, the transmitter channel of the videoLink should supply the LCD-monitor with
a satisfying picture quality.
When you have ensured that the picture is satisfying, permanently attach the A300-antennas to the
walls using all 4 included screws. It is very important that you do not change the position or direction
when you attach them to the wall.
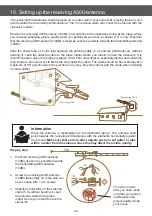
When you have attached the antennas permanently you will need to
heat the shrink tubes around the cable joints between the antenna
cables and the A300-antennas. Make sure that the shrink tubes
cover these joints and then use a lighter to fix the tubes around the
joints. The shrink tubes will prevent rust from appearing on the joints,
which would decrease the signal quality. Heat slowly and carefully!
Step by step
1. Attach the A300-antennas permanently to the wall by using all 4
included screws/antenna.
2. Use a lighter to attach the shrink tubes around the joints of the
antenna cables and the A300-antennas.
3. You have completed the installation of your cowCam™-
solution. Enjoy your wireless supervision of your barn!
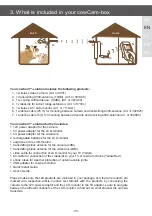
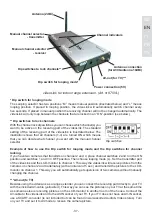
Transmitting A300 on the barn wall
facing towards your house
Receiving A300 on the house wall facing
towards your barn
Содержание 302K05
Страница 1: ...DE Bedienungsanleitung EN User Guide FI Käyttöopas FR Guide d utilisation SV Användarmanual ...
Страница 3: ... 3 DE FI FR SV EN Deutsch Bedienungsanleitung ...
Страница 30: ... 30 ...
Страница 31: ... 31 DE FI FR SV EN English User guide ...
Страница 59: ... 59 DE FI FR SV EN Suomi Käyttöopas ...
Страница 87: ... 87 DE EN FR SV FI Français Guide d utilisation ...
Страница 115: ... 115 DE EN FR SV FI Svenska Användarmanual ...
Страница 142: ... 142 Declaration of Conformity ...


