AREA 22
SYSTEM SETUP
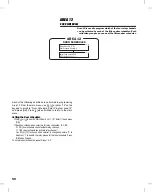
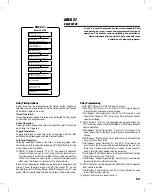
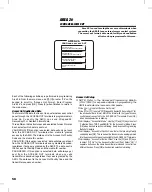
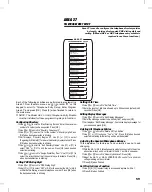
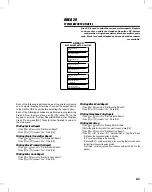
Area 22 is used to program a variety of system functions.
These functions should be set before programming the
other areas. Passwords, system names, event log and
anti-passback timing, and many other system settings are
programmed in this area.
Each of the following activities are performed in programming
Area 22. From the main menu, use [
⇑
], [
⇓
] or enter “22” on the
keypad to scroll to “System Setup, Enter Program Area 22” and
press [OK]. Press [
*
] when finished to return to the main menu.
Setting Installation and Unit Names
➊
Use [
⇑
] or [
⇓
] to scroll to “Installation Name”.
➋
Enter the location name for the installation event log (up to 24
characters) and press [OK].
➌
Use [
⇑
] or [
⇓
] to scroll to “AM/II Name”.
➍
Enter the unit name for the installation event log (up to 24 characters)
and press [OK].
Setting Event Log Limits
➊
Use [
⇑
] or [
⇓
] to scroll to “Retained Event Log”.
➋
Use [
⇐
] or [
⇒
] to select “None 500 1000 2000 5000 Max”. Press [OK]
when desired selection is blinking.
Setting Anti-Passback Time
➊
Use [
⇑
] or [
⇓
] to scroll to “Antipassback Time”.
➋
Use [
⇐
] or [
⇒
] to select “None 1min 2min 3min 4min”. Press [OK] when
desired selection is blinking.
Setting Intregral Radio Direction
➊
Use [
⇑
] or [
⇓
] to scroll to “Integral Radio Direction”.
➋
Use [
⇐
] or [
⇒
] to select “None In Out Neutral”. Press [OK] when
desired selection is blinking. Select “IN”, it is the only functioning option
at this time.
Setting Network Address
➊
Use [
⇑
] or [
⇓
] to scroll to “Network Address”.
➋
Use [
⇐
] or [
⇒
] to select “OFF” or 1-8 for the network address. Press
[OK] when desired selection is blinking. After pressing [OK], press the
reset button.
☞
NOTE: Resetting the unit assures network activation. After reset, the
network LED will be blinking.
Setting Keypad Strike Outs
➊
Use [
⇑
] or [
⇓
] to scroll to “Keypad Strikes and Out”.
➋
Enter the number of keypad attempts allowed (1-7) before keypad
lockout and press [OK].
Setting Door Ajar Time
➊
Use [
⇑
] or [
⇓
] to scroll to “Door Ajar Time”.
➋
Enter the time in seconds that all doors are allowed to be open after
access without causing an alarm. Press [OK].
Setting Local Password
☞
NOTE: The local password must be six digits long. Include any leading
zeros when entering the code.
➊
Use [
⇑
] or [
⇓
] to scroll to “Local Program Password”.
➋
Enter the new six-digit password and press [OK].
Setting Remote Password
☞
NOTE: The remote password must be six digits long. Include
any leading zeros when entering the code.
➊
Use [
⇑
] or [
⇓
] to select “Remote Program Password”.
➋
Enter the six-digit password and press [OK].
✘
CAUTION: Write the new passwords down and keep
them in a safe place. Programming access is impossible
without the proper password. If you forget the
pass word, ca ll Li near Technical Services for
instructions for resetting the passwords to the factory
default.
Setting Priority Access Password
☞
NOTE: The priority access password must be six digits long.
➊
Use [
⇑
] or [
⇓
] to select “Priority Access Password”.
➋
Enter the six digit password and press [OK].
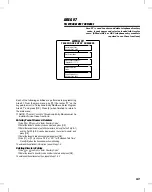
SYSTEM SETUP
AREA 22
22.1
22.2
Installation Name
AM/II Name
22.3
22.4
22.5
22.6
22.7
22.8
22.9
22.10
Retained Event Log
None 500 1000 2000 5000 Max
Antipassback Time
None 1min 2min 3min 4min
Integral Radio Direction
None In Out Neutral
Network Address
0ff 1 2 3 4 5 6 7 8
Keypad Strikes and Out
Strikes Allowed: 0
Door Ajar Time
Open Time Seconds: 000
Local Program Password
Password: 123456
Remote Program Password
Password: 123456
Priority Access Password
Password: 123456
22.11
54


