Guided Tours
Tour #3: Controlling Chamber Conditions
Using the LI-6400
3-23
sample (
H2OS_mml
) will increase as well, but not as much, since the paper
is not able to evaporate as much water into the more humid air.
7
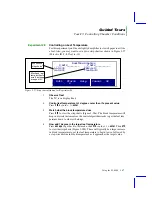
Change to a low flow rate: 100 µmol s
-1
.
Press
F2
then type
100
. (Notice the short cut: when you arenÕt changing con-
trol
modes
, you can just start typing the target value after you press the func-
tion key. In our case, we didnÕt need to press
F
again to specify fixed flow
mode.)
8
Note the sample and reference humidities
The reference value hasnÕt changed, but the sample value increased, because
the air is going through the chamber at a much slower rate, thereby having a
longer exposure to the evaporating paper. In fact, you may start getting ÒHigh
Humidity AlertÓ flashing on the center line of the display. If it does, ignore it.
(Warning messages are discussed later, on page 3-26.)
9
Turn the desiccant to full scrub
Observe that the reference and sample humidities fall, and note that a) the
sample value comes down slowly because of the slow flow rate
4
, and b) the
reference goes back to near zero, but c) the sample doesnÕt return to the value
you had in Step 4, because now the flow is slower.
Fixed Humidity Operation
One of the powerful features of the LI-6400 is itÕs ability to operate in a fixed
humidity mode. It does this by actively regulating the flow rate to maintain a
4.
If you have a CO
2
mixer, the reference value will decrease rapidly, because Òex-
cessÓ flow is routed to the reference line (Figure 1-2 on page 1-5).
Points to Remember
¥ At equilibrium, reference humidity is determined solely by the desiccant
tube scrub setting; it doesnÕt depend on flow rate.
¥ At equilibrium, sample humidity is determined by
a) desiccant tube scrub setting
b) flow rate
c) evaporation from the leaf.
¥ The lowest chamber humidities are achieved by high flow and full scrub-
bing, and the highest by low flow and not scrubbing. Between these limits,
any chamber humidity can be achieved by various combinations of flow
rate and scrub setting. (For a picture of this, see Figure 3-39 on page 3-47.)
Содержание LI-6400
Страница 1: ...Using the LI 6400 Portable Photosynthesis System ...
Страница 15: ...Part I The Basics ...
Страница 16: ......
Страница 174: ...Making Measurements Answers to Questions 4 56 Using the LI 6400 4 ...
Страница 175: ...Part II Useful Details ...
Страница 176: ......
Страница 200: ...Standard Tools Power ON Hooks 5 24 Using the LI 6400 5 ...
Страница 214: ...Real Time Data Real Time Graphics 6 14 Using the LI 6400 6 ...
Страница 234: ...Environmental Control Light Control 7 20 Using the LI 6400 7 ...
Страница 244: ...Light Sensor Considerations Gallium Arsenide Phosphide GaAsP Sensor 8 10 Using the LI 6400 8 ...
Страница 288: ...Data Logging Making Your Own AutoPrograms 9 44 Using the LI 6400 9 ...
Страница 289: ...Part III Working With Files ...
Страница 290: ......
Страница 312: ...The LPL File System Troubleshooting 10 22 Using the LI 6400 10 ...
Страница 340: ...Downloading Files Using a Data Capture Program 11 28 Using the LI 6400 11 ...
Страница 375: ...Part IV Configuration Issues ...
Страница 376: ......
Страница 420: ...Defining User Variables Old Style vs New Style 15 18 Using the LI 6400 15 ...
Страница 454: ...Using an Energy Balance Further Reading 17 12 Using the LI 6400 17 ...
Страница 455: ...Part V Maintenance Troubleshooting ...
Страница 456: ......
Страница 572: ...Troubleshooting Useful Information 20 46 Using the LI 6400 20 ...
Страница 587: ...Diagnostics and Utilities Sys Utility Programs Using the LI 6400 21 15 EBVpd t C guess EBSatVap _EBvap_kPa ...
Страница 593: ...Part VI Programming ...
Страница 594: ......
Страница 622: ...Programming with LPL Compiler Directives 22 28 Using the LI 6400 22 ...
Страница 846: ...Index I 16 Using the LI 6400 ...


