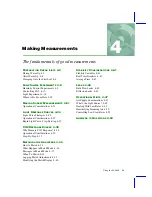
Making Measurements
Preparation Check Lists
4-6
Using the LI-6400
4
then adjust it (see
Zeroing the Leaf Temperature Thermocouple
Finally, reconnect the thermocouple, open the chamber, and verify that
ÒTleaf_¡CÓ responds when the thermocouple warmed by touching it.
8
Set Desired Reference Values for CO
2
and H
2
O
If you are using the CO
2
mixer, set it to control on reference concentration
with a target of 400 µmol mol
-1
. Make sure that the soda lime is on full scrub.
If you are not using the CO
2
mixer, monitor the reference CO
2
concentration.
Is
CO2R_uml
sufficiently stable? (Over a 30 s period, it should change less
than 2 µmol mol
-1
.) If not, use a larger buffer volume.
For H
2
O, set the desiccant at mid-range (between scrub and bypass) for now.
9
Leaks?
Set the flow rate to 200 µmol s
-1
. With the chamber closed and empty, exhale
around the chamber gaskets, and look for any fluctuations in the sample cell
CO
2
concentration (
CO2S_µml
, display group
a
). If there are no leaks, the
CO2S_µml
value should not increase by more than 1 µmol mol
-1
.
10
Match the IRGAs
Matching the IRGAs is easily accomplished whether the chamber is empty or
not, but itÕs good policy to do this once right before starting a measurement.
Refer to
on page 4-34 for how to do this.
Verify that the match valve is in fact working. Figure 4-4 on page 4-35 shows
what to look for.
You are now ready to clamp onto a leaf and begin measurements.
Clamping Onto the First Leaf
Once youÕve got the system behaving well with no leaf in the chamber, you
are ready to start. The basic procedure is quite simple: set initial conditions in
the chamber, put a leaf in the chamber, and do a final adjustment if necessary
so that you have the conditions in the chamber that you want, then wait for
things to stabilize.
1
Light
If using the LED source, set the light to the desired value (ambient is a good
value to start with - it wonÕt be an abrupt change for the leaf). If you arenÕt
Содержание LI-6400
Страница 1: ...Using the LI 6400 Portable Photosynthesis System ...
Страница 15: ...Part I The Basics ...
Страница 16: ......
Страница 174: ...Making Measurements Answers to Questions 4 56 Using the LI 6400 4 ...
Страница 175: ...Part II Useful Details ...
Страница 176: ......
Страница 200: ...Standard Tools Power ON Hooks 5 24 Using the LI 6400 5 ...
Страница 214: ...Real Time Data Real Time Graphics 6 14 Using the LI 6400 6 ...
Страница 234: ...Environmental Control Light Control 7 20 Using the LI 6400 7 ...
Страница 244: ...Light Sensor Considerations Gallium Arsenide Phosphide GaAsP Sensor 8 10 Using the LI 6400 8 ...
Страница 288: ...Data Logging Making Your Own AutoPrograms 9 44 Using the LI 6400 9 ...
Страница 289: ...Part III Working With Files ...
Страница 290: ......
Страница 312: ...The LPL File System Troubleshooting 10 22 Using the LI 6400 10 ...
Страница 340: ...Downloading Files Using a Data Capture Program 11 28 Using the LI 6400 11 ...
Страница 375: ...Part IV Configuration Issues ...
Страница 376: ......
Страница 420: ...Defining User Variables Old Style vs New Style 15 18 Using the LI 6400 15 ...
Страница 454: ...Using an Energy Balance Further Reading 17 12 Using the LI 6400 17 ...
Страница 455: ...Part V Maintenance Troubleshooting ...
Страница 456: ......
Страница 572: ...Troubleshooting Useful Information 20 46 Using the LI 6400 20 ...
Страница 587: ...Diagnostics and Utilities Sys Utility Programs Using the LI 6400 21 15 EBVpd t C guess EBSatVap _EBvap_kPa ...
Страница 593: ...Part VI Programming ...
Страница 594: ......
Страница 622: ...Programming with LPL Compiler Directives 22 28 Using the LI 6400 22 ...
Страница 846: ...Index I 16 Using the LI 6400 ...


