56
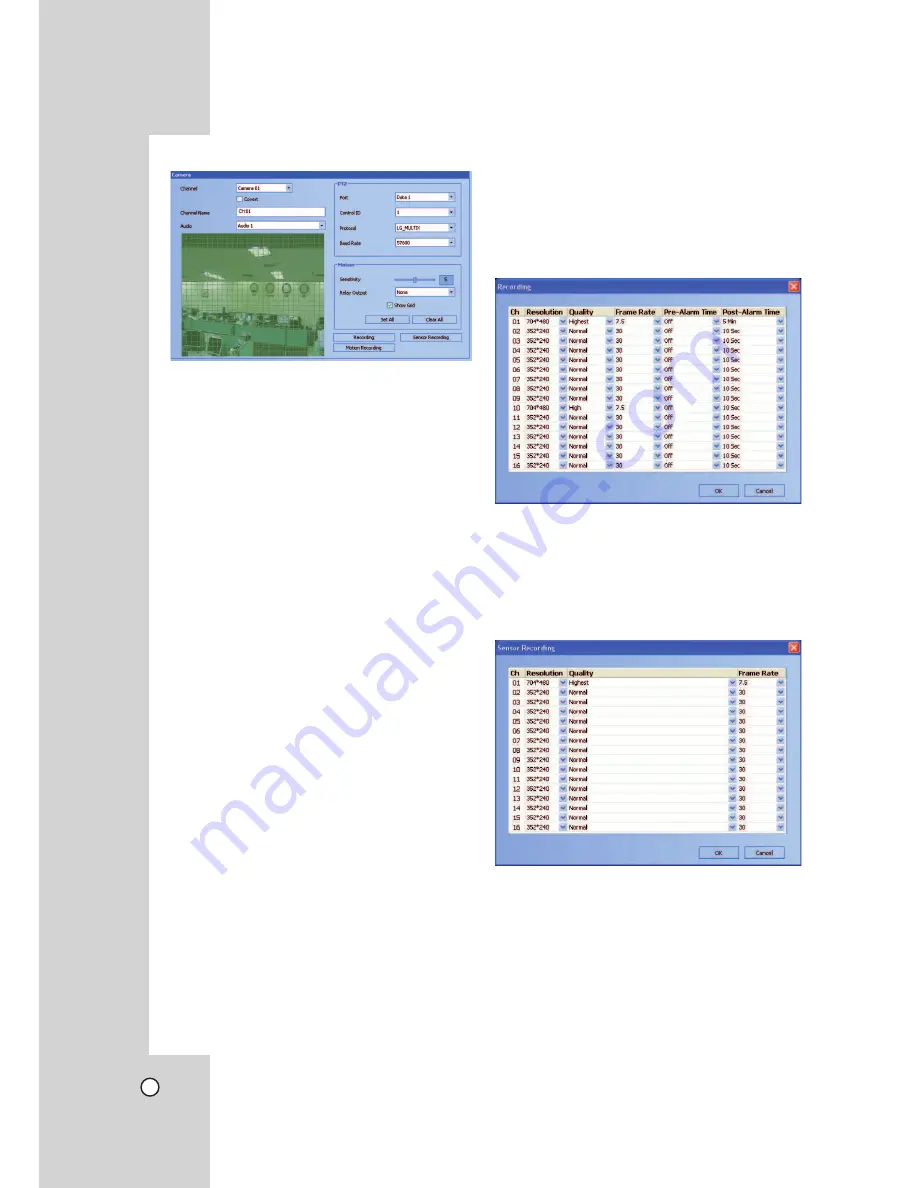
Camera Setting
1. Select a channel for settings.
If you want to block a channel from other users,
mark up the convert option. The marked up chan-
nels are displayed “LG logo” on the live windows
for POWER or NORMAL user.
2. Enter the new channel name.
3. Select input audio channel.
4. Set the PTZ control options.
•
Port:
Select the connected data port of the
RS-422/485 terminal on the rear panel.
•
Control ID:
Select the PTZ camera ID from
0 to 255. Make the same settings as the PTZ
camera.
•
Protocol:
Select the protocol supported by
PTZ camera.
•
Baud Rate:
Select the communication
speed.(1200, 2400, 4800, 9600, 19200,
38400, 57600 or 115200)
5. Set the motion options.
•
Sensitivity
: Set the sensitivity level for the
created motion detection area. Sensitivity can
be set from 0 to 10.
•
Relay Output
: Select the number of the
RELAY-OUT terminal for the output alarm
signal when motion is detected.
•
Area
: The factory default of the Motion detec-
tion area is set as the whole area. You can
change the area by using mouse on the pre-
view window screen.
- Select area: Click one point with the left
mouse button and drag & drop to the end
point.
- Clear area : Click the start point with the
right mouse button and drag & drop to the
end point.
Notes:
•
If you want to display the grid, mark up the [Show
Grid] option.
•
If you want to select the entire area, click the [Set
All] button or click the [Clear All] button to cancel
the selected area.
Recording Settings
1. Click the [Recording] button.
The recording setting window appears.
2. Set each option using the mouse (see page 27).
3. Click the [OK] button to confirm the settings.
Sensor Recording Settings
1. Click the [Sensor Recording] button.
The sensor recording setting window appears.
2. Set each option using the mouse (see page 27).
3. Click the [OK] button to confirm the settings.


